Monday, 27 April 2009

New Tutorial........Walk in the park

This Tutorial was written on 26th April 2009
Any Simularity to any other Tutorial is purely coincidental

SUPPLIES NEEDED

1/2 tubes of choice or close up .I am using Suzanne Woolcott under license number Jabe you can purchase the tubes from her website
Scrap- kit by Oopsie Daisy.net,kit is called A DAY IN THE PARK (Taggers size) and can be purchased HERE.
Mask of choice
Font of Choice.

LETS GET STARTED

Open your supplies and minimise
Open new raster layer 750 x 750 pixels Floodfill with white send to bottom,
Open a paper of Choice copy and paste as a new Layer,Layer New Mask Layer, from image find your mask in the dropdown section and apply making sure invert mask data is unchecked,onto mask layer hit delete and merge group

Open Frame 1 copy and paste as a new layer resize by 80% Add a dropshadow 2,2,50,5,Black
Open Tube/close up of choice copy and paste as a new layer below the frame layer resize by 80% then back to the frame grab your magic wand holding down shift key select each part of frame select modify by 5 then invert onto tube layer hit delete select none Add a drop shadow 2, 2, 50, 5, Black to tube and frame

Open Hotair balloon copy and paste as a new layer resize by 40% then position on the frame top right hand side Add a drop shadow 2, 2, 50, 5, Black,

Open Lamppost copy and paste as a new layer resize by 80% then postion on the left hand side above the frame Add a dropshadow 2,2,50,5,Black

Open Tube copy and paste as a new layer resize by 80% then postion on the left hand side in front of the lamppost Add a dropshadow 2,2,50,5,Black

Next Open Kite copy and paste as a new layer resize by 50% then place behind the tube layer as though holding it Add a dropshadow 2,2,50,5,Black

Open Bird copy and paste as a new layer resize by 20% then postion on the right hand side on the frame Add a dropshadow 2,2,50,5,Black

Open Walkway copy and paste as a new Layer resize by 50% then position behind the frame layer in the middle of the frame so looks like a path Add a drop shadow 2, 2, 50, 5, Black,

Open Fence copy and paste as a new layer resize by 40% then position behind the lamppost and at the end of the walkway duplicate and position on other side Add a drop shadow 2, 2, 50 ,5, Black,

Open Tree copy and paste as a new Layer resize by 40% then position behind the fence duplicate and psoition behind other fence Add a dropshadow 2,2,50,5,Black

Open Train copy and paste as a new layer resize by 50% then position on the right hand side in front of the fence layer Add a dropshadow 2,2,50,5,Black

add any copyright and your name,
Layers Merge Flatten,
crop your tag and resize by 90%
Save as Png.

New Tutorial............Midnight Sun


This Tutorial was written on 27th April 2009
Any Simularity to any other Tutorial is purely coincidental

SUPPLIES NEEDED

1/2 tubes of choice I am using Barbara Jensen under License number BJ0932
you can purchase the tubes from there website
Scrap- kit by Lynn of Scrappin Divaz, kit is called Little Midnight Sun(Taggers size) and can be purchased HERE.
Mask of choice.
Font of Choice.

LETS GET STARTED

Open your supplies and minimise
Open new raster layer 750 x 750 pixels Floodfill with white send to bottom,
Open a paper of Choice copy and paste as a new Layer,Layer New Mask Layer, from image find your mask in the dropdown section and apply making sure invert mask data is unchecked,onto mask layer hit delete and merge group

Open Torncardboard Frame copy and paste as a new layer above the mask layer resize by 20% then duplicate place at the side of each other

Open Laces copy and paste as a new layer above the frames resize by 20% position between both the frames leave enough space between them so you can see the mask see my tag for reference Add a drop shadow 2, 2, 50, 5, Black

Open Flowerbranch copy and paste as a new layer above the frame layer on the bottom left hand side resize by 20% Add a drop shadow 2, 2, 50, 5, Black,

Next Open Rossette 1 copy and paste as a new layer above the flowerbranch resize by 30% then Add a dropshadow 2,2,50,5,Black

Open Sequinspill copy and paste as a new Layer above the mask layer resize by 50% then again by 60% Add a dropshadow 2,2,50,5,Black

Open Flowerpainting copy and paste as a new layer resize by 30% postion on the frame on the bottom right hand side Add a dropshadow 2,2,50,5,Black

Onto the Frame now grab your magic wand select inside one of the frames hold down your shift key and select inside both squares select modify by 5 new raster layer floodfill with a colour of choice select none move this layer below the frame with your magic wand again select both squares again and paste a tube of choice as a new layer over the frame back to the frame modify by 5 select invert onto the tube and hit delete lower the opacity to around 70 to the tube Add a drop shadow 2, 2, 50, 5, Black,

Onto the other Frame grab your magic wand select inside one of the frames hold down your shift key and select inside both squares select modify by 5 new raster layer floodfill with a colour of choice select none move this layer below the frame with your magic wand again select both squares again and paste a tube of choice as a new layer over the frame back to the frame modify by 5 select invert onto the tube and hit delete lower the opacity to arouns 70 to the tube Add a drop shadow 2, 2, 50, 5, Black,

Open Tube of choice copy and paste as a new layer above the frame position on the right hand side or as desired resize by 80% Add a drop shadow 2, 2, 50 ,5, Black,

Open Fancy Butterfly 2 copy and paste as a new layer resize by 10% position on the top right hand side of the frame layer Add a dropshadow 2,2,50,5,Black

Open Startrail copy and paste as a new layer above Frame layer resize by 20% then again position on the top left hand side of the frame duplicate and position this bottom right side see my tag for reference Add a dropshadow 2,2,50,5,Black

add any copyright and your name,
Layers Merge Flatten,
crop your tag and resize by 90%
Save as Png.

Sunday, 26 April 2009

New Tutorial.......Down on the Farm

This Tutorial was written on 26th April 2009
Any Simularity to any other Tutorial is purely coincidental

SUPPLIES NEEDED

1 tubes of choice .
Scrap- kit by Pink Princess designs, kit is called Rebecca of sunnybrook farm (Taggers size)
and can be purchased HERE
Mask of choice
Font of Choice.

LETS GET STARTED

Open your supplies and minimise

Open new raster layer 750 x 750 pixels Floodfill with white send to bottom,

Open a paper of Choice copy and paste as a new Layer,Layer New Mask Layer, from image find your mask in the dropdown section and apply making sure invert mask data is unchecked,onto mask layer hit delete and merge group

Open Barn copy and paste as a new layer resize by 60% then again by 20% place in the middle of the tag Add a dropshadow 2,2,50,5,Black

Open Fence copy and paste as a new layer above the barn layer resize by 20% then place to the right hand side of the barn duplicate and position duplicate on the left hand side of the barn see my tag for reference Add a drop shadow 2, 2, 50, 5, Black

Open Grass copy and paste as a new layer below the fence layer resize by 20% then duplicate and psoition duplicate behind seconf fence Add a drop shadow 2, 2, 50, 5, Black,

Next Open Sunflower copy and paste as a new layer resize by 60% then again by 20% place behind the grass layer duplicate 3 times and psotion as desired Add a dropshadow 2,2,50,5,Black
Open Tree copy and paste as a new Layer resize by 50% then a gain by 20% position on the left hand side behind the grass Add a dropshadow 2,2,50,5,Black

Open Birdhouse copy and paste as a new layer resize by 60% then again by 20% postion on the right hand side behind the grass Add a dropshadow 2,2,50,5,Black

Open Wheelbarrow copy and paste as a new Layer resize by 20% then position in front of the barn Add a drop shadow 2, 2, 50, 5, Black,

Open Duck copy and paste as a new layer resize by 50% then again by 20% position on the wheelbarrow Add a drop shadow 2, 2, 50 ,5, Black,

Open Applebasket copy and paste as a new layer resize by 50% then again by 20% position on the right hand side of the fence layer Add a dropshadow 2,2,50,5,Black

Open Tube of choice copy and paste as a new layer resize by 80% position in front of the barn next to the wheelbarrow Add a dropshadow 2,2,50,5,Black

Open sun copy and paste as a new layer resize by 10% position top left hand side of the layer Add a dropshadow 2,2,50,5,Black

Open clouds copy and paste as a new layer resize by 60% then again by 20% duplicate and position top right hand side of layer Add a dropshadow 2,2,50,5,Black

Open any animals of choice copy and paste as a new layer resize by 50% then again by 20% position as desired Add a dropshadow 2,2,50,5,Black

add any copyright and your name,
Layers Merge Flatten,
crop your tag and resize by 90%
Save as Png.

Wednesday, 22 April 2009

New Tutorial............Dirty Princess

This Tutorial was written on 22nd April 2009
Any Simularity to any other Tutorial is purely coincidental

SUPPLIES NEEDED

1/2 tubes of choice I am using Ismael Rac under License MPT9906which can be purchased from MPT.
Scrap- kit by Lynn of Scrappin Divaz, kit is called Dirty Princess (Taggers size) and can be purchased HERE.
Mask 185 by Vix which can be dowloaded HERE. Thank you for sharing
Font of Choice.

LETS GET STARTED

Open your supplies and minimise
Open new raster layer 700 x 700 pixels Floodfill with white send to bottom,
Open a paper of Choice copy and paste as a new Layer,Layer New Mask Layer, from image find your mask in the dropdown section and apply making sure invert mask data is unchecked,onto mask layer hit delete and merge group resize by 90%

Open circle wordart copy and paste as a new layer above the mask layer resize by 80% then again by 20% Add a drop shadow 2, 2, 50, 5, Black

Open Star wordart copy and paste as a new layer above the circle layer resize by 70% then again by 60% Add a drop shadow 2, 2, 50, 5, Black,

Next Open TriFrame copy and paste as a new layer resize by 90% then again by 30% grab your magic wand hold down the shift key select inside each sqaure modify expand by 5 layer new raster layer floodfill with black select none Add a dropshadow 2,2,50,5,Black

Open Tubes copy and paste as a new Layer resize by 80% position below the frame and above the black layer back to the frame select the left side of the square select modify expand by 5 select invert onto your tube layer hit delete select none onto the right side paste your tube as a new layer below your frame back to the frame select modify expand by 5 invert onto to hit delete select none Add a dropshadow 2,2,50,5 Black I left the middle frame with just a colour but if desired you can add a tube lower the opactiy to 50 on both tubes

Open tube of choice copy and paste as a new layer resize by 90 postion in front of the frame Add a dropshadow 2,2,50,5,Black

Open pewter star copy and paste as a new Layer resize by 20% then again by 20% position above the frame layer on the right hand side duplicate twice and position as desired duplicate 3 more times and place bottom left of frame Add a drop shadow 2, 2, 50, 5, Black,

Open Glitter splat copy and paste as a new layer resize by 50% then again by 60% position above the frame layer on the left hand side duplicate and position on the bottom right of the frame Add a drop shadow 2, 2, 50 ,5, Black,

add any copyright and your name,
Layers Merge Flatten,
crop your tag and resize by 90%
Save as Png.

New Tutorial........All Aboard the Goodship

This Tutorial was written on 22nd April 2009
Any Simularity to any other Tutorial is purely coincidental

SUPPLIES NEEDED

1 tube of choice
Scrap- kit by Kristi of The Scrappin Divaz, kit is called Good ship lollipop (Taggers size) and can be purchased HERE.
Font of Choice.

LETS GET STARTED

Open your supplies and minimise

Open new raster layer 750 x 750 pixels Floodfill with white send to bottom,
Open sun copy and paste as a new layer position at the top right hand side resize by 60% then again by 20% Add a drop shadow 2, 2, 50, 5, Black

Open Cloud 1 of choice copy and paste as a new layer resize by 30% then again by 60% duplicate and position both on the top left hand side Add a drop shadow 2, 2, 50, 5, Black,

Next Open the water copy and paste as a new layer resize by 30% position at the bottom grab your move tool and move the sides so they fit in the canvas Add a dropshadow 2,2,50,5,Black
Open Ship copy and paste as a new Layer resize by 50% then again by 20% position behind the water layer on the right hand side Add a drop shadow 2, 2, 50, 5, Black,

Open lighthouse copy and paste as a new Layer resize by 50% then again by 20% position on the left hand side behind the water Add a dropshadow 2,2,50,5 Black

Open whale copy and paste as a new layer resize by 70% then again by 30% position behind the water layer in front of the ship Add a drop shadow 2, 2, 50 ,5, Black,

Open dolphin copy and paste as a new layer resize by 20% place in front of the water layer Add a dropshadow 2,2,50,5,Black

Open Bird copy and paste as a new layer resize by 10% then postion on the lighthouse on the left hand side Add a dropshadow 2,2,50,5,Black

Open lifesaver copy and paste as a new layer resize by 50% then again by 10% place on the lighthouse Add a dropshadow 2,2,50,5,Black

Open the Anchor copy and paste as a new layer resize by 50% then again by 30% place behind the water by the ship Add a dropshadow 2,2,50,5,Black

add any copyright and your name,
Layers Merge Flatten,
crop your tag and resize by 90%
Save as Png.

New Tutorial...............Imagination City

This Tutorial was written on 21st April 2009
Any Simularity to any other Tutorial is purely coincidental

SUPPLIES NEEDED

1 tube of choice I am using Pinuptoons under License CI0035LM which can be purchased from CILM.
Scrap- kit by Kristi of The Scrappin Divaz, kit is called Imagination Station (Taggers size) and can be purchased HERE.
Mask of choice
Font of Choice.

LETS GET STARTED

Open your supplies and minimise

Open new raster layer 700 x 700 pixels Floodfill with white send to bottom,

Open a paper of Choice copy and paste as a new Layer,Layer New Mask Layer, from image find your mask in the dropdown section and apply making sure invert mask data is unchecked,onto mask layer hit delete and merge group

Open Rainbow copy and paste as a new layer above the mask layer resize by 70% then again by 20% position near the top of the layer on the right side Add a drop shadow 2, 2, 50, 5, Black

Open Plane of choice copy and paste as a new layer resize by 50% then again by 20% image mirror position above the rainbow Add a drop shadow 2, 2, 50, 5, Black,

Next open the Hill copy and paste as a new layer resize by 50% then again by 30% place on the right side near the bottom duplicate and mirror grab your eraser tool and erase the tree the stump will still be there but thats ok as we will hide it with our tube place the duplicate layer below the original so you have 2 hills see my tag for reference Add a dropshadow 2,2,50,5,Black

Open Town Hall copy and paste as a new Layer resize by 30% position behind the hill layers Add a drop shadow 2, 2, 50, 5, Black,

Open Tube copy and paste as a new Layer resize by 80% position on top of the Hill on the left side be sure to hide the little stump with the tube or if you are using same tube as me the easel will hide it Add a dropshadow 2,2,50,5 Black

Open Train copy and paste as a new layer resize by 40% then again by 30% position above the tube layer on the left side Add a drop shadow 2, 2, 50 ,5, Black,

Open girl 2 copy and paste as a new layer resize by 20% place her behind the train as though she's in one of the carts lol Add a dropshadow 2,2,50,5,Black

Open Car copy and paste as a new layer resize by 50% then again by 20% place over the Hill on the right hand side Add a dropshadow 2,2,50,5,Black

Open girl1 copy and paste as a new layer resize by 20% place her behind the car Add a dropshadow 2,2,50,5,Black

I used the easel with my tube but if you use a different tube there is an easel in the kit i added some words to the easel and a few splats That's all

add any copyright and your name
Layers Merge Flatten,
crop your tag and resize by 90%
Save as Png.

Tuesday, 21 April 2009

New Tutorial...............Groovy Chick

This Tutorial was written on 21st April 2009
Any Simularity to any other Tutorial is purely coincidental

SUPPLIES NEEDED

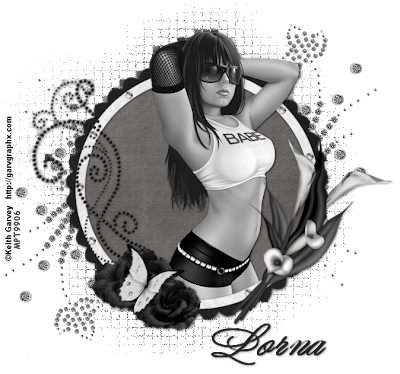
1 tube of choice I am using Keith Garvey under License MPT9906 which can be purchased from MPT.
Scrap- kit by Pink Princess designs, kit is called All Glammed Up (Taggers size) and can be purchased HERE.
Template 202 from Missy of Divine Intentionz Here.
Thank you For Sharing
Mask of choice
Font of Choice.

LETS GET STARTED

Open your supplies and minimise

Open Template 202 shift D and close original delete info layer then Image canvas size 700 x 700 pixels lock aspect ratio unchecked, Layer New Raster Layer floodfill with white send to bottom,Delete Background Layer

Open a paper of Choice copy and paste as a new Layer,Layer New Mask Layer, from image find your mask in the dropdown section and apply making sure invert mask data is unchecked,onto mask layer hit delete and merge group lower the opacity to around 80 add/remove noise 40 uniform monochrome checked

Onto rectangle 1 select all,select float, defloat layer new raster layer floodfill with a colour to compliment your tube select none delete original rectangle 1,Add a drop shadow 2, 2, 50, 5, Black

OnTO Merged Layer Selection all, select float, select defloat,layer new raster layer floodfill the wording with a colour of choice select none Add a drop shadow 2, 2, 50, 5, Black, delete Original Layer,Add a drop shadow 2, 2, 50, 5, Black,

Open Bracket copy and paste as a new Layer resize by 60% then again by 50% position above the mask layer Add a drop shadow 2, 2, 50, 5, Black,

Open Sparkles copy and paste as a new layer resize by 50% then again by 30% position above the bracket layer on the left side duplicate and mirror Add a drop shadow 2, 2, 50 ,5, Black,

Open cellphone copy and paste as a new layer resize by 30% then again by 30%place on the left hand side Add a dropshadow

Open lipstick copy and paste as a new layer resize by 70% then again by 30% place on theleft side by the cellphone Add a dropshadow 2,2,50,5,Black

Open Shoe copy and paste as a new layer resize by 50% then again by 30% place on the right hand side Add a dropshadow 2,2,50,5,Black

Open cosmo copy and paste as a new layer resize by 40% then again by 30% place on the right hand saide Add a dropshadow 2,2,50,5,Black

Open Tube copy and paste as a new Layer resize by 80% position on top layeradd a dropshadow 2,2,50,5 Black

add any copyright and your name
,Layers Merge Flatten
,crop your tag and resize by 90%
Save as Png.

New Tutorial..........Party Girl

This Tutorial was written on 21st April 2009
Any Simularity to any other Tutorial is purely coincidental

SUPPLIES NEEDED

1 tube of choice I am using Jennifer Janesko under License CI0035LMwhich can be purchased from CILM
.Scrap- kit by Pink Princess designs, kit is called Divaz Birthday (Taggers size) and can be purchased HERE.
Mask of choice
Font of Choice.

LETS GET STARTED

Open your supplies and minimise

Open new raster layer 700 x 700 pixels Floodfill with white send to bottom,
Open a paper of Choice copy and paste as a new Layer,Layer New Mask Layer, from image find your mask in the dropdown section and apply making sure invert mask data is unchecked,onto mask layer hit delete and merge group

Open Frame 2 copy and paste as a new layer above the mask layer resize by 50% then again by 30% Add a drop shadow 2, 2, 50, 5, Black

Open a paper of choice copy and paste as a new layer below the frame layer onto the frame grab your magic wand selct inside the frame modify expand by 5 select invert onto the paper layer hit delete select none Add a drop shadow 2, 2, 50, 5, Black,

Next i chose some text and added it inside the frame then duplicated it a few times and positioned it to fill the frame erase any parts showing outside the frame merge the text together Add a dropshadow 2,2,50,5,Black

Open Tube copy and paste as a new Layer resize by 80% position on top of the frame duplicate and place this below the frame back to the top tube erase any parts showing over the frame layeradd a dropshadow 2,2,50,5 Black

Open a Ribbon copy and paste as a new Layer resize by 50% then again by 40% position above the frame layer Add a drop shadow 2, 2, 50, 5, Black,

Open balloon copy and paste as a new layer resize by 50% then again by 30% position above the ribbon layer on the right side choose a few balloons and position Add a drop shadow 2, 2, 50 ,5, Black,

Open a bow copy and paste as a new layer resize by 60% then again by 20% place over the balloons to hold them together Add a dropshadow 2,2,50,5,Black

Add any other elements of choice
add any copyright and your name,
Layers Merge Flatten,
crop your tag and resize by 90%
Save as Png.

Sunday, 19 April 2009

New Tutorial.............Hidden Love


This Tutorial was written on 19th April 2009
Any Simularity to any other Tutorial is purely coincidental

SUPPLIES NEEDED

1/2 tubes of choice I am using Suzanne Woolcott under License AMIJABE which can be purchased from Her Website.
Scrap- kit by Captivated Visions, kit is called Dark Angel (Taggers size) and can be purchased HERE.
Template 130 from Designz by Ali HERE. Thank you For Sharing
Font of Choice.

LETS GET STARTED

Open your supplies and minimise
Open Template 130 shift D and close original delete info layer then Image canvas size 700 x 700 pixels lock aspect ratio unchecked, Layer New Raster Layer floodfill with white send to bottom,Delete Background Layer

Open a paper of Choice copy and paste as a new Layer above raster 1 layer the tall black rectangle onto the raster 1 layer select all select float defloat onto paper layer hit delete select none close off raster 1 layer

Onto raster 2 layer select all select float select defloat modify expand by 2 new raster layer floodfill with Black select none

Open a tube of choice copy and paste as a new layer below raster 2 select inside the raster 2 layer the floodfilled black frame select modify by 4 select invert onto tube layer hit delete select none Add a dropshadow 2,2,50,5,Black

Open Paper of choice copy and paste as a new Layer, onto raster 3 select all, select float, defloat invert onto paper layer delete select none close original raster 3 layer,Add a drop shadow 2, 2, 50, 5, Black

Onto raster 4 layer select all select float select defloat modify expand by 2 new raster layer floodfill with Black select none

Open a tube of choice copy and paste as a new layer below raster 4 select inside the raster 4 layer the floodfilled black frame select modify by 4 select invert onto tube layer hit delete select none Add a dropshadow 2,2,50,5,Black

Open a paper of Choice copy and paste as a new Layer above raster 5 layer the black rectangle onto the raster 5 layer select all select float defloat onto paper layer hit delete select none close off raster 1 layer

Onto raster 6 layer select all select float select defloat modify expand by 2 new raster layer floodfill with Black select none

Open a tube of choice copy and paste as a new layer below raster 6 select inside the raster 6 layer the floodfilled black frame select modify by 4 select invert onto tube layer hit delete select none Add a dropshadow 2,2,50,5,Black

Open Butterfly copy and paste as a new layer resize by 60% then again by 30% place on the left hand side duplicate and palce below the frame on the right side Add a dropshadow 2,2,50,5,Black

Open winged heart element copy and paste as a new layer resize by 60% then again by 30% duplicate place around your frames see my tag for reference Add a dropshadow
Open decorated hanger copy and paste as a new layer resize by 30% place on one of the frames Add a dropshadow 2,2,50,5,Black

Open AngelTube copy and paste as a new Layer resize by 30% position on top of the frame layer Add a dropshadow 2,2,50,5 Black

Open Lock and Key copy and paste as a new layer resize by 70% then again by 30% place on the frame at the top Add a dropshadow 2,2,50,5,Black

Open safety pin copy and paste as a new layer resize by 60% place on the frame at the bottom corner Add a dropshadow 2,2,50,5,Black
add any copyright and your name
,Layers Merge Flatten,
crop your tag and resize by 90%
Save as Png.

New Tutorial............Boop so cute

This Tutorial was written on 19th April 2009
Any Simularity to any other Tutorial is purely coincidental

SUPPLIES NEEDED
1 tube of choice I am using suzanne woolcott under License AMIJABEwhich can be purchased from Her Website
.Scrap- kit by Scraps by Jessica, kit is called Boop so cute (Taggers size) and can be purchased HERE.
Mask 119 by Weescotlass which can be downloaded HERE, Thank you for sharing
Font of Choice.

LETS GET STARTED

Open your supplies and minimise
Open a new raster layer 700x700 floodfill with white
,
Open a paper of Choice copy and paste as a new Layer,Layer New Mask Layer, from image find your mask in the dropdown section and apply making sure invert mask data is unchecked,onto mask layer hit delete and merge group lower the opacity to around 80

Open Rainbow 1 copy and paste as a new layer above the white background resize by 80% Add a dropshadow 2,2,50,5,Black

Open Frame 1 copy and paste as a new Layer, above the rainbow layer resize by 80%,position evenly with the rainbow layer, Add a drop shadow 2, 2, 50, 5, Black

Open a tube of choice copy and paste as a new Layer resize by 70% place below the frame layer position inside the frame onto your frame layer grab your magic wand select inside the frame modify expand by 5 select invert onto the tube layer and hit delete select none, Add a dropshadow 2,2,50,5,Black to the frame and tube
Open sun copy and paste as a new layer reisze by 60% then again by 40% position top left of the frame layer duplicate and on the original adjust gaussian blur setting 20 Add a dropshadow 2,2,50,5,Black to duplicate sun

Open fence copy and paste as a new layer resize by 40% duplicate position both in front of the clouds,Add a dropshadow 2,2,50,5,Black

oPEN Grass copy and paste as a new layer resize by 40% duplicate and position both behind the fence layer Add a dropshadow 2,2,50,5,Black

Open House copy and paste as a new layer resize by 30% place in the middle of the fence Add a dropshadow 2,2,50,5,Black

Open orange tree copy and paste as a new layer resize by 40% place on the left side of the fence Add a dropshadow 2,2,50,5,Black

Open tube copy and paste as a new layer resize by 60% place on the right hand side of the fence Add a dropshadow 2,2,50,5,Black

Open any animals as desired copy and paste as a new Layer resize by 70% then again by 40% place around the fenceadd a dropshadow 2,2,50,5 Black

add any copyright and your name
,Layers Merge Flatten,
crop your tag and resize by 90%
Save as Png.

Saturday, 18 April 2009

New Tutorial.............Cancer

This Tutorial was written on 18th April 2009
Any Simularity to any other Tutorial is purely coincidental

SUPPLIES NEEDED

1 tube of choice I am using Elias Chatzoudis under License MPT9906which can be purchased from MPT.
Scrap- kit by Stacey's Design's, kit is called Cancer (Taggers size) and can be purchased HERE.
Template 197 from Missy of Divine Intentionz Here. Thank you For Sharing
Font of Choice.

LETS GET STARTED

Open your supplies and minimise
Open Template 197 shift D and close original delete info layer then Image canvas size 700 x 700 pixels lock aspect ratio unchecked, Layer New Raster Layer floodfill with white send to bottom,Delete Background Layer

Open the bracket Journaling Box copy and paste as a new layer above the white background position evenly behind the circle layer resize by 80% select all select float select defloat new raster layer and floodfill with black select none close off the original Add a dropshadow 2,2,50,5,Black

Open Paper of choice copy and paste as a new Layer, On circle layer select all, select float, defloat invert onto paper layer delete select none close original circle ,Add a drop shadow 2, 2, 50, 5, Black

Open Paper of choice copy and paste as a new Layer duplicate twice close these 2 off select background frame 1 Selection all, select float, select defloat,invert on to original paper layer hit delete select none onto background frame 2 select all select float defloat invert open one of the closed off papers hit delete select none onto background paper 3 select all select float invert open last closed off paper hit delete select none
Open Tubes of choice copy and paste as a new Layer duplicate 3 times close off 3 of them on the first background frame layer select all select float defloat invert onto tube layer hit delete select none, next background frame 2 layer select all select float defloat invert open 2nd tube hit delete select none onto 3rd background layer select all select float select defloat invert open 3rd tube hit delete select none Add a dropshadow 2,2,50,5,Black to the tubes then adjust hue and saturation colourise both settings to 0 apply on all 3 tube layers so they are grey scale

On Frame 1 select all select float defloat modify by 2 new raster layer floodfill with black select none close off original do the same for frames 2 and 3 Add a drop shadow 2, 2, 50 ,5, Black,

Open last closed off tube and position on the top layer on the left side of the bracket and frames adjust hue and saturation colourise both settings to 0 and apply Add a dropshadow 2,2,50,5,Black

Open a tag copy and paste as a new layer resize by 60% place on the right side of the top frame Add a dropshadow

Open a tassel copy and paste as a new layer resize by 30% place on the left hand side of the frame laer duplicate and place one below grab your eraser tool and erase bits so its hanging on the frame Add a dropshadow

Open butterfly copy and paste as a new Layer resize by 40% then again by 20% duplicate place one at the top of the bracket and second below the bracket on the left side add a dropshadow 2,2,50,5 Black

add any copyright and your name,
Layers Merge Flatten,
crop your tag and resize by 90%
Save as Png.

New Tutorial.............Rock Princess

This Tutorial was written on 18th April 2009
Any Simularity to any other Tutorial is purely coincidental

SUPPLIES NEEDED

1 tube of choice I am using Elias Chatzdious under License MPT9906which can be purchased from MPT.
Scrap- kit by Just a girl's dream, kit is called Rock Princess (Taggers size) and can be purchased HERE.
Template 208 from Missy of Divine Intentionz HERE. Thank you For Sharing
Mask 119 by weescotlass which can be downloaded HERE Thank you for sharing
Font of Choice.

LETS GET STARTED

Open your supplies and minimise
Open Template 208 shift D and close original delete info layer then Image canvas size 700 x 700 pixels lock aspect ratio unchecked, Layer New Raster Layer floodfill with white send to bottom,Delete Background Layer

Open a paper of Choice copy and paste as a new Layer,Layer New Mask Layer, from image find your mask in the dropdown section and apply making sure invert mask data is unchecked,onto mask layer hit delete and merge group lower the opacity to around 50

Grab your preset shape elipse foreground Black background closed off width 10 draw out a circle roughly same size as your mask layer convert to raster Open up the wired fence and paste as a new layer place below the circle layer and resize bigger or smaller depending on your circle size lol so it fits snug in your circle layer

Open Paper of choice copy and paste as a new Layer, On Star layer select all, select float, defloat invert onto paper layer delete select none close original Star ,position inside the circle layer above the wired fence Add a drop shadow 2, 2, 50, 5, Black

Open Paper of choice copy and paste as a new Layer On Wording Layer Selection all, select float, select defloat,invert on to paper layer hit delete select none Add a drop shadow 2, 2, 50, 5, Black, delete Original Layer position above the star layer inside the circle close off the music notes as we don't need these

Open piano keys copy and paste as a new Layer below the circle layer duplicate and position the other above the wording layer grab your eraser tool and erase any parts showing outside the frame add a drop shadow 2, 2, 50, 5, Black,

Open Autograph book copy and paste as a new layer resize by 30% place on the cirlce layer on the left side Add a drop shadow 2, 2, 50 ,5, Black,

Open speaker copy and paste as a new layer resize by 50% place on the left hand side Add a dropshadow

Open lipstick copy and paste as a new layer resize by 70% then again by 40% place on the speaker see my tag for reference Add a dropshadow

Open drumkit copy and paste as a new layer resize by 70% place on the right hand side of the circle Add a dropshadow

Open Tube copy and paste as a new Layer resize by 80% position on top layeradd a dropshadow 2,2,50,5 Black

I added a few musical notes from my preset shapes
add any copyright and your name,
Layers Merge Visible
,crop your tag and resize by 90%
Save as Png.

Friday, 17 April 2009

New Tutorial.........Rock Star

This tutorial was written on 17th April 2009
Any simularity to another tutorial is purely coincidental

I am using PTU scrapkit by Creative Intentionz kit is called Just Another Rock Star (tagger size) which can be Purchased HERE
Tubes of choice i am using Elias Chatzoudis under license number MPT9906 you can purchase there tubes from MPT
Mask 119 by Weescotlass which you can download HERE Thank you for sharing
Font of choice

Let's Get Started
Open your supplies and minimise
Open a new raster layer 700 x 700 and floodfill with white
Open a paper of choice copy and paste as a new layer place above the white background layer, then layers new mask from image find your mask in the dropdown section source luminance checked invert data unchecked and apply delete mask layer and merge group lower the opacity to around 90

Next Open Frame 1 copy and paste as a new layer open your tubes resize by 90% duplicate close off one of the tubes for later minimise them Open a paper of choice copy and paste below the frame layer onto your frame layer grab your magic wand and hold down your shift key to select all boxes select inside each frame select modify by 5 select invert back to aper layer hit delete then paste your tube as a new layer below your frame and hit delete select none, duplicate your tube and mirror i added some wording into my middle frame instead of a tube Add a dropshadow 1,1,30,3,Black to the tubes and the frame

Grab your preset shape set to rectangle background Black and draw a rectangle around one of the frames convert to raster duplicate twice and position on the other frames merge the 3 when happy place below the frame layerAdd a dropshadow 1,1,30,3,Black

Open a Texture Tag copy and paste as a new layer resize by 40% duplicate position to each of the bottom sides of the frame see my tag Add a dropshadow 1,1,30,3,Black

Open closed off tube copy and paste as a new layer place on top of the frame layers Add a dropshadow 1,1,30,3,Black

Open a folded ribbon copy and paste as a new layer resize by 50% position on the left side below the frame or as desired Add a dropshadow 1,1,30,3,Black

Open a guitar copy and paste as a new layer resize by 70% place on the left side above the folded ribbon layer see my tag Add a dropshadow 1,1,30,3,Black

Open a medal copy and paste as a new layer resize by 70% place on the right side on the frame Add a dropshadow 1,1,30,3,Black

Open a star copy and paste as a new layer resize by 70% then again by 20% duplicate and position on your frames duplicate 2 more times and position on bottom right of frame Add a dropshadow 1,1,30,3,Black

Add your copyright information and your name
crop your tag resize by 80%
save your file as a png file and you are finished
I hope you enjoyed this tutorial,

Wednesday, 15 April 2009

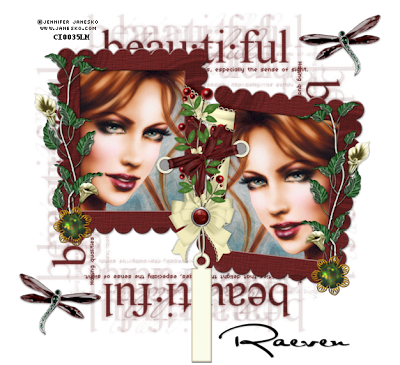
New Tutorial...........Antiquities

This tutorial was written on 15th April 2009
Any simularity to another tutorial is purely coincidental
I am using PTU scrapkit by Heart and soul creations kit is called Antiquities (tagger size) which can be Purchased
HERE
Tubes of choice i am using 2 close ups from Jennifer Janesko under license number CI0035LM you can purchase there tubes from CILM
Mask 2 by Vix which you can download HERE under goodies.Thank you for sharing
Font of choice

Let's Get Started

Open your supplies and minimise

Open a new raster layer 700 x 700 and floodfill with white
Open a paper of choice copy and paste as a new layer place above the white background layer, then layers new mask from image find your mask in the dropdown section source luminance checked invert data unchecked and apply delete mask layer and merge group

Next Open Frame 1 copy and paste as a new layer resize by 85% open your tubes and resize by 70% minimise them back to your frame layer and inside one of the boxes grab your magic wand select inside the frame select modify by 5 then paste your tube as a new layer below your frame onto your frame select invert back to your tube and delete select none do the same process for tube two merge tubes and frame
Add a dropshadow 1,1,30,3,Black

Open a dragonfly copy and paste as a new layer resize by 50% duplicate position to each of the sides of the mask see my tag
Add a dropshadow 1,1,30,3,Black

Open a flower vintage of choice copy and paste as a new layer resize by 60% duplicate place on top of the frame layers either side of the frame
Add a dropshadow 1,1,30,3,Black

Open green brad paste as a new layer duplicate and position both on top of the flower vintage layers or as desired
Add a dropshadow 1,1,30,3,Black

Open eyelet copy and paste as a new layer resize by 40% place in the middle of the frame see my tag
Add a dropshadow 1,1,30,3,Black

Add your copyright information and your name crop your tag
resize by 80% save your file as a png file
and you are finished
I hope you enjoyed this tutorial,

Monday, 13 April 2009

New Tutorial............Rock Chick

This tutorial was written on 13th April 2009
Any simularity to another tutorial is purely coincidental

I am using PTU scrapkit by shells scraps Kit is called Rock and Roll (tagger size) which can be Purchased HERE
Tube of choice i am using Scott Blair under lisence number MPT9906 which can be purchased from MPT
Mask OF Choice
Font of choice

Let's Get Started

Open your supplies and minimise

Open a new Layer 700 x 700 floodfill with white
Open paper 18 copy and paste as a new layer,layer new mask layer from image find your mask in tHe dropdown section source luminance checked, invert data unchecked apply, delete mask layer merge mask group

Open up Photo gallery Frame copy and paste as a new layer
Open a paper of choice copy and paste as a new layer grab your magic wand hold down the shift key select 3 boxes and select modify by 5 select invert onto paper layer hit delete select none

Open Tube of choice copy and paste as a new layer resize by 80% duplicate close off original for now place duplicate layer below the frame layer position in one of the boxes we are filling 3 we have just filled with paper grab your magic wand select inside one of the frame boxes selection modify by 5 select invert onto tube layer hit delete select none back to closed off layer duplicate open duplicate layer repeat same steps for second box and then again for box 3 Add a dropshadow to each tube layer 1,1,30,3,Black

Back to frame layer select the 3 remaining boxes holding down shift key select modify by 5 new raster layer floodfill with white select none move this layer above the background layer

Open Music note 2 copy and paste as a new layer resize by 40% then again by 30% place in one of the 3 white floodfilled boxes duplicate twice and place in the reamining 2 Add a dropshadow to the notes Add a dropshadow to the frame 1,1,30,3,Black

Open Drum kit copy and paste as a new layer resize by 90% then again by 40% place above the frame layer on the left hand side of the frame Add a dropshadow 1,1,30,3,Black

Open star of choice copy and paste as a new layer resize by 30% then again by 20% duplicate about 6/8 times depending place around the top corners of your frame or as desired Add a dropshadow 1,1,30,3,Black

Open the closed off tube layer place on top of all the layers position on the right side of the frame i also duplicated the musical notes a few times and positioned around the tube Add a dropshadow 1,1,30,3,Black

Add your copyright information and your name
crop your tag resize by 80%
save your file as a png file and you are finished
I hope you enjoyed this tutorial,

Tuesday, 7 April 2009

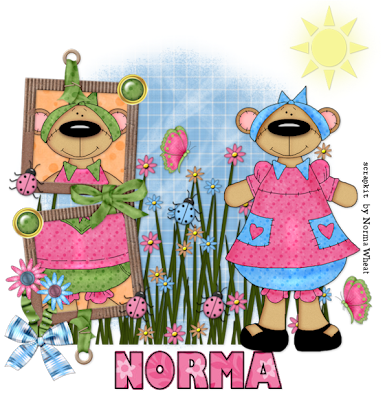
New Tutorial............Summer Dreams


This tutorial was written on 7th April 2009

Any simularity to another tutorial is purely coincidental


I am using PTU scrapkit by Norma of SWheat Creations kit is called Summer Dreams (tagger size) which can be Purchased HERE

Tubes of choice i am using Bears from the Kit

Mask 119 by Weescotlass which can be downloaded HERE Thank you for sharing

Font of choice


Let's Get Started


Open your supplies and minimise


Open a new Layer 700 x 700 floodfill with white


Open a paper of choice copy and paste as a new layer place above the white background layer, then layers from mask then image then in the dropdown section find your mask source luminance checked invert mask data unchecked and apply delete the mask layer and merge mask layer


Open GrassnFlowers copy and paste as a new layer resize by 90% then again by 80% position bottom of stems to bottom of mask layer Add a dropshadow 1,1,30,3,Black


Open up a Frame of choice copy and paste as a new layer,resize by 80% then again by 80% position to the left side above the grass layer


Next Open a paper of choice copy and paste as a new layer onto the frame layer selection inside the frame holding down shift key to select both then selection modify by 4, selection invert back to paper layer hit delete select none


Open a Tube of choice copy and paste as a new layer place below the frame layer position as desired onto the frame layer selection inside the frame holding down shift key to select both then selection modify by 4, selection invert back to Tube layer hit delete select none

Add a dropshadow to the frame layer and the tube layer 1,1,30,3,Black


Merge down the tube layer,paper layer and Frame layer
Open a tag of choice copy and paste as a new layer resize by 60% position on the right side add a dropshadow 1,1,30,3,Black


Open a flower of choice copy and paste as a new layer resize by 30% then place on the left side near bottom of the frame layer see me tag for reference Add a dropshadow 1,1,30,3,Black


Open a Brad of choice copy and paste as a new layer resize by 30% place above the frame layer on the top corner of the top frame duplicate and place on the top corner of the bottom part of frame like my tag add a dropshadow Open a Butterfly of choice copy and paste as a new layer resize by 20% place as desired duplicate and positon second as desired add a dropshadow


Open a Ladybird of choice copy and paste as a new layer resize by 30% duplicate position both on the frame corners duplicate a few times and place inbetween the grass i did image free rotate by 20 right on mine to give the effect walking on the grass lol add a dropshadow


Next for the sun i used my preset shape and found a sun in my shapes folder drew the sun and floodfilled with yellow i duplicated and on bottom layer added a gaussian blur setting 17


Add your copyright information and your name

crop your tag resize by 80%

save your file as a png file and you are finished
I hope you enjoyed this tutorial,

Monday, 6 April 2009

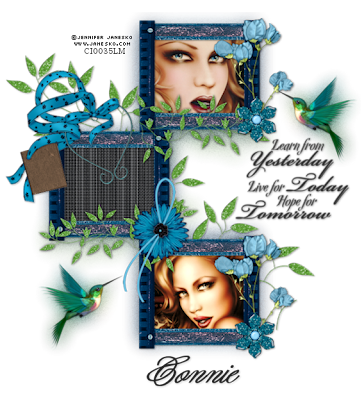
New Tutorial...............Giving


This tutorial was written on 6th April 2009
Any simularity to another tutorial is purely coincidental

SUPPLIES NEEDED

I am using PTU scrapkit by Connies Creative Chaos kit is called Giving (tagger size) which can be Purchased HERE
2/3 Close up Tubes of choice i am using Jennifer Janesko under lisence number CI0035LM which can be purchased from CILM
WordArt 5 from Weescotlass which can be downloaded HERE Thanks for sharing
Font of choice


Let's Get Started


Open your supplies and minimise
Open a new Layer 700 x 700 floodfill with white

Open up Frame 4 copy and paste as a new layer resize by 80%
Open Tube 1 of choice copy and paste as a new layer resize by 80% place below the frame layer grab your magic wand select inside one of the frame boxes selection modify by 10 select invert onto tube layer hit delete select none Add a dropshadow 1,1,30,3,Black


Onto Tube 2 copy and paste as a new layer resize by 80% place below the frame layer grab your magic wand select inside the second frame box selection modify by 10 select invert onto tube layer hit delete select none Add a dropshadow 1,1,30,3,Black

Open a paper of choice copy and paste as a new layer resize by 80% place below the frame layer grab your magic wand select inside the third frame box selection modify by 10 select invert onto tube layer hit delete select none Add a dropshadow 1,1,30,3,Black

Add a dropshadow to the frame layer 1,1,30,3,Black Merge down these layers remember leave your white background layer duplicate the merged layer and resize by 80% adjust Blur,Gaussian Blur setting 20 then add noise setting uniform checked monochrome checked setting 40

Open DoodleGreen 2 of choice copy and paste as a new layer place above the duplicated Gaussian layer resize by 60% place between the frames i postioned on the lower frame then duplicated postioned this layer near the middle one and erased any parts showing Add a dropshadow 1,1,30,3,Black

Open wordart of choice copy and paste as a new layer resize by 70% place on the right side of the frame layer reduce the opacity to around 80% Add a dropshadow

Open Humming1 of choice copy and paste as a new layer resize by 50% place on the right side of the frame duplicate and on the duplicate layer adjust blur gaussian blur add noise setting 40 uniform merge down both layers duplicate and mirror position to the bottom left of the frame add a dropshadow

Open a TiedHeartRibbon copy and paste as a new layer resize by 40% place on the left corner of the middle frame add a dropshadow

Open Blue1 copy and paste as a new layer resize by 60% twice and place on the top frame corner duplicate and place on the bottom corner frame add a dropshadow

Open Blue3 copy and paste as a new layer resize by 30% place over the Blue1 duplicate and place over the second Blue1 add a dropshadow

Open Flower 4 copy and paste as a new layer resize by 70% then again by 30% place on the bottom corner of the middle frame add a dropshadow

Open Tiedblue2 copy and paste as a new layer resize by 50% then again by 40% place over flower 4 add a dropshadow

Add your copyright information and your name
crop your tag resize by 80%
save your file as a png file and you are finished
I hope you enjoyed this tutorial,

New Tutorial.........Eggstravaganza

This tutorial was written on 6th April 2009
Any simularity to another tutorial is purely coincidental

I am using FTU scrapkit by Monica of simplysensationalscraps kit is called Eggstravaganza (tagger size) which can be downloaded HERE
Tubes of choice i am using Elias Chatzoudis under lisence number MPT9906 which can be purchased from MPT
Mask 119 by Weescotlass which can be downloaded HERE Thank you for sharing
Font of choice

Let's Get Started

Open your supplies and minimise

Open a new Layer 700 x 700 floodfill with white

Open a paper of choice copy and paste as a new layer place above the white background layer, then layers from mask then image then in the dropdown section find your mask source luminance checked invert mask data unchecked and apply delete the mask layer and merge mask layer reduce the opacity to around 80 or as desired

Open up Frame 4 copy and paste as a new layer, Image free rotate by 90% right Next Open a paper of choice copy and paste as a new layer onto the frame layer selection inside the frame holding down shift key to select both the selection modify by 4, selection invert back to paper layer hit delete select none Open a Tube of choice copy and paste as a new layer place below the frame layer position as desired grab your erase tool and erase any parts overhanging over the frame Add a dropshadow to the frame layer and the tube layer 1,1,30,3,Black

Merge down the tube layer,paper layer and Frame layer

Open tag of choice copy and paste as a new layer resize by 60% place over the frame layer on the right side add a dropshadow 1,1,30,3,Black

Open grass of choice copy and paste as a new layer resize by 50% then place on the right side near bottom of the frame layersee me tag for reference Add a dropshadow 1,1,30,3,Black

Open Blossom of choice copy and paste as a new layer resize by 60% place above the grass layer on the left side duplicate and mirror place on the right side of the grass like my tag add a dropshadow
Open Fence of choice copy and paste as a new layer resize by 50% place above the Blossom layer add a dropshadow

Merge down the Grass,Fence and Blossom layer Duplicate and postion on the left side of the frame layer like my tag

Open a Basket of choice copy and paste as a new layer resize by 80% then again by 50% place beside the fence layer on the right side and add a dropshadow 1,1,30,3,Black
Open Rabbit of choice copy and paste as a new layer resize by 50% place beside the basket layer add a dropshadow

Open eggs of choice copy and paste as a new layer resize by 50% place on the left side of the fence layer position as desired add a dropshadow

Open Flowepot of choice copy and paste as a new layer resize by 80% then again by 60% place on the left side of the frame add a dropshadow

Open butterfly of choice copy and paste as a new layer resize by 60% place on Left side of the frame layer duplicate and mirror add a dropshadow

Add your copyright information and your name
crop your tag resize by 80%
save your file as a png file and you are finished
I hope you enjoyed this tutorial,

Sunday, 5 April 2009

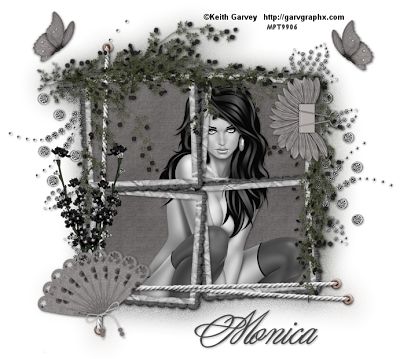
New Tutorial.........Top Notch


This tutorial was written on 5th April 2009Any simularity to another tutorial is purely coincidental

I am using FTU scrapkit by Monica of simplysensationalscraps kit is called silver shaddow (tagger size) which can be downloaded
HERE
Tubes of choice i am using Keith Garvey under lisence number MPT9906 which can be purchased from MPT
Font of choice

Let's Get Started

Open your supplies and minimise

Open a new Layer 700 x 700 floodfill with white

Open up Frame 6 copy and paste as a new layer Open a Tube of choice copy and paste as a new layer place below the frame layer position as desired grab your erase tool and erase any parts overhanging over the frame then adjust hue saturation colourize hue 0 saturation 0 your tube should now be grey.

Open a paper of choice copy and paste as a new layer place above the white background layer so your layer pallette should be from bottom upwards white background,paper layer, Tube and frame layer,back to the paper layer grad your eraser tool and erase any parts outside the frame layer Add a dropshadow to the frame layer and the tube layer 1,1,30,3,Black

Merge down the tube layer,paper layer and Frame layer duplicate and on the original adjust blur, gaussian blur with settings at 20.00 then add noise 30 gaussian, monochrome checked
open Binder of choice copy and paste as a new layer resize by 50% then image free rotate 90% right place over the frame layer on the right side add a dropshadow 1,1,30,3,Black

Open Blossom of choice copy and paste as a new layer resize by 70% then duplicate image mirror place both together and merge down place on the bottom left of the frame layer Add a dropshadow 1,1,30,3,Black
Open Fan of choice copy and paste as a new layer resize by 60% place above the Blossom layer on the left side image free roatae by 20% left add a dropshadow Open Doodle of choice copy and paste as a new layer place above the duplicated gaussian layer on the right side of the frame duplicate and flip position on the left side of the frame add a dropshadow

Open butterfly of choice copy and paste as a new layer resize by 30% place on one of the frame layers duplicate and mirror add a dropshadow

Add your copyright information and your name
crop your tag resize by 80%
save your file as a png file and you are finished
I hope you enjoyed this tutorial,

New Tutorial..............Silver Shadow


This tutorial was written on 5th April 2009Any simularity to another tutorial is purely coincidental

I am using FTU scrapkit by Monica of simplysensationalscraps kit is called silver shaddow (tagger size) which can be downloaded HERE
Tubes of choice i am using Keith Garvey under lisence number MPT9906 which can be purchased from MPT
Font of choice


Let's Get Started

Open your supplies and minimise
Open a new Layer 700 x 700 floodfill with white
Open up Frame 1 copy and paste as a new layer Open a paper of choice copy and paste as a new layer place above the white background layer grab your eraser tool and erase any parts outside the frame layer add a dropshadow 1,1,30,3,Black

Open a Tube of choice copy and paste as a new layer resize by 90% place below the frame layer duplicate and place this layer above the frame layer desired grab your erase tool and erase any parts overhanging over the frame on both tube layers then adjust hue saturation colourize hue 0 saturation 0 on both tube layers your tube should now be grey.
Add a dropshadow to the frame layer and the tube layer 1,1,30,3,Black

Merge down the tube layers, paper layer and Frame layer duplicate and on the original effects texture effects mosiac,antique settings 50,50 symmetric ticked 70,2,50 and apply

Open Doodle of choice copy and paste as a new layer place above the duplicated mosiac layer on the right side of the frame duplicate and flip position on the left side of the frame add a dropshadow

Open butterfly of choice copy and paste as a new layer resize by 70% then again by 60% place on the roses on the frame layers add a dropshadow

Open a lily of choice copy and paste as a new layer image free rotate by 20% right place on the right side of the frame on the bottom corner add a dropshadow

Add your copyright information and your name
crop your tag resize by 80%
save your file as a png file and you are finished
I hope you enjoyed this tutorial,

Wednesday, 1 April 2009

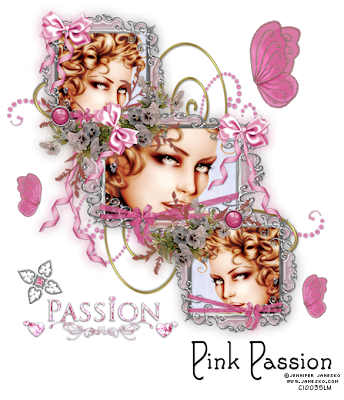
New Tutorial.................Pink Passion


This tutorial was written on 1st April 2009Any simularity to another tutorial is purely coincidental


I am using PTU scrapkit by Babycakes kit is called pink passion (tagger size)
which can be purchased
HERE
Tubes of choice i am using a close up image of Jennifer Janesko under lisence number CI0035LM which can be purchased from CILM
Font of choice


Let's Get Started

Open your supplies and minimise

Open a new Layer 700 x 700 floodfill with white

Open up Triple Frame copy and paste as a new layer resize by 70% Open a Tube of choice copy and paste as a new layer resize by 80% place below the frame layer in the middle frame position as desired grab your erase tool and erase any parts overhanging over the frame. Open another tube copy and paste as a new layer ressize by 80% position to the top left frame again below frame layer and erase any parts overhanging duplicate mirror place bottom right and erase any bits showing
Add a dropshadow to the frame layer and the tube layers 1,1,30,3,Black


open Doodle 2 copy and paste as a new layer resize by 80% then again by 70% place above the white background layer and below the tubes position as desired or like my tag just showing above the right side of frame erase any parts showing at the bottom you don't want the duplicate and mirror then flip place on the bottom left of the frame erase any parts showing over the top right of frame
add a dropshadow 1,1,30,3,Black


Open Bc wings copy and paste as a new layer resize by 80% then again by 40% place at the top right of the tag duplicate and resize by 50% duplicate again and position both around your tag Add a dropshadow 1,1,30,3,Black


Open word art copy and paste as a new layer resize by 60% place below the frame layer on the left side add a dropshadow Open Rose Jewel copy and paste as a new layer resize by 50% image free rotate by 20 degrees left place by the word art add a dropshadow


Open Brad 2 copy and paste as a new layer resize by 25% place on one of the frame corners duplicate and place on a different one add a dropshadow


Add your copyright information and your name
crop your tag resize by 80%
save your file as a png file and you are finished

I hope you enjoyed this tutorial,