Saturday, 31 January 2009

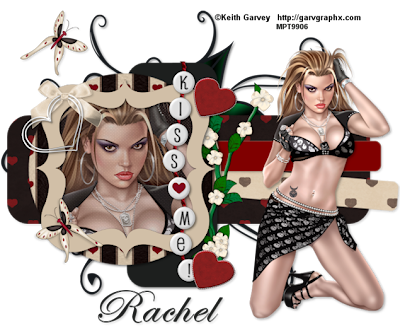
New Tutorial..................Loved Up


This tutorial was written by me on 30th January 2009.
Any similarity to any other tutorial is purely coincidental


SUPPLIES NEEDED


1 tube of choice and 1 close up image I am using Keith Garvey under License MPT9906 which can be purchased from MPT.
Font of choice. I used Edwardian Script
Elegant Scrap- kit by Rachel of Captivated Visions, kit is called All Loved Up and can be purchased
HERE.
Template 18 from Sara at Saras-scraps
Here. Under My Templates.Thank you For Sharing


LETS GET STARTED


Open your supplies and minimise
Open Template 18 shift D and close original delete info layer then Image canvas size 680 x 600 pixels lock aspect ratio unchecked, Layer New Raster Layer floodfill with white send to bottom
Open Paper 1 of choice copy and paste as a new Layer, Resize by 80% On Circle layer select all, select float, defloat invert onto paper layer delete select none close original circle , add a drop shadow 2, 2, 50, 5, Black


Open Paper 20 copy and paste as a new Layer click on the Bracket Background Layer Selection all, select float, select defloat,invert on to paper 20 layer hit delete select none add a drop shadow 2, 2, 50, 5, Black, delete Original Layer


Open Paper 5 copy and paste as a new Layer ,onto Rectangle 1 and follow all the same steps as above add a dropshadow 2,2, 50,5, Black


Onto Rectangle 3 layer, select all, select float, select defloat, layer new raster layer I flood filled with black but you could add a paper if you wanted hit delete select none add a drop shadow 2, 2, 50 ,5, Black, I did the same process for Rectangle 4 and the Bracket Layer too but complimented a colour from one of the papers


Open Close up Tube copy and paste as a new Layer resize as desired position over the bracket layer onto the bracket layer select, select all, select float,defloat select,modify,expand by 5 onto tube layer hit delete move tube Layer below bracket Layer lower opacity to around 75% add a drop shadow


Open tube resize by 80% positon on the right hand side of the template make sure Layer is at the top add a dropshadow 2,2,50,5 Black


Open Doodle 1 copy and paste as a new Layer resize by 60% position above the white background layer add a drop shadow 2,2,50,5 Black


Open Flower 6 layer and Copy and paste as a new Layer resize by 40% position the flower under bracket background Layer see my tag for reference add a dropshadow ,
Open Word art 2 copy and paste as a new Layer resize by 90% then again by 50% place over bracket layer add a dropshadow


Open Heartcharm with bow 1 copy and paste as a new Layer resize by 80% and then by 40% or as desired add a dropshadow


Open Puffy Heart 3 copy and paste as a new Layer resize by 60% then by 30% and add a dropshadow then duplicate place one on the bottom of the flower stem and the other at the top or as desired


Open Butterfly 6 copy and paste as a new Layer resize by 30% add a dropshadow 2,2,50,5 Black
add any copyright and your name,
Layers Merge Flatten,
crop your tag and resize by 90%
save as png


Friday, 30 January 2009

New Tutorial...............Lollipop


This tutorial was written by me on 30th January 2009.
Any similarity to any other tutorial is purely coincidental


SUPPLIES NEEDED


1 tube of choice I am using Elias Chatzoudis under License MPT9906 which can be purchased from MPT
Font of choice.
Freebie Scrap- kit by Seachell of Seachell Scrapz, kit is called Lollipop of Love and can be found
HERE.
Template 5 from Sara at Saras-scraps
Here. Under My Templates.Thank you For Sharing


LETS GET STARTED

Open your supplies and minimise
Open Template 5 shift D and close original delete info layer then Image canvas size 600x 650 pixels aspect ratio unchecked, Layer New Raster Layer floodfill with white send to bottom
Open paper 3 copy and paste as a new Layer, On Square Layer select all.,float,defloat ,invert onto paper layer delete select none close original square, add a drop shadow 2, 2, 50, 5, Black


Open Paper 2 copy and paste as a new Layer click on the Bracket Shape, Selection all, select float, select defloat,invert on to paper 2 layer hit delete select none add a drop shadow 2, 2, 50, 5, Black, delete Original Layer


I did the same process for both rectangle layers as above
Onto Frame 1 layer,select all,select float, select defloat, layer new raster layer I flood filled with black but you could add a paper if you wanted select none add a drop shadow 2, 2, 50 ,5, Black,
I did the same process for each Frame Layer.


Onto Background 1 select all select float, defloat select invert, copy and paste a paper of choice and delete
add a dropshadow 2.2.50.5, Black


I did the same process for each Frame Layer.
Open tube resize by 80% positon in the middle of the Template like my tag ,duplicate tube resize by 80% position under first frame layer click inside Black Frame select all, select float, select defloat modify expand by 5 onto tube delete
add a drop shadow 2, 2, 50, 5, Black and duplicate i did a paper for my middle one but you can do a tube if you desire

Add any elements you wish or as my tag for reference
I duplicated my bracket shape Layer added a gaussian blur and also mosiac glass effect

Add your name and any copyright needed
Layers Merge Flatten, crop your tag
save as png

Monday, 19 January 2009

New Tutorial..........Heartfelt Janesko


This tutorial was written by me on 27th October 2008.
Any similarity to any other tutorial is purely coincidental.


SUPPLIES NEEDED


1 image or tube I am using the gorgeous art of Jennifer Janesko, you will need a license to use there artwork which can be purchased from CILM.
Font of choice. I used Saginaw
Mask 91 by Weescotlass
HERE. Thank You Chelle
Awesome FTU Scrap- kit by Missy of Misfits Scrapz , kit is called I Heart You
HERE.
Please leave a comment when downloading the supplies


Let's Get Started


Open new image 650 x 650 transparent and Flood fill with White, Open a Paper copy and paste as a new Layer, open Mask 91 and go to Layers/New Mask Layer from Image in the dropdown box select the mask, invert mask checked go to your Layer Delete Mask Merge group


Open a Frame i used Frame 2, copy and paste as a new Layer , resize by 90% resize all layers unchecked,copy and paste a paper of choice i used paper 3 back to your frame layer use your Magic wand tolerance and feather set to 0 click inside the frame selections modify/expand by 15 invert back to your paper layer hit delete and selection none


Open Bow 2 copy and paste as a new layer resize by 80% image/Free Rotate by 10% Left and position lower down on your Frame add a drop shadow


Open a tube copy and paste as a new layer, resize by 90% duplicate and place below the frame layer back to the top tube layer and erase any parts showing over the Frame like mine add a drop shadow 2, 2, 50 ,5, Black


Open Lillies 22 copy and paste as a new Layer image/mirror resize by 80% place under the bow layer add a drop shadow


Open loveribbon 2 copy and paste as a new Layer resize by 55% position over the Lillies add a drop shadow 2,2,50,5 Black


Open Hearttag 2 copy and paste as a new layer resize by 50% position over the bow add a drop shadow

add any copyright and your name,
Layers Merge Flatten,
Resize,I also Crop my Tag too
save as png
I hope this was an easy tutorial and you enjoyed it lol

New Tutorial................Melted Heartz


This tutorial was written by me on 25th October 2008.
Any similarity to any other tutorial is purely coincidental.


SUPPLIES NEEDED


1 image or tube I am using the gorgeous art of Rion Vernon, you will need a license to use there artwork which can be purchased from CILM.
Font of choice. I used Saginaw
Mask Blinds1 by Montispixelplayground
HERE. Thank You Monti
Awesome FTU Scrap- kit by Laura of cinnamonscraps, kit is called Love never melts
HERE. Please leave a comment when downloading the supplies


Let's Get Started


Open new image 650 x 650 transparent and Flood fill with White, Open a Paper copy and paste as a new Layer, open Monti's Mask and go to Layers/New Mask Layer from Image in the dropdown box select the mask, invert mask checked go to your Layer Delete Mask resize by 90%


Open a Frame i used Frame 4, copy and paste as a new Layer , resize by 80% resize all layers unchecked,image/free rotate by 10% left, copy and paste a paper of choice back to your frame layer use your Magic wand tolerance and feather set to 0 click inside the frame selections modify/expand by 10 invert back to your paper layer hit delete and selection none


Open a tube copy and paste as a new layer, resize by 80% if needed and place inside the frame layer erase any parts showing over the frame like mine add a drop shadow 2, 2, 50 ,5, Black
Open a bow of choice copy and paste as a new Layer resize by 70% position as desired i placed mine over the Frame add a drop shadow don't worry if slighlty big as we will be covering this lol
Open Heart with a string 1 copy and paste as a new Layer resize by 40% then position on the left side of the frame add a drop shadow 2,2,50,5 Black


Open Flower 6 copy and paste as a new layer resize by40% position on the right side of the frame add a drop shadow


Open Blossoming 2, copy and paste as a new layer resize by 60% place below the heart string layer and on the same side as the heart like my tag add a drop shadow


Open beads copy and paste as a new layer resize by 60% add a drop shadow place on the right side of the frame, open a butterfly of choice copy and paste as a new layer resize by 30% add a drop shadow and place as desired that's it lol

add any copyright and your name,
Layers Merge Flatten,
I also Crop my Tag too save as png
I hope this was an easy tutorial and you enjoyed it lol

New Tutorial................Golden Amour

This tutorial was written by me on 25th October 2008.
Any similarity to any other tutorial is purely coincidental.

SUPPLIES NEEDED

1 image or tube I am using the gorgeous art of Keith Garvey, you will need a license to use there artwork which can be purchased from MPT .
Font of choice. I used TKdoodle
Awesome FTU Scrap- kit by Kittzcreationz, kit is called Amour HERE.
Please leave a comment when downloading the supplies

Let's Get Started

Open new image 700 x 700 transparent and Flood fill with White, Open a Frame, I used Ribbon with butterflies copy and paste as a new Layer, resize by 80% all layers unchecked,duplicate and on bottom layer adjust/blur gaussian blur setting 20 then add/remove noise setting 30

Open a paper of choice copy and paste as a new Layer , back to your frame layer holding down your shift key use your Magic wand tolerance and feather set to 0 click inside the frame layer on both cirlces selections modify/expand by 15 invert back to your paper layer hit delete and selection none

Open a tubes copy and paste as a new layer, resize by 90% if needed, apply magic wand setting and selection invert again as in paper layer and same again for the other tube add a drop shadow 2, 2, 50 ,5, Black, to your tubes and Frame

Open Charm 3, copy and paste as a new Layer resize by 40% position as desired i placed mine in the middle of my Frame add a drop shadow

Open staple ribbon copy and paste as a new Layer resize by 60% position on the left side of the frame add a drop shadow 2,2,50,5 Black then duplicate image/mirror

Open Doodle line, copy and paste as a new layer above the white background resize by 65% position on the left side of the Frame image/duplicate image/Mirror add a drop shadow

add any copyright and your name,
Layers Merge Flatten,
I also Crop my Tag too resize
save as png
That's it lol a quick tutorial
I hope this was an easy tutorial and you enjoyed it lol

New Tutorial..............Minted


This tutorial was written by me on 25th October 2008.
Any similarity to any other tutorial is purely coincidental.


SUPPLIES NEEDED


1 image or tube I am using the gorgeous art of Jamie Kidd, you will need a license to use there artwork which can be purchased from CILM.
Font of choice. I used Saginaw
Mask178 by Weescotlass
HERE. Thank You Chelle
Awesome FTU Scrap- kit by Bluey of Bluedreamdesigns, kit is called Purplicious
HERE.
Please leave a comment when downloading the supplies


Let's Get Started


Open new image 650 x 650 transparent and Flood fill with White, Open a Paper copy and paste as a new Layer, open Mask 178 and go to Layers/New Mask Layer from Image in the dropdown box select the mask, invert mask checked go to your Layer Delete Mask


Open a Frame i used Frame 2, copy and paste as a new Layer , resize by 80% resize all layers unchecked, copy and paste a paper of choice back to your frame layer use your Magic wand tolerance and feather set to 0 click inside the frame selections modify/expand by 10 invert back to your paper layer hit delete and selection none add a drop shadow Open Journal copy and paste as a new layer image/mirror image/free rotate by 30%


Open a tube copy and paste as a new layer, resize by 80% if needed and place over the frame layer duplicate place below the frame layer back to the top tube erase any parts showing over the frame like mine add a drop shadow 2, 2, 50 ,5, Black


Open Flower 8 copy and paste as a new Layer resize by 90% image/mirror position on the left hand side of the frame Open Flower 7 copy and paste as a new layer resize by 75% image/mirror position on the left side of the frame slighlty lower than the first flower add a drop shadow to both Open flower 2 copy and paste as a new layer resize by 35% place over the stem of the first flowers add a dropshadow


Open beads copy and paste as a new layer resize by 70% add a drop shadow place on the right side of the frame on the journal, open a butterfly of choice copy and paste as a new layer resize by 30% add a drop shadow and place as desired
that's it lol

add any copyright and your name,
Layers Merge Flatten,
I also Crop my Tag too save as png

I hope this was an easy tutorial and you enjoyed it lol

New Tutorial...............Candy Princess


This tutorial was written by me on 25th October 2008.
Any similarity to any other tutorial is purely coincidental.


SUPPLIES NEEDED


1 image or tube I am using the gorgeous art of Barbara Jensen, you will need a license to use there artwork which can be purchased direct from here site.
Font of choice. I used Saginaw
Mask Blinds1 by Montispixelplayground
HERE. Thank You Monti
Awesome FTU Scrap- kit by Yvette of misfitsscrapz, kit is called Snowprincess
HERE. Please leave a comment when downloading the supplies


Let's Get Started


Open new image 650 x 650 transparent and Flood fill with White, Open a Paper copy and paste as a new Layer, open Monti's Mask and go to Layers/New Mask Layer from Image in the dropdown box select the mask, invert mask checked go to your Layer Delete Mask then duplicate if you wish to make darker merge down resize by 90%


Open a Frame i used Frame 5, copy and paste as a new Layer , resize by 90% resize all layers unchecked,copy and paste a paper of choice i used paper 14 back to your frame layer use your Magic wand tolerance and feather set to 0 click inside the frame selections modify/expand by 15 invert back to your paper layer hit delete and selection none


Open a tube copy and paste as a new layer, resize by 90% if needed duplicate and place below the frame layer back to the top tube layer and erase any parts showing over the bow like mine add a drop shadow 2, 2, 50 ,5, Black


Open a Tree Decoration copy and paste as a new Layer resize by 50% position as desired i placed mine on the top left corner of my Frame add a drop shadow
Open a Bow copy and paste as a new Layer resize by 80% then by 60% position on the right side of the frame add a drop shadow 2,2,50,5 Black


Open a Flower copy and paste as a new layer resize by35% position over the tree decoration add a drop shadow duplicate place on the bow


Open Heart 1, copy and paste as a new layer Image/Flip place below the Frame layer and duplicate Image/Mirror add a drop shadow i also duplicated mine and added a gaussian blur and add/noise add the snow princess and tree or any other elements you wish


add any copyright and your name,
Layers Merge Flatten,
I also Crop my Tag too save as png
I hope this was an easy tutorial and you enjoyed it lol

New Tutorial....................Victorian Fairy

This tutorial was written by me on 21st October 2008.
Any similarity to any other tutorial is purely coincidental.

SUPPLIES NEEDED

1 image or tube I am using the gorgeous art of Pinuptoons, you will need a license to use there artwork which can be purchased from CILM.
Font of choice. I used Saginaw
Filter- Tramages-Tow The Line
Mask Blinds1 by Montispixelplayground
HERE. Thank You Monti
Awesome FTU Scrap- kit by Lisa of SophisticatedScraps, kit is called Long Time ComingHERE. Please leave a comment when downloading the supplies

Let's Get Started

Open new image 650 x 650 transparent and Flood fill with White, Open a Paper copy and paste as a new Layer,Effects Filter Tramages Tow the Line with settings 75,50,50,20 apply open Monti's Mask and go to Layers/New Mask Layer from Image in the dropdown box select the mask, invert mask checked go to your Layer Delete Mask then duplicate and on original adjust blur Gaussian blur setting 20 Open another paper and repeat Tramages Effect then apply the mask again and merge down Mask,Mask blur Mask layer

Open a Frame i used Frame 2, copy and paste as a new Layer , resize by 40% resize all layers unchecked, Copy and Paste a Tube of choice resize if needed then duplicate image/mirror position over the frame back to the frame layer use your Magic wand Tolerance and Feather set to 0 click inside your Frame selection modify/expand by 5 Layer new Raster Layer Floodfill with a colour to compliment your tube Go to Frame layer still selected invert back to tube layer hit delete selection none add a dropshadow to your tube and frame merge the tube,floodfill layer and frame

Open Beadedswirl, copy and paste it as a new layer resize by 80% image flip position above your mask layer as desired or like mine add a drop shadow 2, 2, 50 ,5, Black

Open Butterfly copy and paste as a new Layer resize by 40% twice position as desired i duplicated mine a few times and placed around my frame add a drop shadow

Open Bow 2 copy and paste as a new Layer resize by 50% duplicate position on the beadedswirls add a drop shadow 2,2,50,5 Black

add any copyright and your name,
Layers Merge Flatten,
I also Crop my Tag too
and save as png
I hope this was an easy tutorial and you enjoyed it lol

New Tutorial................Precious in Pink


This tutorial was written by me on 20 October 2008.
Any similarity to any other tutorial is purely coincidental.


SUPPLIES NEEDED


1 image or tube I am using the gorgeous art of Jamie Kidd, you will need a license to use there artwork which can be purchased from CILM.
Font of choice. I used Affair
Mask 63 by Weestcotlass
HERE. Thank You Chelle
Awesome FTU Scrap- kit by Laura of CinnamonScraps, kit is called Precious Love
HERE. Please leave a comment when downloading the supplies


Let's Get Started


Open new image 650 x 650 transparent and Flood fill with White, Open Paper 3 copy and paste as a new Layer, open Mask 63 and go to Layers/New Mask Layer from Image in the dropdown box select the mask, go to your Layer Delete Mask then Layers merge group so your Mask is on it's own Layer


Open a Frame i used Frame 1, copy and paste as a new Layer , resize by 80% resize all layers unchecked, Copy and Paste a paper of choice I used Paper 3 Back on your Frame layer use your Magic wand Tolerance and Feather set to 0 click inside your Frame Layer selections modify/expand by 15 selection invert back to your paper Layer hit delete and selection none


Open your tube and paste as a new layer position it over the frame layer resize by 80% if needed add a drop shadow and duplicate move this Layer below your frame layer back to top tube layer and erase any parts showing add a drop shadow to the frame


Open Ribbon wrap 3, copy and paste it as a new layer resize by 80% image mirror position on top of your frame on the Left hand side add a drop shadow 2, 2, 50 ,5, Black
Open Heart charm 1, copy and paste as a new Layer resize by 70% position on top of the Ribbon wrap add a drop shadow


Open Gem 4 copy and paste as a new Layer resize by 40% position on the ribbon wrap knot add a drop shadow 2,2,50,5 Black


Open Beaded heart 1, and Copy and paste as a new Layer resize by 70% add a drop shadow and position below your Frame on the Left hand side and duplicate and move to the other side like my tag


Open Flower 1 and copy paste as a new Layer resize by 35% add a dropshadow and duplicate twice position on your frame as desired.


add any copyright and your name,
Layers Merge Flatten, I also Crop my Tag too

and save as png
I hope this was an easy tutorial and you enjoyed it lol

New Tutorial....................Precious Blossom

This tutorial was written by me on 19 October 2008.
Any similarity to any other tutorial is purely coincidental.

SUPPLIES NEEDED

1 image or tube I am using the gorgeous art of Jennifer Janesko, you will need a license to use there artwork which can be purchased from CILM.
Font of choice. I used Cupiedoll
Mask 81 by Weestcotlass
HERE. Thank You Chelle
Awesome FTU Scrap- kit by Laura of CinnamonScraps, kit is called Precious Love HERE. Please leave a comment when downloading the supplies

Let's Get Started

Open new image 650 x 650 transparent and Flood fill with White, Open Paper 12 copy and paste as a new Layer, open Mask 81 and go to Layers/New Mask Layer from Image in the dropdown box select the mask, go to your Layer Delete Mask then Layers merge group so your Mask is on it's own Layer

Open a Frame i used Frame 4, copy and paste as a new Layer , resize by 80% resize all layers unchecked, Copy and Paste a paper of choice I used number 12 Back on your Frame layer use your Magic wand Tolerance and Feather set to 0 click inside your Frame Layer selections modify/expand by 15 selection invert back to your paper Layer hit delete and selection none
Open your tube and paste as a new layer position it inside the frame layer resize by 80% if needed erase any parts showing add a drop shadow to the tube and your Frame layer merge down your Frame, tube and paper
Duplicate your Frame Layer twice so you have 3 in total on the bottom one Image/Free rotate right 20 second Frame Image/Free rotate left 20, position them so they are further apart and yours should look like mine

Open Heart charm 2 copy and paste it as a new layer resize by 80% position on top frame on the Left hand side add a drop shadow 2, 2, 50 ,5, Black

Open Blossoming 2 copy and paste as a new Layer resize by 80% twice position on the right hand side of the top Frame Layer add a drop shadow

Open Bow 3 copy and paste as a new Layer resize by 70% twice position over the Blossoming add a drop shadow 2,2,50,5 Black

Open Beaded heart 2 and Copy and paste as a new Layer resize by 70% twice add a drop shadow and position above your first Frame layer on the Left hand side Frame Layer and duplicate image mirror and move above your mask layer and it should be on your right hand side Frame, see my tag for reference hope I haven’t confused you lol
add any copyright and your name,
Layers Merge Flatten,
I also Crop my Tag too and save as png
I hope this was an easy tutorial and you enjoyed it lol

New Tutorial............Christmas Treasures

This tutorial was written by me on 14 October 2008.
Any similarity to any other tutorial is purely coincidental.

SUPPLIES NEEDED

1 image or tube of choice
I am using the gorgeous art of AL RIO, you will need a license to use there Artwork
Artwork which can be purchased from CILM
Font used Saginaw - HERE
Awesome FTU Scrap kit by Monica of Simply Sensational Scraps, kit is called Christmas Treasures HERE
Filter-VDL-Adrenaline/Snowflakes

LETS GET STARTED

Open new image 650 x 650 transparent and Flood fill with White, Open a Frame i used Frame 1, copy and paste as a new Layer , Image/Free rotate, rotate 90 left Image resize, resize by 80% resize all layers unchecked on your Frame layer use your Magic wand Tolerance and Feather set to 0 click inside your Frame New raster Layer selections modify/expand by 15 flood fill with Black still selected effects VDL Adrenaline/Snowflake with the following setting:
from top to bottom 29,4,14,66,0 Basic Snow
apply selection none, layers move down below your frame layer add a drop shadow to your Frame Layer

Open your tube and paste as a new layer position it inside the frame layer resize by 80% if needed erase any parts showing add a drop shadow to the tube
Open Wrap 2 copy and paste it as a new layer resize by 80% twice position on top of the frame add a drop shadow 2, 2, 50 ,5, Black

Open Flower 1 copy and paste as a new Layer resize by 80% then 80% twice position on the left side of the Frame then duplicate and Image Free rotate 90% left position to the top left corner see my tag for reference merge down add a drop shadow

Open the Holly copy and paste as a new Layer resize by 70% and then by 40% place Left side over the wrap I also duplicated and mirrored so I had 2 but that’s your choice add a drop shadow 2,2,50,5 Black

Open Tree 1 and Copy and paste as a new Layer resize by 50% add a drop shadow and position Open the Boxes and resize by 30% place a few in front of the Tree Like my Tag Open Rudolf 1 resize by 30% and place by the Tree

add any copyright and your name, and any wording you would like I used Happy Holidays

Layers Merge Flatten I also Crop my Tag too
and save as png
I hope this was an easy tutorial and you enjoyed it lol

New Tutorial...............Happiness


This tutorial was written by me on 14 October 2008. Any similarity to any other tutorial is purely coincidental.


SUPPLIES NEEDED

1 image or tube of choice
I am using the gorgeous art of Keith Garvey, you will need a license to use his Artwork
Artwork which can be purchased from MPT
Font used Saginaw -
HERE
Mask 198 by Vixpsp.
HERE - Thank you Vix
Awesome FREE Scrapkit by Raeven , kit is on her scrap site kit is called Golden Delight. Dont forget to download the Wordart too which the link is above the kit called Happiness. Please leave a comment when downloading the supplies


LETS GET STARTED


Open new image 650 x 650 transparent and Flood fill with White Open a Paper of choice i used Raster 10 copy and paste as a new Layer open Mask 198 and go to Layers/New Mask Layer from Image in the dropdown box select the mask, go to your Layer Delete Mask then Layers merge group so your Mask is on it's own Layer Duplicate your Mask on the Original Adjust Gaussian Setting 20.00 Adjust Add/Remove Noise setting 30.00 ensure random is checked and monochrome and apply


Open a Frame i used Raster 5, copy and paste as a new Layer Open another Paper i used Raster 13 back to Frame layer use your Magic wand Tolerance and Feather set to 0 click inside your Frame selections modify/expand by 15 selection invert and back to your paper layer hit delete select none move your paper below your frame Layer add a dropshadow to your Frame
Open your tube and paste as a new layer position it inside the frame layer resize if needed and erase any parts showing add a dropshadow to the tube


Open Bow copy and paste it as a new layer position to the left side of the frame add a drop shadow 2, 2, 50 ,5, Black

Open beads of choice and place the bead underneath the bow layer duplicate it and position of personal choice i duplicated again and made them on different levels add a dropshadow
Open Glitter star i used Raster 3 resize by 70% add a dropshadow and place to the right of the tag duplicate twice and place middle and bottom of frame on the ribbon parts as though attached to the ribbon


Open doodle Raster 4 and Copy and paste as a new layer just above the mask layer add a dropshadow then duplicate and flip so you should have 1 at the top and 1 at the bottom of the frame like mine lol .

Open the Words Happiness and place on your tag add a dropshadow

Layers Merge Flatten

I also Crop my Tag too and
add any copyright and your name,
save as png
I hope this was an easy tutorial and you enjoyed it lol

New Tutorial................Elegance

This tutorial was written by me on 28 September 2008.
Any similarity to any other tutorial is purely coincidental. This is my first tutorial so be gentle with me OK lol

SUPPLIES NEEDED

1 image or tube of choice
I am using the gorgeous art of Keith Garvey, you will need a license to use his Artwork which can be purchased from MPT
Font used JeffrianaJF - HERE
Word Art by Weescotslass. HERE - Thank you Chelle
Awesome FREE Scrapkit by Monica of Simply Sensational Scraps, kit is called Rosie Elegance HERE Please leave a comment when downloading the supplies

LETS GET STARTED

Open new image 650 x 650 transparent and Flood fill with WhiteOpen frame 3 copy and paste as a new Layer resize by 90%

Open diamond circle 1, copy and paste as a new Layer above your frame layer resize
this by 90% and place inside your frame layer (See main image for guidance)
Open ribbon charm 1 copy and paste it as a new layer and resize this by 90%. Use your move
tool to position it to the side of the frame at the bottom (see main image for guidance) and
add a drop shadow 2, 2, 50 ,5, Black

Open bow of choice and resize by 80% twice then resize again by 90%, place the bow at the
bottom left of the ribbon charm and duplicate move the 2nd bow to the top of the ribbon charm
do the same for the butterfly charm1 as above and place them underneath the bow layers that it
looks like it has been threaded through the main knot. Merge the bow and charm down onto a
single layer and the add same drop shadow as above

Open butterfly1 and Copy and paste as a new layer resize by 70% twice and place at one side
of the frame then duplicate and mirror so you should have 2 at either side of the frame like
mine lol add a drop shadow 2, 3, 50, 5 Black

Select your Magic Wand Tolerance and Feather both 0. Select inside your diamond circle layer.
Selections Modify Expand by 2. Then either add a new layer and flood fill the selection with a
colour that will complement your tube OR select a paper from the Kit, Copy and paste as a new layer.

Selections Invert and hit delete on your keyboard. Move the layer you just created below your
frame layer

Open your wording or add your own copy and paste as a new layer above your paper layer.
Duplicate a few times and place as desired inside your frame merge down your wording then lower

the opacity to around 30 or which suits your paper best
Back to your frame layer and duplicate on the original adjust blur Gaussian setting 20.00 then
adjust add/remove noise setting 30.00, ensure random is checked and monochrome checked just gives a lovely effect around the frame instead of a mask

Now for the tube copy and paste the tube as a new layer at the top of all your layers apply same
drop shadow as above then duplicate the tube layer move this down above the paper layer
then back to your top tube erase parts of the tube covering the frame and ribbon or until happy
lol
add any copyright and your name,
I also added a gradient glow to my text.
Crop your Image
Save as Png
I hope this was an easy tutorial and you enjoyed it lol