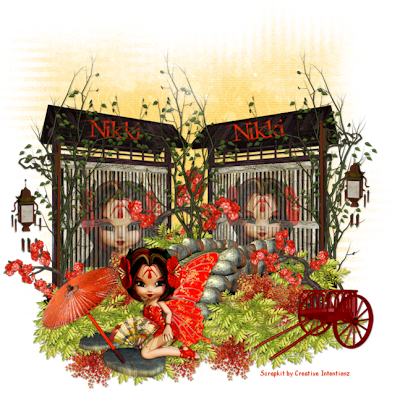
This tutorial was written on 24th August 2009
Any simularity to another tutorial is purely coincidental
I am using PTU scrapkit by Nikki of Creative Intentionz kit is called Tennin Fairy(tagger size) which can be Purchased HERE
Tubes of choice
Font of choice
Mask of choice
Let's Get Started
Open your supplies and minimise
Open a new raster layer 750 x 750 and floodfill with white
Open a paper of Choice copy and paste as a new Layer,Layer New Mask Layer, from image find your mask in the dropdown section and apply making sure invert mask data is unchecked,onto mask layer hit delete and merge group
Open Wall 1 copy and paste as a new layer resize by 60% position near the left hand side of the canvas duplicate the wall then mirror position both together see my tag for reference
Add a dropshadow 1,1,30,3,Black
Open Pappilon fairy 3 copy and paste as a new layer resize by 30% position above the first wall layer inside it lower the opacity to around 50 duplicate then mirror position on the second wall Add a dropshadow 1,1,30,3,Black
Next Open vine 1 copy and paste as a new layer,resize by 60% position above the wall on the second wall layer paste on the right hand side duplicate and position between both walls then duplicate and mirror position on the first wall left hand side see my tag for reference
Add a dropshadow 1,1,30,3,Black
Open Tree 3 copy and paste as a new layer resize by 40% position above the wall layer in the middle of both Add a dropshadow 1,1,30,3,Black
Open Lantern copy and paste as a new layer resize by 70% then again by 70% position on the right hand side above the wall layer duplicate then mirror position on the left hand side edge of the first wall Add a dropshadow 1,1,30,3,Black
Open Bridge copy and paste as a new layer resize by 60% then position in the middle of both wall layers as desired Add a dropshadow 1,1,30,3,Black
Open Leaves 2 copy and paste as a new layer resize by 40% then duplicate a few times position around the bridge on both sides as desired also add Leaves 1 where you desireAdd a dropshadow 1,1,30,3,Black
Open Ribbon copy and paste as a new layer resize by 50% position top right hand side of the window Add a dropshadow 1,1,30,3,Black
Open Heart 7 copy and paste as a new layer resize by 40% position on the top left hand side of the window Add a dropshadow 1,1,30,3,Black
Open Cloud copy and paste as a new layer resize by 60% then again by 70% duplicate twice and position above the window layer Add a dropshadow 1,1,30,3,Black
Duplicate tree 3 twice resize by 40% position one by the bridge and the other on the left hand edge of the wall Add a dropshadow 1,1,30,3,Black
Open Stonepath copy and paste as a new layer resize by 50% position at the bottom of the bridge Add a dropshadow 1,1,30,3,Black
Open Tube of choice copy and paste as a new layer resize by 60% position on the stonepath Add a dropshadow 1,1,30,3,Black
Open fog copy and paste as a new layer resize by 70% position above the walls Add a dropshadow 1,1,30,3,Black
Open Wagon copy and paste as a new layer resize by 30% image mirror position on the right hand side on the leaves Add a dropshadow 1,1,30,3,Black
Open Umbrella copy and paste as a new layer resize by 50% position by your tube Add a dropshadow 1,1,30,3,Black
Add your copyright information and your name
crop your tag resize by 80%
save your file as a png file
and you are finished
I hope you enjoyed this tutorial,


No comments:
Post a Comment