Saturday, 29 August 2009

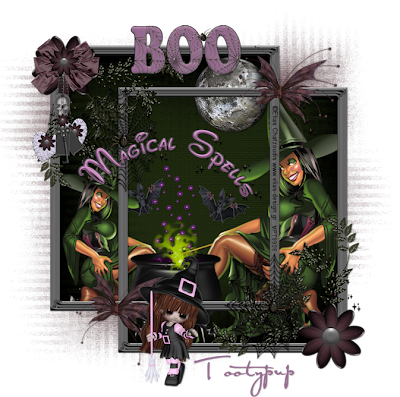
New Tutorial.........Little miss Witchypoo


This tutorial was written on 29th August 2009
Any simularity to another tutorial is purely coincidental
I am using PTU scrapkit by Tootypups Scraps kit is called Little miss witchypoo(tagger size) which can be Purchased HERE
Tubes of choice i am using Elias Chatzoudis under lisence number mpt9906 you can purchase tubes from mpt
Font of choice
Mask of choice

Let's Get Started
Open your supplies and minimise
Open a new raster layer 750 x 750 and floodfill with white
Open a paper of Choice copy and paste as a new Layer,Layer New Mask Layer, from image find your mask in the dropdown section and apply making sure invert mask data is unchecked,onto mask layer hit delete and merge group


Open Frame 2 copy and paste as a new layer,resize by 60%, grab your selection tool draw around the one of the squares on the frame then layer new raster layer floodfill with black select none place this below the frame duplicate and place on the second square frame merge down both layers Add a dropshadow 1,1,30,3,Black

Open a paper of Choice copy and paste as a new Layer above the black floodfill layer,Layer New Mask Layer, from image find your mask in the dropdown section and apply making sure invert mask data is unchecked,onto mask layer hit delete and merge group lower opacity to 30

Open Moon copy and paste as a new layer resize by 70% position inside the frame top right hand side see my tag Add a dropshadow 1,1,30,3,Black

Next Open Cauldron 2 copy and paste as a new layer,resize by 80% position on the Left hand side inside the frame Add a dropshadow 1,1,30,3,Black

Open Tube of choice copy and paste as a new layer resize by 80% position inside the frame on the right hand side below the cauldron duplicate your tube resize aqgain and duplicate mirror position on the left hand side Add a dropshadow 1,1,30,3,Black

Open Web copy and paste as a new layer resize by 50% then position on the right hand side above the frame layer duplicate and place on the left hand side Add a dropshadow 1,1,30,3,Black

Open spider copy and paste as a new layer resize by 30% then position 0n the web duplicate and place on the other web Add a dropshadow 1,1,30,3,Black

Open Keychain copy and paste as a new layer resize by 30% then position on the top left hand side of the frameAdd a dropshadow 1,1,30,3,Black

Open wordart of choice copy and paste as a new layer resize by 80% then position top of the frame Add a dropshadow 1,1,30,3,Black

Open magical spells wordart copy and paste as a new layer resize by 50% position above the frame over the cauldron see my tag Add a dropshadow 1,1,30,3,Black

Open littlewitch of choice copy and paste as a new layer resize by 80% then position below the coffin just on the edge so the tube looks like its in the coffin Add a dropshadow 1,1,30,3,Black

Open Bat2 copy and paste as a new layer resize by 30% position on the left hand side duplicate and mirror place on the right hand side Add a dropshadow 1,1,30,3,Black

Add your copyright information and your name
crop your tag resize by 80%
save your file as a png file
and you are finished
I hope you enjoyed this tutorial,

New Tutorial......Divas


This tutorial was written on 29th August 2009
Any simularity to another tutorial is purely coincidental
I am using PTU scrapkit by Shell's scraps kit is called Star Diva (tagger size) which can be Purchased HERE
Tubes of choice i am using Ismael Rac under license number amijabe you can purchase there tubes from Artistic minds inc
Font of choice
Mask of choice

Let's Get Started

Open your supplies and minimise

Open a new raster layer 750 x 750 and floodfill with white

Open a paper of Choice copy and paste as a new Layer,Layer New Mask Layer, from image find your mask in the dropdown section and apply making sure invert mask data is unchecked,onto mask layer hit delete and merge group

Open Frame of choice copy and paste as a new layer,resize by 70%, Grab your magic wand hold down the shift key select inside the frame select all 3 parts select modify by 5 then layer new raster layer floodfill each part with black select none place the floodfill layer below the frame Add a dropshadow 1,1,30,3,Black

Open Tube copy and paste as a new layer resize by 80% position below the frame inside it grab your eraser tool and erase any parts outside the frame lower the opacity to around 50 merge down the tube,frame and floodfill layer Add a dropshadow 1,1,30,3,Black

Next open same tube or another copy and paste as a new layer,resize by 80% position on the top of the frame image mirror Add a dropshadow 1,1,30,3,Black

Open Buttonlabel 1 copy and paste as a new layer resize by 50% position above the frame layer on the left hand side top edge Add a dropshadow 1,1,30,3,Black

Open ribbonbuckle 1 copy and paste as a new layer position resize by 60% grab your pick tool and stretch the buckle to fit across the bottom of the frame see my tag for reference Add a dropshadow 1,1,30,3,Black

Open star 1 copy and paste as a new layer resize by 20% then position above the ribbonbuckle layer on the left hand side corner duplicate resize by 40% position on the right hand side corner Add a dropshadow 1,1,30,3,Black

Open Doodle 1 copy and paste as a new layer resize by 90% then position below the frame Add a dropshadow 1,1,30,3,Black

Open Starchain copy and paste as a new layer resize by 50% position on the bottom left hand side of the frame duplicate flip then position on right hand side Add a dropshadow 1,1,30,3,Black

Open Butterfly copy and paste as a new layer resize by 70% then again by 20% position above the main tube on the left hand side duplicate then mirror position on the right hand side Add a dropshadow 1,1,30,3,Black

Open Diva string copy and paste as a new layer resize by 40% position on the frame Add a dropshadow 1,1,30,3,Black

Add your copyright information and your name crop your tag
Resize by 80% save as a png file.

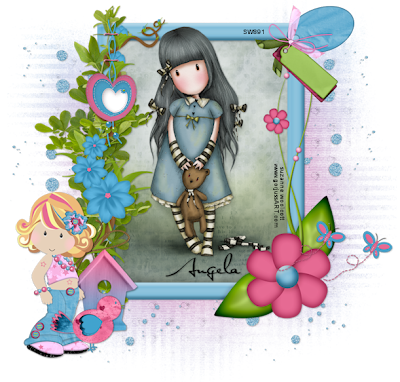
New Tutorial.........Forget me not


This tutorial was written on 29th August 2009
Any simularity to another tutorial is purely coincidental
I am using PTU scrapkit by Angela of Schnegge scraps kit is called Jaqueline (tagger size) which can be Purchased HERE
Tubes of choice i am using Suzanne Woolcott under license number SW891 you can purchase there tubes from gorjussART.com
Font of choice
Mask of choice

Let's Get Started
Open your supplies and minimise
Open a new raster layer 750 x 750 and floodfill with white
Open a paper of Choice copy and paste as a new Layer,Layer New Mask Layer, from image find your mask in the dropdown section and apply making sure invert mask data is unchecked,onto mask layer hit delete and merge group

Open Frame 1 copy and paste as a new layer,resize by 90%, open a paper of choice paste as a new layer below the frame grab your magic wand select inside the frame select float select defloat select modify by 5 then invert onto paper layer then hit delete select none Add a dropshadow 1,1,30,3,Black

Open Tube copy and paste as a new layer position above the frame inside it Add a dropshadow 1,1,30,3,Black

Next Open Tag 1 copy and paste as a new layer,resize by 60% position above the frame layer on the top right hand corner Add a dropshadow 1,1,30,3,Black

Open Branch copy and paste as a new layer resize by 60% position above the frame layer on the left hand side edge duplicate and place one above the other Add a dropshadow 1,1,30,3,Black

Open Flower 6 copy and paste as a new layer position on the left hand side above the branches Add a dropshadow 1,1,30,3,Black

Open Heart 2 copy and paste as a new layer resize by 50% then position above the flower 6 layer on the left hand side Add a dropshadow 1,1,30,3,Black

Open Birdhouse copy and paste as a new layer resize by 40% then position on the bottom of the frame on the left hand side Add a dropshadow 1,1,30,3,Black

Open Lilgirl copy and paste as a new layer resize by 50% position on the bottom left hand side next to the birdhouse Add a dropshadow 1,1,30,3,Black

Open Bird copy and paste as a new layer resize by 40% position above the lilgirl layer Add a dropshadow 1,1,30,3,Black

Open Buttefly 1 copy and paste as a new layer resize by 40% then duplicate position above the flower together on the right hand side see my tag for reference Add a dropshadow 1,1,30,3,Black

Open glitter 1 copy and paste as a new layer resize by 40% then duplicate and place below the frame on the left hand side then merge down both then duplicate and mirror Add a dropshadow 1,1,30,3,Black

Add your copyright information and your name
crop your tag resize by 80%
save your file as a png file
and you are finished
I hope you enjoyed this tutorial,
Thursday, 27 August 2009

New Tutorial.......Hallow's Eve

This tutorial was written on 27th August 2009
Any simularity to another tutorial is purely coincidental
I am using PTU scrapkit by Nikki of Creative Intentionz kit is called Hallows Eve(tagger size) which can be Purchased HERE
Tubes of choice i am using Suzanne Woolcott under lisence number SW891
you can purchase her tubes @ gorjussART.com
Font of choice
Mask of choice

Let's Get Started
Open your supplies and minimise
Open a new raster layer 750 x 750 and floodfill with white
Open a paper of Choice copy and paste as a new Layer,Layer New Mask Layer, from image find your mask in the dropdown section and apply making sure invert mask data is unchecked,onto mask layer hit delete and merge group

Open Haunted house copy and paste as a new layer Add a dropshadow 1,1,30,3,Black

Open Spidersweb copy and paste as a new layer resize by 30% position on the house top right hand window Add a dropshadow 1,1,30,3,Black

Next Open Cat copy and paste as a new layer,resize by 60% position on the Left hand side roof of the house Add a dropshadow 1,1,30,3,Black

Open deadweed1 of choice copy and paste as a new layer resize by 70% position on the right hand side infront of the haunted house duplicate and place right hand corner Add a dropshadow 1,1,30,3,Black

Open Grass1 copy and paste as a new layer resize by 40% position infront of the house Add a dropshadow 1,1,30,3,Black

Open Headstone 3 copy and paste as a new layer resize by 30% then position on the right hand side above the grass layer Add a dropshadow 1,1,30,3,Black

Open Tree 1 copy and paste as a new layer resize by 70% then again by 70% position 0n the right hand side above the headstone layer Add a dropshadow 1,1,30,3,Black

Open skull 1 copy and paste as a new layer resize by 30% then position on the right hand side beside the treeAdd a dropshadow 1,1,30,3,Black

Open moon copy and paste as a new layer resize by 80% then again by 40% position top left hand side of the hauntedhouse Add a dropshadow 1,1,30,3,Black

Open coffin 1 copy and paste as a new layer resize by 50% position on the left hand side of the hauntedhouse Add a dropshadow 1,1,30,3,Black

Open Tube of choice copy and paste as a new layer resize by 80% then position below the coffin just on the edge so the tube looks like its in the coffin Add a dropshadow 1,1,30,3,Black

Open jackolantern copy and paste as a new layer resize by 40% position beside the coffin Add a dropshadow 1,1,30,3,Black

Open Bat2 copy and paste as a new layer resize by 30% position above the Hauntedhouse on the right hand side duplicate and mirror place on the left hand side Add a dropshadow 1,1,30,3,Black
Open Wordart copy and paste as a new layer resize by 60% position above the hauntedhouse Add a dropshadow 1,1,30,3,Black

Open Ghost copy and paste as a new layer resize by 60% position as desired Add a dropshadow 1,1,30,3,Black

Add your copyright information and your name
crop your tagresize by 80% save your file as a png file
and you are finished
I hope you enjoyed this tutorial,

New Tutorial....Colour of my love


This tutorial was written on 27th August 2009
Any simularity to another tutorial is purely coincidental
I am using PTU scrapkit by Cazie Designs kit is called Colour of my love (tagger size) which can be Purchased HERE
Tubes of choice i am using Elias Chatzoudis under license number Mpt9906 you can purchase there tubes from Mpt
Font of choice
Mask of choice

Let's Get Started
Open your supplies and minimise
Open a new raster layer 750 x 750 and floodfill with white


Open a paper of Choice copy and paste as a new Layer,Layer New Mask Layer, from image find your mask in the dropdown section and apply making sure invert mask data is unchecked,onto mask layer hit delete and merge group

Open Frame 2 copy and paste as a new layer resize by 70% grab your magic wande select inside the frame select float then defloat select modify by 5 select invert copy and paste a paper of choice below the frame hit delete select none Add a dropshadow 1,1,30,3,Black

Open Tube copy and paste as a new layer position below the frame duplicate position this below the frame grab your eraser tool and on the first layer erase any parts outside the frame Add a dropshadow 1,1,30,3,Black

Next Open Doodle 2 copy and paste as a new layer,resize by 20% position below the frame layer on the left hand side duplicate then mirror Add a dropshadow 1,1,30,3,Black

Open Balloon copy and paste as a new layer resize by 70% position on the left hand side of the frame duplicate then mirror postiton on the right hand side of the frame Add a dropshadow 1,1,30,3,Black

Open Heart ribbon 1 copy and paste as a new layer resize by 50% then again by 40% position on the top right hand side over the frame Add a dropshadow 1,1,30,3,Black

Open Flower4 copy and paste as a new layer resize by 60% then again by 30% position above the frame layer on the bottom right hand side duplicate the flower image free rotate by 10 degrees left copy and paste flower 2 resize by 60% then again by 30% position between the others duplicate then image free rotate by 20 degrees right Add a dropshadow 1,1,30,3,Black

Open Pillow 2 copy and paste as a new layer resize by 80% then again by 20% position on the bottom of the frame on the right hand side above the flowersAdd a dropshadow 1,1,30,3,Black

Open Butterfly 2 copy and paste as a new layer resize by 50% then again by 20% position on top of the flowers on the left hand side of the frame duplicate and place beside the flowers Add a dropshadow 1,1,30,3,Black

Open wordart copy and paste as a new layer resize by 40% position on the top of the frame Add a dropshadow 1,1,30,3,Black

Add your copyright information and your name

crop your tag resize by 80%
save your file as a png fileand you are finished
I hope you enjoyed this tutorial,

Monday, 24 August 2009

New Tutorial..........Autumn Dreams


This tutorial was written on 24th August 2009

Any simularity to another tutorial is purely coincidental

I am using PTU scrapkit by Angela of Schnegge scraps kit is called An Autumn romance (tagger size) which can be Purchased HERE

Tubes of choice i am using Jennifer Janesko under license number CI0035LM you can purchase there tubes from CILM

Font of choice

Mask of choice


Let's Get Started
Open your supplies and minimise
Open a new raster layer 750 x 750 and floodfill with white
Open a paper of Choice copy and paste as a new Layer,Layer New Mask Layer, from image find your mask in the dropdown section and apply making sure invert mask data is unchecked,onto mask layer hit delete and merge group

Open Heart 4 copy and paste as a new layer resize by 60% image free rotate by 15 degrees left Add a dropshadow 1,1,30,3,Black


Next open a paper of choice below the frame grab your magic wand select inside the frame select float select defloat modify by 3 then invert onto paper layer hit delete select none Add a dropshadow 1,1,30,3,Black


Open Tube copy and paste as a new layer resize by 80% position below the frame grab your magic wand select inside the frame select float select defloat modify by 3 then invert onto tube layer hit delete select none merge down the paper tube and frame then duplicate and mirror position beside each other Add a dropshadow 1,1,30,3,Black

Open Floral vine copy and paste as a new layer resize by 60% position above the frame layer on the right hand side duplicate then mirror position on the left hand side of the left frame Add a dropshadow 1,1,30,3,Black


Open Flower 2 copy and paste as a new layer resize by 30% then position on the right hand side above the vine duplicate position on the left hand side over the vine duplicate again place in the middle of both frames Add a dropshadow 1,1,30,3,Black

Open Fence copy and paste as a new layer resize by 70% then position below the frames Add a dropshadow 1,1,30,3,Black


Open ivy 2 copy and paste as a new layer resize by 50% then position on the fence duplicate and place further along the fenceAdd a dropshadow 1,1,30,3,Black


Open Ladder copy and paste as a new layer resize by 50% position on the left hand side sitting below the frame below the vine layer Add a dropshadow 1,1,30,3,Black


Open Bouquet copy and paste as a new layer resize by 30% position on the fence on the left hand side duplicate and place further down on the fence Add a dropshadow 1,1,30,3,Black


Open mushroom copy and paste as a new layer resize by 30% then position on the left hand side of the fence duplicate and position on the right hand side of the fence Add a dropshadow 1,1,30,3,Black


Open Piano copy and paste as a new layer position on the right hand side infront of the fence i added some roses onto the piano keys Add a dropshadow 1,1,30,3,Black


Open Tube of choice copy and paste as a new layer resize by 80% position next to the piaino Add a dropshadow 1,1,30,3,Black


Add your copyright information and your name

crop your tag resize by 80% save your file as a png file

and you are finished

I hope you enjoyed this tutorial,

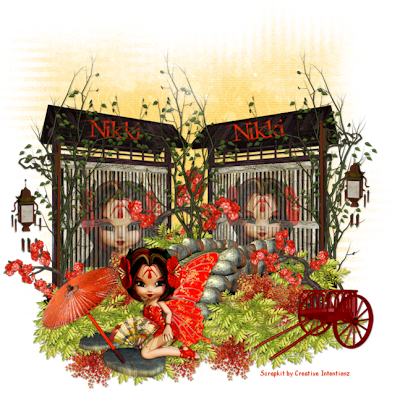
New Tutorial.......Tennin Fairy


This tutorial was written on 24th August 2009
Any simularity to another tutorial is purely coincidental
I am using PTU scrapkit by Nikki of Creative Intentionz kit is called Tennin Fairy(tagger size) which can be Purchased HERE
Tubes of choice
Font of choice
Mask of choice

Let's Get Started

Open your supplies and minimise

Open a new raster layer 750 x 750 and floodfill with white

Open a paper of Choice copy and paste as a new Layer,Layer New Mask Layer, from image find your mask in the dropdown section and apply making sure invert mask data is unchecked,onto mask layer hit delete and merge group

Open Wall 1 copy and paste as a new layer resize by 60% position near the left hand side of the canvas duplicate the wall then mirror position both together see my tag for reference
Add a dropshadow 1,1,30,3,Black

Open Pappilon fairy 3 copy and paste as a new layer resize by 30% position above the first wall layer inside it lower the opacity to around 50 duplicate then mirror position on the second wall Add a dropshadow 1,1,30,3,Black

Next Open vine 1 copy and paste as a new layer,resize by 60% position above the wall on the second wall layer paste on the right hand side duplicate and position between both walls then duplicate and mirror position on the first wall left hand side see my tag for reference
Add a dropshadow 1,1,30,3,Black

Open Tree 3 copy and paste as a new layer resize by 40% position above the wall layer in the middle of both Add a dropshadow 1,1,30,3,Black

Open Lantern copy and paste as a new layer resize by 70% then again by 70% position on the right hand side above the wall layer duplicate then mirror position on the left hand side edge of the first wall Add a dropshadow 1,1,30,3,Black

Open Bridge copy and paste as a new layer resize by 60% then position in the middle of both wall layers as desired Add a dropshadow 1,1,30,3,Black

Open Leaves 2 copy and paste as a new layer resize by 40% then duplicate a few times position around the bridge on both sides as desired also add Leaves 1 where you desireAdd a dropshadow 1,1,30,3,Black

Open Ribbon copy and paste as a new layer resize by 50% position top right hand side of the window Add a dropshadow 1,1,30,3,Black

Open Heart 7 copy and paste as a new layer resize by 40% position on the top left hand side of the window Add a dropshadow 1,1,30,3,Black

Open Cloud copy and paste as a new layer resize by 60% then again by 70% duplicate twice and position above the window layer Add a dropshadow 1,1,30,3,Black

Duplicate tree 3 twice resize by 40% position one by the bridge and the other on the left hand edge of the wall Add a dropshadow 1,1,30,3,Black

Open Stonepath copy and paste as a new layer resize by 50% position at the bottom of the bridge Add a dropshadow 1,1,30,3,Black

Open Tube of choice copy and paste as a new layer resize by 60% position on the stonepath Add a dropshadow 1,1,30,3,Black

Open fog copy and paste as a new layer resize by 70% position above the walls Add a dropshadow 1,1,30,3,Black

Open Wagon copy and paste as a new layer resize by 30% image mirror position on the right hand side on the leaves Add a dropshadow 1,1,30,3,Black

Open Umbrella copy and paste as a new layer resize by 50% position by your tube Add a dropshadow 1,1,30,3,Black

Add your copyright information and your name
crop your tag resize by 80%
save your file as a png file
and you are finished
I hope you enjoyed this tutorial,

Wednesday, 12 August 2009

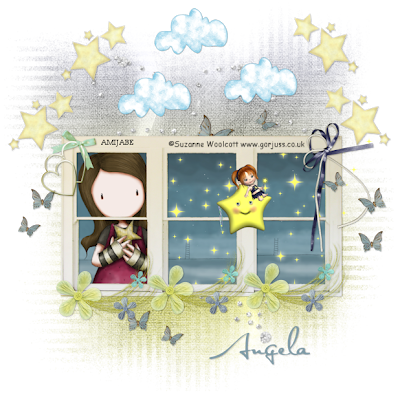
New Tutorial........Twinkle little star


This tutorial was written on 12th August 2009
Any simularity to another tutorial is purely coincidental
I am using PTU scrapkit by Angela of Schnegge scraps kit is called Twinkle little star (tagger size) which can be Purchased HERE
Tubes of choice i am using Suzanne Woolcott under license number AMIJABE you can purchase there tubes from her website
Font of choice
Mask of choice

Let's Get Started

Open your supplies and minimise
Open a new raster layer 700 x 700 and floodfill with white
Open a paper of Choice copy and paste as a new Layer,Layer New Mask Layer, from image find your mask in the dropdown section and apply making sure invert mask data is unchecked,onto mask layer hit delete and merge group


Open Window copy and paste as a new layer
Add a dropshadow 1,1,30,3,Black

Open Tube copy and paste as a new layer position below the window grab your eraser tool and erase any parts outside the window
Add a dropshadow 1,1,30,3,Black

Next Open Bling copy and paste as a new layer,position above the mask layer
Add a dropshadow 1,1,30,3,Black

Open Butterfly 6 copy and paste as a new layer resize by 80% position above the bling layer Add a dropshadow 1,1,30,3,Black

Open Heart 4 copy and paste as a new layer resize by 50% then position on the right hand side over the flower
Add a dropshadow 1,1,30,3,Black

Open Sparkles copy and paste as a new layer resize by 80% then position above the tube layer on the right hand side grab your eraser tool erase any parts outside the window layer
Add a dropshadow 1,1,30,3,Black

Open Deco 2 copy and paste as a new layer resize by 40% then position on the bottom of the window on the left hand side duplicate and place next to the first one duplicate and place next to the first one
Add a dropshadow 1,1,30,3,Black

Open Ribbon copy and paste as a new layer resize by 50% position top right hand side of the window
Add a dropshadow 1,1,30,3,Black

Open Heart 7 copy and paste as a new layer resize by 40% position on the top left hand side of the window
Add a dropshadow 1,1,30,3,Black

Open Cloud copy and paste as a new layer resize by 60% then again by 70% duplicate twice and position above the window layer
Add a dropshadow 1,1,30,3,Black

Open Stars 3 copy and paste as a new layer resize by 50% then again by 50% duplicate and place top left hand side of the window merge down and duplicate again then mirror
Add a dropshadow 1,1,30,3,Black

Add your copyright information and your name
crop your tagresize by 80%
save your file as a png file
I hope you enjoyed this tutorial,
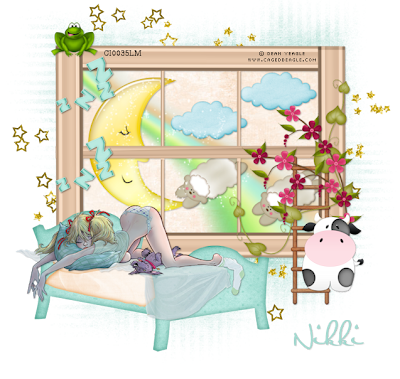
New Tutorial........Dreaming


This tutorial was written on 12th August 2009
Any simularity to another tutorial is purely coincidental
I am using PTU scrapkit by Nikki of Creative Intentionzs kit is called Dreams take flight (tagger size) which can be Purchased HERE
Tubes of choice i am using Dean Yeagle under license number CI0035LM you can purchase there tubes from CILM
Mask of choice
Font of choice
Let's Get Started

Open your supplies and minimise
Open a new raster layer 750 x 750 and floodfill with white
Open a paper of choice copy and paste as a new layer place above the white background layer, then layers new mask from image find your mask in the dropdown section source luminance checked invert data unchecked and apply delete mask layer and merge group
Open Window of choice copy and paste as a new layer image free rotate by 90 degrees left open a paper of choice copy and paste as a new layer below the window grab your magic wand hold down the shift key back to window layer select each of the squares then select defloat select modify by 5 select invert back to the paper layer hit delete select none
Add a dropshadow 1,1,30,3,Black

Next Open Rainbow copy and paste as a new layer,image mirror position near the bottom use your move tool and stretch the rainbow so it fits near the top of the window grab your eraser tool and erase the bits from outside the window bottom
Add a dropshadow 1,1,30,3,Black

Open Moon copy and paste as a new layer position below the window on the left hand side
Add a dropshadow 1,1,30,3,Black
Open Cloud 2 copy and paste as a new layer resize by 40% then duplicate position below the window on the right hand side
Add a dropshadow 1,1,30,3,Black

Open Sheep 3 copy and paste as a new layer resize by 30% then position on the right hand side below the frame duplicate and place beside the first one
Add a dropshadow 1,1,30,3,Black
Open Sparkle copy and paste as a new layer position above the moon layer
Add a dropshadow 1,1,30,3,Black

Open Ladder copy and paste as a new layer resize by 50% position bottom right hand side of the window
Add a dropshadow 1,1,30,3,Black
Open Forgetmenots copy and paste as a new layer resize by 60% image mirror position on the window corner on the right hand side above the ladder
Add a dropshadow 1,1,30,3,Black

Open Cow copy and paste as a new layer resize by 40% position over the ladder on the right hand side
Add a dropshadow 1,1,30,3,Black

Open Bed copy and paste as a new layer position bottom left hand side of the window
Add a dropshadow 1,1,30,3,Black
Open Tube copy and paste as a new layer resize by 80% position on the bed
Add a dropshadow 1,1,30,3,Black

Open Frog copy and paste as a new layer resize by 30% position top corner of the window on the left hand side
Add a dropshadow 1,1,30,3,Black
Open Clusterstars copy and paste as a new layer image mirror position above the mask layer on the top left hand side duplicate and place further down
Add a dropshadow 1,1,30,3,Black
Add your copyright information and your name
crop your tag resize by 80%
save your file as a png file
I hope you enjoyed this tutorial,
Sunday, 9 August 2009

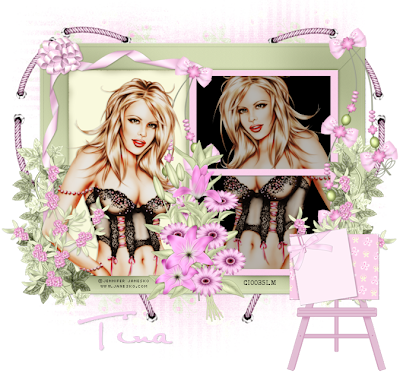
New Tutorial......Butterfly n rose


This tutorial was written on 9th August 2009
Any simularity to another tutorial is purely coincidental
I am using PTU scrapkit by Tina's Magical World kit is called Butterfly fly rose (tagger size) which can be Purchased HERE
Tubes of choice i am using Jennifer Janesko under license number CI0035LM you can purchase there tubes from her CILM
Mask of choice
Font of choice
Let's Get Started
Open your supplies and minimise
Open a new raster layer 750 x 750 and floodfill with white
Open a paper of choice copy and paste as a new layer place above the white background layer, then layers new mask from image find your mask in the dropdown section source luminance checked invert data unchecked and apply delete mask layer and merge group

Open Frame 22 copy and paste as a new layer grab your magic wand select inside the 2 square parts holding down the shift key select all select float select defloat select modify by 5 new raster layer floodfill with black hit delete select none move layer below the frame Add a dropshadow 1,1,30,3,Black
Open Tube copy and paste as a new layer resize by 80% position on the left hand side of the frame duplicate mirror position below the frame in the floodfill layer grab your eraser tool and erase any part of the tube outside the frame Add a dropshadow 1,1,30,3,Black

Open string heart copy and paste as a new layer position below the frame on the left hand side duplicate and position on the right hand side grab your eraser tool and erase the opposite half on both layers so you have one big half see my tag for reference Add a dropshadow 1,1,30,3,Black
Open Ivy copy and paste as a new layer resize by 50% then flip position on the left hand corner of the frame duplicate then mirror Add a dropshadow 1,1,30,3,Black

Open Flowerbranch copy and paste as a new layer resize by 50% then image mirror position on the left hand side over the ivy layer duplicate them mirror Add a dropshadow 1,1,30,3,Black

Open cornerribbon copy and paste as a new layer resize by 60% then position on the left hand side of the frame Add a dropshadow 1,1,30,3,Black

Open Bowhanger copy and paste as a new layer resize by 60% position on the right hand top corner duplicate then mirror position on the pink edge of the frame see my tag for reference Add a dropshadow 1,1,30,3,Black

Open flowerarrangement copy and paste as a new layer resize by 60% position on the frame bottom middle Add a dropshadow 1,1,30,3,Black

Open Easel copy and paste as a new layer resize by 50% position on the right hand side Add a dropshadow 1,1,30,3,Black

Open envelope copy and paste as a new layer resize by 60% then again by 50% position on the easel Add a dropshadow 1,1,30,3,Black

Add your copyright information and your name
crop your tag resize by 80%
save your file as a png file
I hope you enjoyed this tutorial,
New Tutorial....Noah and Friends

This tutorial was written on 9th August 2009
Any simularity to another tutorial is purely coincidental
I am using PTU scrapkit by Kristi of Scrappin Divas kit is called Noah and Friends (tagger size) which can be Purchased HERE
Tubes of choice i am using Suzanne Woolcott under license number AMIJABE you can purchase there tubes from her AMI
Font of choice
Let's Get Started
Open your supplies and minimise
Open a new raster layer 750 x 750 and floodfill with white
Open a paper of Choice copy and paste as a new Layer,Layer New Mask Layer, from image find your mask in the dropdown section and apply making sure invert mask data is unchecked,onto mask layer hit delete and merge group

Open Hill copy and paste as a new layer resize by 90% then again by 60% position near bottom of canvas Add a dropshadow 1,1,30,3,Black

Next Open grass copy and paste as a new layer,resize by 90% then again by 60 position above the hill layer near the bottom edge Add a dropshadow 1,1,30,3,Black

Open Pond copy and paste as a new layer resize by 60% then position below the grass layer position on the hill Add a dropshadow 1,1,30,3,Black

Open Treestump copy and paste as a new layer resize by 80% then again by 40% position on the left hand side below the grass layer grab your eraser tool and erase part of the hill outside the stump and on the stump layer the root Add a dropshadow 1,1,30,3,Black

Open Tree copy and paste as a new layer resize by 80% then again 40% position above the pond layer in the middle Add a dropshadow 1,1,30,3,Black

Open Ark copy and paste as a new layer resize by 40% position behind the tree on the left hand side Add a dropshadow 1,1,30,3,Black

Open Rainbow copy and paste as a new layer resize by 60% image free rotate by 20 left position top left hand side Add a dropshadow 1,1,30,3,Black

Open stars copy and paste as a new layer resize by 20% position top right hand side duplicate 3 times and position as required Add a dropshadow 1,1,30,3,Black
Open Rain copy and paste as a new layer resize by 80% then again by 30% position below the rainbow cloud duplicate and position underneath other cloud Add a dropshadow 1,1,30,3,Black
Open Tube copy and paste as a new layer resize by 80% position above the Ark layer on the left hand side Add a dropshadow 1,1,30,3,Black

Open any Animal elements required and position as desired Add a dropshadow 1,1,30,3,Black
Add your copyright information and your name
crop your tag resize by 80%
save your file as a png file
I hope you enjoyed this tutorial,
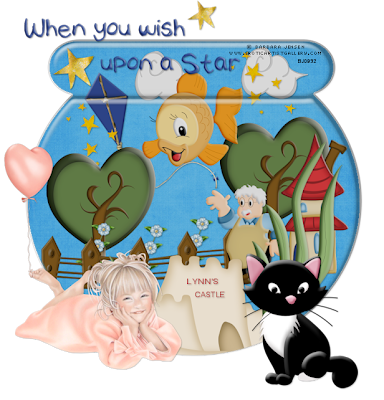
New Tutorial.....Geppetto's underwater fun


This tutorial was written on 9th August 2009
Any simularity to another tutorial is purely coincidentalI am using PTU scrapkit by Lynn of Scrappin Divas kit is called Geppettos dream (tagger size) which can be Purchased
HERE
Tubes of choice i am using Barbara Jenson under license number BJ0932 you can purchase there tubes from her WEBSITE
Font of choice

Let's Get Started
Open your supplies and minimise
Open a new raster layer 750 x 750 and floodfill with white
Open Fishbowl copy and paste as a new layer grab your magic wand select inside the bowl select contract by 1 then select invert copy and paste a paper of choice copy and paste as a new layer below the bowl hit delete select none Add a dropshadow 1,1,30,3,Black

Open Tube copy and paste as a new layer resize by 80% position above the fishbowl layer on the left hand side Add a dropshadow 1,1,30,3,Black

Next Open House of choice copy and paste as a new layer,resize by 70% then again by 60 position below the fishbowl on the right hand side Add a dropshadow 1,1,30,3,Black

Open Fence copy and paste as a new layer resize by 60% then mirror position below the fishbowl on the left hand side grab your eraser tool and gently erase any little parts shwoing Add a dropshadow 1,1,30,3,Black

Open Geppetto copy and paste as a new layer resize by 60% then position on the right hand side next to the fence and house see my tag for reference Add a dropshadow 1,1,30,3,Black

Open Tree copy and paste as a new layer resize by 40% then position below the fishbowl on the left hand side below the fence duplicate then position behind the house Add a dropshadow 1,1,30,3,Black

Open Kite copy and paste as a new layer resize by 40% position behind the tree on the left hand side Add a dropshadow 1,1,30,3,Black

Open cloud copy and paste as a new layer resize by 20% position top right hand side below the fishbowl duplicate and place next to first one Add a dropshadow 1,1,30,3,Black

Open stars copy and paste as a new layer resize by 20% position over the cloud duplicate and place by tree on left hand side Add a dropshadow 1,1,30,3,Black

Open Flowerstrand copy and paste as a new layer resize by 20% position behind the fence duplicate twice and place as desired behind the fence Add a dropshadow 1,1,30,3,Black

Open Cleo fish copy and paste as a new layer resize by 30% position near top of fishbowl below it Add a dropshadow 1,1,30,3,Black

Open Figgy cat copy and paste as a new layer resize by 40% position above the fishbowl on the right hand side Add a dropshadow 1,1,30,3,Black

Add your copyright information and your name
crop your tag resize by 80%
save your file as a png file
I hope you enjoyed this tutorial,

New Tutorial....Paarty time

This tutorial was written on 9th August 2009
Any simularity to another tutorial is purely coincidental
I am using PTU scrapkit by Jen of C.C.Creationz kit is called August Part-ay (tagger size) which can be Purchased HERE
Tubes of choice i am using Suzanne Woolcott under license number AMIJABE you can purchase there tubes from her AMI
Mask 84 by Weescottlass HERE, Thank you for sharing
Font of choice
Let's Get Started
Open your supplies and minimise
Open a new raster layer 750 x 750 and floodfill with white
Open a paper of choice copy and paste as a new layer place above the white background layer, then layers new mask from image find your mask in the dropdown section source luminance checked invert data unchecked and apply delete mask layer and merge group

Open Frame 4 copy and paste as a new layer resize by 80% image free rotate by 90 degrees right grab your magic wand select inside the frame select modify by 5 then select invert copy and paste tubes of choice copy and paste as a new layer below the frame hit delete select none Add a dropshadow 1,1,30,3,Black

Open Button copy and paste as a new layer position above the frame layer resize by 20% position on the ribbon Add a dropshadow 1,1,30,3,Black

Next Open Gift box of choice copy and paste as a new layer,resize by 30% position above the frame on the right hand side open another gift box resize by 30% position next to the first one duplicate both and mirror see my tag for reference Add a dropshadow 1,1,30,3,Black

Open Balloon copy and paste as a new layer resize by 60% position by the frame on the left hand side Add a dropshadow 1,1,30,3,Black

Open balloon copy and paste as a new layer resize by 50% then position on the left hand side next to first balloon duplicate and mirror Add a dropshadow 1,1,30,3,Black

Open Butterfly copy and paste as a new layer resize by 20% then position on the frame on the left hand corner Add a dropshadow 1,1,30,3,Black

Open party server copy and paste as a new layer resize by 40% then position on the right hand side infront of the gift boxes Add a dropshadow 1,1,30,3,Black

Add your copyright information and your name
crop your tag resize by 80%
save your file as a png file
I hope you enjoyed this tutorial,
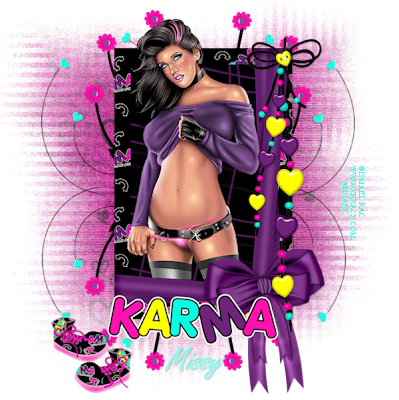
New Tutorial.......Karma


This tutorial was written on 9th August 2009
Any simularity to another tutorial is purely coincidental
I am using PTU scrapkit by Missy of Scraps with Attitude kit is called Karma (tagger size) which can be Purchased HERE
Tubes of choice i am using Ismael Rac under license number AMIJABE you can purchase there tubes from her AMI
Mask 81 by Weescottlass HERE, Thank you for sharing
Font of choice

Let's Get Started

Open your supplies and minimise
Open a new raster layer 750 x 750 and floodfill with white
Open a paper of choice copy and paste as a new layer place above the white background layer, then layers new mask from image find your mask in the dropdown section source luminance checked invert data unchecked and apply delete mask layer and merge group

Open Frame with wrap copy and paste as a new layer grab your magic wand select inside the frame select modify by 5 then select invert copy and paste a paper of choice copy and paste as a new layer below the frame hit delete select none Add a dropshadow 1,1,30,3,Black

Open Tube copy and paste as a new layer position above the frame layer duplicate position one below the frame grab your eraser tool erase any parts off the top tube you dont want showing Add a dropshadow 1,1,30,3,Black

Next Open Heart of choice copy and paste as a new layer,resize by 80% position above the frame on the right hand side Add a dropshadow 1,1,30,3,Black

Open Wordart copy and paste as a new layer resize by 40% position at the bottom of the frame Add a dropshadow 1,1,30,3,Black
Open Shoes copy and paste as a new layer resize by 60% then again by 30% position on the left hand side Add a dropshadow 1,1,30,3,Black


Open Branch copy and paste as a new layer resize by 50% then position below the frame on the left hand side duplicate then mirror duplicate then flip duplicate then mirror you should have 4 lol see my tag Add a dropshadow 1,1,30,3,Black

Add your copyright information and your name
crop your tag resize by 80%
save your file as a png file
I hope you enjoyed this tutorial,

Saturday, 8 August 2009

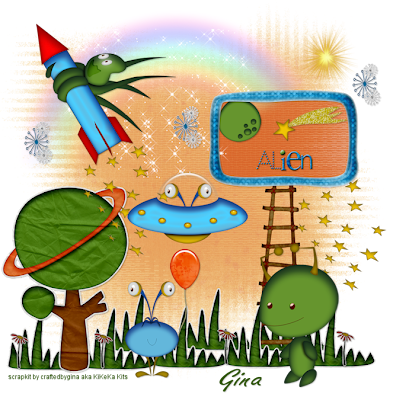
New Tutorial....Rowley Rocket


This tutorial was written on 7th August 2009
Any simularity to another tutorial is purely coincidental
I am using PTU scrapkit by Gina of KiKeKa Kits, kit is called Rowley Rocket (tagger size) which can be Purchased HERE
Tubes of choice
Mask of choice
Font of choice

Let's Get Started

Open your supplies and minimise

Open a new raster layer 750 x 750 and floodfill with white
Open a paper of choice copy and paste as a new layer place above the white background layer, then layers new mask from image find your mask in the dropdown section source luminance checked invert data unchecked and apply delete mask layer and merge group

Open Grass copy and paste as a new layer,resize by 80% duplicate a few times and position around the bottom of your tag see my tag for reference Add a dropshadow 1,1,30,3,Black

Open Tree copy and paste as a new layer resize by 50% position on the left hand side Add a dropshadow 1,1,30,3,Black

Next Open a Flower copy and paste as a new layer,resize by 20% then duplicate a few times position above the grass layer Add a dropshadow 1,1,30,3,Black

Open Ladder copy and paste as a new layer resize by 50% then position on the right hand side between the grass Add a dropshadow 1,1,30,3,Black

Open Frame copy and paste as a new layer resize by 40% then position on the right hand side above the ladder grab your magic wand select inside the the frame new raster layer floodfill with a colour of choice select none position below the frame add any elements you wish inside the frame see my tag for reference Add a dropshadow 1,1,30,3,Black

Open Rainbow copy and paste as a new layer resize by 70% then position top left hand side Add a dropshadow 1,1,30,3,Black

Open Astro 7 copy and paste as a new layer resize by 50% position above the rainbow on the left hand side Add a dropshadow 1,1,30,3,Black

Open Sun copy and paste as a new layer resize by 60% then again by 40% place on the right hand side above the frame Add a dropshadow 1,1,30,3,Black

Open Astro 5 copy and paste as a new layer resize by 60% then position next to the ladder on the right hand side Add a dropshadow 1,1,30,3,Black

Open Astro 10 copy and paste as a new layer resize by 40% position between the frame and tree see my tag for reference Add a dropshadow 1,1,30,3,Black

Open Astro 2 copy and paste as a new layer resize by 40% position on the left hand side near the tree duplicate and position the duplicate eyes under astro 10 grab your eraser tool and erase all the other parts outside the astro 10 Add a dropshadow 1,1,30,3,Black

open balloon copy and paste as a new layer resize by 40% position by astro 2 Add a dropshadow 1,1,30,3,Black

Add any elements as desired

Add your copyright information and your name
crop your tag resize by 80%
save your file as a png file
I hope you enjoyed this tutorial,
Thursday, 6 August 2009

New Tutorial.....Glam Rock

This tutorial was written on 6th August 2009
Any simularity to another tutorial is purely coincidental
I am using PTU scrapkit by Kristi of Scrappin Divas kit is called 80s Glam Rock (tagger size) which can be Purchased HERE
Tubes of choice i am using Ismael Rac under license number AMIJABE you can purchase there tubes from AMI
Mask of choice
Font of choice
Let's Get Started

Open your supplies and minimise
Open a new raster layer 750 x 750 and floodfill with white

Open a paper of choice copy and paste as a new layer place above the white background layer, then layers new mask from image find your mask in the dropdown section source luminance checked invert data unchecked and apply delete mask layer and merge group

Open Rocknroll heartbreaker Film Frame copy and paste as a new layer,Open your tube as a new layer position below the frame on the left hand side duplicate the tube and mirror back to the Frame grab your magic wand select inside the frame holding down the shift key select all 3 parts then select modify by 5 select invert onto the tube layer hit delete onto other tube layer hit delete select none lower the opacity to around 75 to both tubes Add a dropshadow 1,1,30,3,Black

Back to the film frame grab your magic wand hold down the shift key select all 3 parts then select modify by 5 new raster layer floodfill each part with black select none place these below the tubes,Open a new tube and paste as a new layer resize by 80% position this in the middle of the film frame see my tag for reference Add a dropshadow 1,1,30,3,Black

Next Open Music copy and paste as a new layer,resize by 90% then again by 60% position above the mask layer Add a dropshadow 1,1,30,3,Black

Open Records copy and paste as a new layer resize by 40% then again by 40% duplicate and position above the music layer on the Left hand side Add a dropshadow 1,1,30,3,Black

Open Headphones copy and paste as a new layer resize by 30% then position on the music layer on the right hand side Add a dropshadow 1,1,30,3,Black

Open Glitter splats copy and paste as a new layer resize by 50% then position as desired Add a dropshadow 1,1,30,3,Black

Open Sparkles copy and paste as a new layer resize by 30% position above the frame on the left hand side duplicate then mirror Add a dropshadow 1,1,30,3,Black
Open Hairspray copy and paste as a new layer resize by 60% then again by 40% place on the left hand side of the frame Add a dropshadow 1,1,30,3,Black

Open Shoes copy and paste as a new layer resize by 30% then position next to the hairspray on the left hand side Add a dropshadow 1,1,30,3,Black

Open Nailpolish copy and paste as a new layer resize by 30% position on the left hand side of the frame Add a dropshadow 2,2,50,5,Black

Open Lips copy and paste as a new layer resize by 40% duplicate a few times then position around the tag Add a dropshadow 1,1,30,3,Black

Add your copyright information and your name
crop your tag resize by 80%
save your file as a png file
I hope you enjoyed this tutorial,