Monday, 30 March 2009

New Tutorial...............Rhapsody


This tutorial was written on 30th March 2009
Any simularity is purely coincidental


SUPPLIES NEEDED


I am using PTU scrapkit by Heart & Soul Creations kit is called Rhapsody (tagger size) which can be purchased
HERE
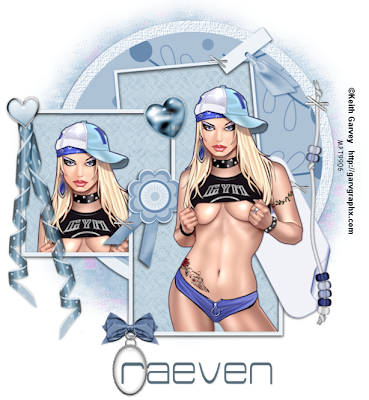
Tube of choice i am using Keith Garvey under License number MPT9906 which can be purchased from MPT
Font of choice
Mask of choice


Let's Get Started


Open your supplies and minimise

Open a new Layer 700 x 700 floodfill with white

Open a paper of choice copy and paste as a new layer above the white background layers new mask layer, from image find your mask in the dropdown section source luminance checked invert mask data unchecked and apply delete the mask layer and merge group


Open up Frame 2 copy and paste as a new layer grab your magic wand select in each of the frame pieces select modify by 4 Open a paper of choice copy and paste as a new layer select invert on the frame layer back to the paper layer hit delete select none add a dropshadow to the frame 1,1,30,3,Black


open a Tube of choice copy and paste as a new layer resize by 90% then place by the bottom frame window so the bottom part is inside the frame duplicate and position inside the left frame window erase any parts showing outside the frame or see my tag for reference add a dropshadow to both tubes 1,1,30,3,Black


Open HeartRibbon 1, copy and paste as a new layer resize by 90% image mirror place on the left side of the frame by your tube add a dropshadow Open Beads 1 copy and paste as a new layer resize by 50% then by 60% place on the right side of the frame
add a dropshadow

Open Glass heart 1 copy and paste as a new layer resize by 40% then by 50% image fee rotate by 20 degrees left place in the middle of the 2 frames like my tag or as desired
add a dropshadow


Add your copyright information and your name
save your file as a png file and you are finished

I hope you enjoyed this tutorial,

New Tutorial..............Pink Sherbert

This tutorial was written on 29th March 2009
any simularity is purely coincidental
SUPPLIES NEEDED

I am using Pink Sherbert (Taggers size) from Heart and Soul creationz
which can be purchased HERE
Tube of Choice I am using Jennifer Janesko under license CI0035LM
which you can purchase from CILM
Mask of choiceFont of choice

Lets get Started

This is a quick and easy Tutorial lolOpen a new raster layer 700 x 700 Floodfill with whiteOpen a paper of choice copy and paste as a new layer layers new mask from image find your mask from the drop down section source luminance checked invert data unchecked and apply delete mask layer merge group

Open Frame 4 copy and paste as a new layer grab your magic wand and use your shift key select inside the frame ensuring you get each piece as there is some small pieces by the flower lol select modify by 6 select invert paste a paper of choice below frame layer hit delete select none add a dropshadow 1,1,30,3,Black

Open a tube of choice copy and paste as a new layer below the frame layer add a dropshadow 1,1,30,3,Black duplicate and position one above the frame erase parts showing over the frame on both tube layers or until happy

Open a decoration of choice copy and paste as a new layer resize by 60% place on the frame on the ribbon at the bottom duplicate and position next to other add a dropshadow

Open a loopybow of choice copy and paste as a new layer resize by 60% image mirror then place on the left side of the frame like my tag Open a sunflower copy and paste as a new layer resize by 60% place over the loopybow like my tag add a dropshadow to both

Add any copyright and your name crop your tag and save as png
that's it easy lol
Thanks for trying my tutorial

Sunday, 29 March 2009

New Tutorial........Spring is Here


This tutorial was written in Paintshop Pro x11 but should be able to be done in any version of the programme

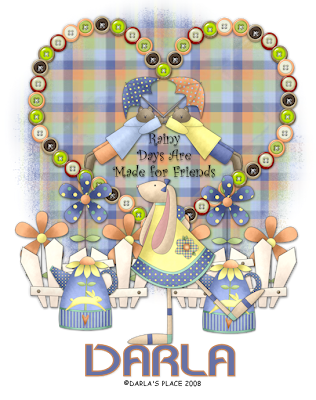
I am using PTU scrapkit by Darla's Place called Spring is here (tagger size) which can be purchased
HERE

Font of choice
Mask of choice

Let's Get Started

Open your supplies and minimise

Open a new Layer 700 x 700 floodfill with white

Open up Heartbuttons copy and paste as a new layer resize by 60% then again by 35% Open a paper of choice copy and paste as a new layer above the background layer

onto heartbutton layer use your magic wand select inside the frame select modify by 10 then select invert onto your paper layer hit delete select none.Add a dropshadow to the frame layer 1,1,30,3,Black


open Bears 3 copy and paste as a new layer resize by 60% then again by 25% position in the middle of your frame like my tag add a dropshadow 1,1,30,3,Black merge down the frame,bear3 and paper layer


Open a paper of choice copy and paste as a new layer above the white background layers new mask layer, from image find your mask in the dropdown section source luminance checked invert mask data unchecked and apply delete the mask layer and merge group


Open Fence 1, copy and paste as a new layer resize by 50% then again by 50% place on top above the frame layer Open Flower2 copy and paste as a new layer resize by 50% then by 50% again place behind the fence layer and duplicate position either side of fence and add a dropshadow


Open Pitcher copy and paste as a new layer resize by 40% then by 20% place above the fence layer duplicate and mirror position as desired and add a dropshadow


Open Bunny 7 copy and paste as a new layer resize by 50% twice then 60% place above the fence layer in the middle so you can still see the wordart add a dropshadow


Add your copyright information and your name and save your file as a .png file and you are finished

I hope you enjoyed this tutorial,

New Tutorial.............Exquiste Romance

This tutorial was written on 29th March 2009
SUPPLIES NEEDED

I am using PTU scrapkit by Queenbrat Desings called Exquiste Romance (tagger size) which can be purchased HERE
Font of choiceMask by Monti's pixel playground called Montis blinds 1 HERE
Tube of choice i am using Keith Garvey under License number MPT9906
you need a license to use there artwork which can be purchased from MPT

Let's Get Started

Open your supplies and minimise

Open a new Layer 700 x 700 floodfill with white

Open a paper of choice copy and paste as a new layer above the white background layers new mask layer, from image find your mask in the dropdown section source luminance checked invert mask data unchecked and apply delete the mask layer and merge group

In the forground pallete set it to Black, background closed off open you preset shapes set to Rectangle width set to 10 and draw out a rectangle like my tag convert to raster and duplicate twice position as desired or like my tag merge down the 3 frames. open a paper of choice back to the frames select each frame holding down shift key select modify by 4 select invert onto paper layer hit delete select none close off black frame layer place paper layer below frame layer

Open a paper, copy and paste as a new layer place above the background layer,layers new mask from image find your mask in the dropdown section source luminance checked invert data unchecked and apply delete mask layer merge group

Open heartribbon frame of choice copy and paste as a new layer reisze by 70% place above the mask layer in the middle of the frames or as desired add a dropshadow 1,1,30,3,Black
Open Wrap 3 copy and paste as a new layer resize by 50% then use your move tool position over your frame add a dropshadow 1,1,30,3,Black duplicate twice and position over the other 2 frames

Open a tube of choice place inside the frame or just outside like my tag erase anyparts you dont want showing duplicate twice place inside other 2 frames add a dropshadow 1,1,30,3,Black Open Flower of choice copy and paste as a new layer resize by 30% place over the wrap layer duplicate twice and place over the other wraps add a dropshadow

Open a curled ribbon copy and paste as a new layer resize by 70% then by 30% place above the frame layer duplicate position other side of frame add a dropshadow

Open Button of choice copy and paste as a new layer resize by 40% place above the curled ribbon layer duplicate then place over the other ribbon add a dropshadow

Open a swirl of choice copy and paste as a new layer resize by 50% then image free rotate by 22 degrees right place as desired duplicate and position other as desired add a dropshadow i also colorised mine and added hue and saturation and added some brush effects

Add your copyright information and your name and save your file as a .png file and you are finished

I hope you enjoyed this tutorial,