Sunday, 28 June 2009

New Tutorial.........Stargazer

This tutorial was written on 28th June 2009
Any simularity to another tutorial is purely coincidental
I am using PTU scrapkit by Angela of Schnegge scraps kit is called Stargazer (tagger size) which can be Purchased HERE
Tubes of choice i am using a close up from Jennifer Janesko under license number CI0035LM you can purchase there tubes from CILM
Font of choice

Let's Get Started

Open your supplies and minimise
Open a new raster layer 700 x 700 and floodfill with white
Open frame 1 copy and paste as a new layer grab your magic wand select inside each of the squares holding down your shift key select modify by 5 then select invert copy and paste your tube as a new layer resize by 110% or as desired so it fits in the frame then hit delete select none Add a dropshadow 1,1,30,3,Black

Next Open Bow 4 copy and paste as a new layer,resize by 70%, position over the middle of the frame Add a dropshadow 1,1,30,3,Black

Open Diamond copy and paste as a new layer resize by 40% position on the Left hand side of the frame Add a dropshadow 1,1,30,3,Black

Open String 1 copy and paste as a new layer resize by 50% then position on the frame Add a dropshadow 1,1,30,3,Black

Open Tag 2 copy and paste as a new layer resize by 70% then again by 60% position on the right hand side of the frame Add a dropshadow 1,1,30,3,Black

Open Butterfly 3 copy and paste as a new layer resize by 70% then again by 50% position on the top left hand side of the frame then duplicate image mirror position on the right hand of the frame Add a dropshadow 1,1,30,3,Black

Open Bug copy and paste as a new layer resize by 40% then image free rotate by 20 degrees right position bottom left hand side of the frame Add a dropshadow 1,1,30,3,Black

Open Glitter 2 copy and paste as a new layer position below the frame top right hand side duplicate mirror and flip position on bottom left hand side below the frame
Open Glitter 1 resize by 40% then do the same as above Add a dropshadow 1,1,30,3,Black

Open Star 9 copy and paste as a new layer resize by 40% place on the bottom right hand side of the frame duplicate then mirror and flip position top left hand side of the frame Add a dropshadow 1,1,30,3,Black

Add your copyright information and your name
crop your tag resize by 80%
save your file as a png file
and you are finished
I hope you enjoyed this tutorial,

Tuesday, 23 June 2009

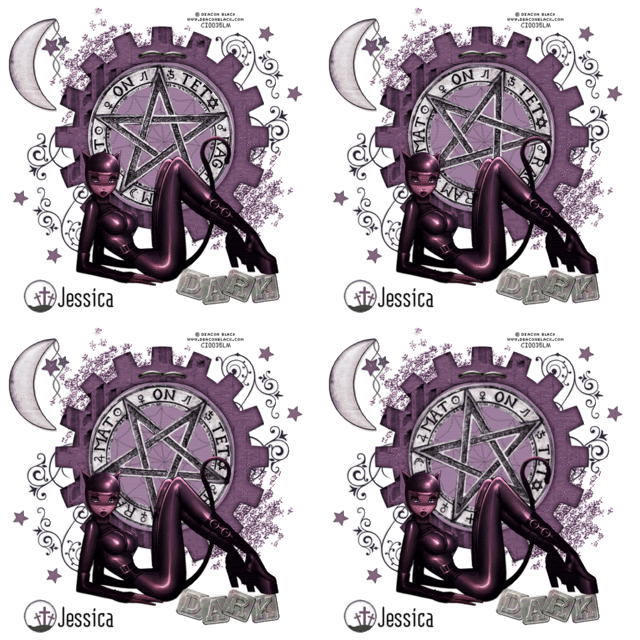
New Tutorial........Gothic Kitten **Animated**


This tutorial was written on 23rd June 2009
Any simularity to another tutorial is purely coincidental
I am using PTU scrapkit by Gothic Inspirations kit is called Dark of the night (tagger size) which can be Purchased HERE
Tubes of choice i am using Deacon Black under license number CI0035LM you can purchase there tubes from CILM
Font is Gothikka and is a free font HERE

Let's Get Started

Open your supplies and minimise
Open a new raster layer 700 x 700 and floodfill with white
Open Frame Old copy and paste as a new layer Add a dropshadow 1,1,30,3,Black
Next Open Matt 3 copy and paste as a new layer,resize by 110% position below the frame layer Add a dropshadow 1,1,30,3,Black

Open Pentagon copy and paste as a new layer position inside the frame Add a dropshadow 1,1,30,3,Black

Open Swirl design copy and paste as a new layer resize by 50% then position below the frame on the top right hand side duplicate then image flip image mirror position bottom left hand side of frame Add a dropshadow 1,1,30,3,Black

Open Star copy and paste as a new layer resize by 50% then again by 20% position on the top right hand side of the swirl design duplicate and position again then merge down both duplicate and position bottom left hand side of the bottom swirl design Add a dropshadow 1,1,30,3,Black

Open Glitter spray copy and paste as a new layer position on the top left hand side below the frame duplicate then image mirror image flip position bottom right hand side of frame Add a dropshadow 1,1,30,3,Black

Open Moonhalfcluster copy and paste as a new layer resize by 40% then place on the top left hand side of the frame Add a dropshadow 1,1,30,3,Black

Open Tube of choice copy and paste as a new layer resize by 90% then place below the frame Add a dropshadow 1,1,30,3,Black

Open staple copy and paste as a new layer resize by 50% position at the top of the frame Add a dropshadow 1,1,30,3,Black

Add your copyright information and your name crop your tag resize by 80%
***ANIMATION if desired***

Onto pentagon layer duplicate image free rotate 20 degrees rightduplicate again image free rotate 20 degrees right do the same until you have a total of 4 layers
close off the top 3 layers leave the first layer open
EDIT>COPY MERGED
into Animation shop
PASTE AS A NEW ANIMATION
back to psp
close off first layer open second layer
EDIT>COPY MERGED
into Animation shop
PASTE AFTER CURRENT FRAME

back to psp
close off second layer open third layer
EDIT>COPY MERGED
into Animation shop
PASTE AFTER CURRENT FRAME
back to psp
close off third layer open fourth layer
EDIT>COPY MERGED
into Animation shop
PASTE AFTER CURRENT FRAME

THEN EDIT SELECT ALL ,ANIMATION FRAME PROPERTIES AND CHANGE TO 15
SAVE FILE AS GIF
Thanks for doing this tutorial

Sunday, 21 June 2009

New Tutorials...........I do believe

This tutorial was written on 21st June 2009
Any simularity to another tutorial is purely coincidental
I am using PTU scrapkit by Kristi of Scrappin Divas kit is called I do Believe (tagger size) which can be Purchased HERE
Tubes of choice
Font of choice

Let's Get Started

Open your supplies and minimise
Open a new raster layer 700 x 700 and floodfill with white
Open Frame 2 copy and paste as a new layer resize by 80% then again by 60% Next grab your magic wand onto the frame layer select inside the frame then modify expand by 5 new raster layer and floodfill with a nice gradient or a paper of choice select none Add a dropshadow 1,1,30,3,Black

Open Cloud copy and paste as a new layer resize by 20% duplicate twice position near the top inside the frame as desired Add a dropshadow 1,1,30,3,Black

Open Castle copy and paste as a new layer resize by 50% then position below the frame on the bottom edge Add a dropshadow 1,1,30,3,Black

Open Fairy 2 copy and paste as a new layer resize by 40% then position on the left hand side in the frame Add a dropshadow 1,1,30,3,Black

Open Fairy 1 copy and paste as a new layer resize by 30% then position on the right hand side in the frame Add a dropshadow 1,1,30,3,Black

Open Vine 2 copy and paste as a new layer resize by 50% then place on the right hand side of the frame duplicate and image flip position to top of frameAdd a dropshadow 1,1,30,3,Black

Open Mushrooms copy and paste as a new layer resize by 50% then again by 50% position right hand side above the vine Add a dropshadow 1,1,30,3,Black

Open Frog copy and paste as a new layer resize by 30% position on the mushroom Add a dropshadow 1,1,30,3,Black

Open Glittervine copy and paste as a new layer resize by 20% position on left hand side of frame duplicate and position above joining together Add a dropshadow 1,1,30,3,Black

Open Flower 1 copy and paste as a new layer resize by 40% position over the glittervine on the top left hand side of the frame Add a dropshadow 1,1,30,3,Black

Open Dragon copy and paste as a new layer resize by 40% image mirror position bottom left hand side above the glittervine Add a dropshadow 1,1,30,3,Black

Add any other Elements as desired

Add your copyright information and your name
crop your tag resize by 80%
save your file as a png file
you are finished
I hope you enjoyed this tutorial,

New Tutorial.........Vintage Souvenirs


This tutorial was written on 21st June 2009
Any simularity to another tutorial is purely coincidentalI am using PTU scrapkit by Lyn of Scrappin Divas kit is called Among my Souvenirs (tagger size) which can be Purchased
HERE Tubes of choice i am using Jennifer Janesko under license number CI0035LM you can purchase there tubes from CILM
Mask of choice
Font of choice

Let's Get Started

Open your supplies and minimise
Open a new raster layer 700 x 700 and floodfill with white
Open a paper of choice copy and paste as a new layer place above the white background layer, then layers new mask from image find your mask in the dropdown section source luminance checked invert data unchecked and apply delete mask layer and merge group

Open Antique Frame copy and paste as a new layer resize by 70% Add a dropshadow 1,1,30,3,Black

Next Open a tube copy and paste as a new layer,resize by 90% position below the frame layer grab your magic wand onto the frame layer select inside the frame then modify expand by 5 select invert onto your tube layer hit delete select none Add a dropshadow 1,1,30,3,Black

Open Beadspill copy and paste as a new layer resize by 40% image flip position on the top right hand side below the frame duplicate then image mirror image flip position below the frame on the bottom left hand side Add a dropshadow 1,1,30,3,Black

Open Babysbreath copy and paste as a new layer resize by 50% then again by 80% position below the frame on the top left hand side Add a dropshadow 1,1,30,3,Black

Open Locket copy and paste as a new layer resize by 40% then position on the left hand side of the frame Add a dropshadow 1,1,30,3,Black

Open Rossette copy and paste as a new layer resize by 50% then again by 20% position on the left hand side above the locket Add a dropshadow 1,1,30,3,Black

Open Heartclock copy and paste as a new layer resize by 40% then place on the right hand side of the frame Add a dropshadow 1,1,30,3,Black

Open Stitchedbutterfly copy and paste as a new layer resize by 20% then image free rotate 10 degrees right place on the right hand side above the heartclock duplicate the butterfly image mirror resize by 40% place on left hand side of frame Add a dropshadow 2,2,50,5,Black

Add your copyright information and your name
crop your tag resize by 80%
save your file as a png file
you are finished
I hope you enjoyed this tutorial,

Saturday, 20 June 2009

New Tutorial.......Happy 4th July

This tutorial was written on 20th June 2009
Any simularity to another tutorial is purely coincidental
I am using PTU scrapkit by Ladyanne Inzpired Designz kit is called July 4th Picnic (tagger size) which can be Purchased HERE
Tubes of choice i am using Michael Landefeld under license number CI0035LM you can purchase there tubes from CILM
Mask of choice
Font of choice

Let's Get Started

Open your supplies and minimise

Open a new raster layer 700 x 700 and floodfill with white
Open a paper of choice copy and paste as a new layer place above the white background layer, then layers new mask from image find your mask in the dropdown section source luminance checked invert data unchecked and apply delete mask layer and merge group lower opacity to around 80

Open Element 20 copy and paste as a new layer image mirror grab your selection tool set to rectangle draw around the inside of the frame just abit bigger than the middle layer new raster layer floodfill with black select none position this below the frame
Add a dropshadow 1,1,30,3,Black

Next Open a tube copy and paste as a new layer,resize by 90% position above the black layer lower the opacity to around 50
Add a dropshadow 1,1,30,3,Black

Open Tube copy and paste as a new layer resize by 90% image mirror position on the left hand side of the frame
Add a dropshadow 1,1,30,3,Black

Open Element 37 copy and paste as a new layer resize by 40% then position above the tube on hand side duplicate and position next to element 37 Open element 36 copy and paste as a new layer resize by 40% position behind element 37
Add a dropshadow 1,1,30,3,Black

Open Element 23 copy and paste as a new layer resize by 60% then position on the right hand side of the frame
Add a dropshadow 1,1,30,3,Black

Open Element 38 copy and paste as a new layer resize by 50% then position on the top left of the canvas
Add a dropshadow 1,1,30,3,Black

Open Element 18 copy and paste as a new layer resize by 70% then place on the right hand side above element 23
Add a dropshadow 1,1,30,3,Black

Open Element 33 copy and paste as a new layer resize by 60% then place on the left hand at the top of the frame
Add a dropshadow 2,2,50,5,Black

Open Element 35 copy and paste as a new layer resize by 20% then duplicate place either side of your name
Add a dropshadow 2,2,50,5,Black

Add your copyright information and your name
crop your tag resize by 80%
save your file as a png file
you are finished
I hope you enjoyed this tutorial,

Thursday, 18 June 2009

New Tutorial............Togetherness


This tutorial was written on 18th June 2009
Any simularity to another tutorial is purely coincidental
I am using PTU scrapkit by Captivated Visions kit is called We are Family (tagger size) which can be Purchased
HERE
Tubes of choice i am using Suzanne Woolcott under license number AMIJABE you can purchase there tubes from her website
Mask 84 by Weescottlass
HERE, Thank you for sharing
Font of choice

Let's Get Started

Open your supplies and minimise

Open a new raster layer 700 x 700 and floodfill with white
Open a paper of choice copy and paste as a new layer place above the white background layer, then layers new mask from image find your mask in the dropdown section source luminance checked invert data unchecked and apply delete mask layer and merge group

Open Grasshill copy and paste as a new layer resize by 80% place on the right hand side duplicate and place over the first one making it slightly longer grab your eraser tool and erase the line down the middle of the hill joining them Add a dropshadow 1,1,30,3,Black

Next Open Ourhouse copy and paste as a new layer,resize by 40% position above hill on the top right hand side Add a dropshadow 1,1,30,3,Black

Open Vine copy and paste as a new layer resize by 20% position on the right hand side of our house Add a dropshadow 1,1,30,3,Black

Open Family tree copy and paste as a new layer resize by 40% then position beside the house on left hand side duplicate and position near bottom of grasshill Add a dropshadow 1,1,30,3,Black
Open Tube copy and paste as a new layer resize by 80% then position on the grasshill on the left hand side Add a dropshadow 1,1,30,3,Black

Open Wordart1 copy and paste as a new layer resize by 50% then position on the top left of the canvas Add a dropshadow 1,1,30,3,Black

Open Cloud copy and paste as a new layer resize by 50% then place on the right hand side of the wordart duplicate and position near the house chimney Add a dropshadow 1,1,30,3,Black

Open Butterflygreen copy and paste as a new layer resize by 20% then place under the wordart on the left hand side duplicate image mirror position between the clouds on the right hand side Add a dropshadow 2,2,50,5,Black

Open Familypaperchain copy and paste as a new layer resize by 25% then duplicate twice place infront of the grasshill to make a fence Add a dropshadow 2,2,50,5,Black

Add your copyright information and your name
crop your tag
resize by 80%
save your file as a png file
you are finished
I hope you enjoyed this tutorial
,

New Tutorial......Purple Minted


This tutorial was written on 18th June 2009
Any simularity to another tutorial is purely coincidental
I am using PTU scrapkit by Angela of Schnegge scraps kit is called Purple & Mint (tagger size) which can be Purchased
HERE
Tubes of choice i am using Keith Garvey under license number MPT9906 you can purchase there tubes from MPT
Font of choice

Let's Get Started

Open your supplies and minimise

Open a new raster layer 700 x 700 and floodfill with white
Open frame 4 copy and paste as a new layer image free rotate by 20 right grab you magic wand select inside the frame select modify by 3 new raster layer floodfill with black place below the frame hit delete select none merge down the two,then duplicate and mirror
Add a dropshadow 1,1,30,3,Black

Next Open Frame 3 copy and paste as a new layer,position above the other frames then grab you magic wand select inside the frame select modify by 3 select invert then paste a paper as a new layer below the frame hit delete select none,next open Tube copy and paste as a new layer resize by 80% above the frame duplicate and place below the frame above the paper back to the top copy grab your eraser tool and erase bits over the bottom of the frame
Add a dropshadow 1,1,30,3,Black

Duplicate your tube layer position over the right hand floodfill layer grab your magic wand select inside the floodfill layer select invert onto tube layer hit delete select none lower the opacity to around 60 duplicate and mirror or do the same process for the left hand side one
Add a dropshadow 1,1,30,3,Black

Open Glitter 2 copy and paste as a new layer position on the right hand side of the frame 4 below it duplicate and mirror Add a dropshadow 1,1,30,3,Black

Open Flower 12 copy and paste as a new layer resize by 90% then position on top of the frame 3 on the bottom right hand side Add a dropshadow 1,1,30,3,Black

Open Bird copy and paste as a new layer resize by 90% then position next to the flower 12 layer Add a dropshadow 1,1,30,3,Black

Open Butterfly 7 copy and paste as a new layer resize by 20% then image free rotate by 20 left position on the top right hand of the frame Add a dropshadow 1,1,30,3,Black

Open Pendant 1 copy and paste as a new layer resize by 80% then image mirror place on the left side of the frame Add a dropshadow 1,1,30,3,Black

Open Heart 2 copy and paste as a new layer resize by 30% then image free rotate by 20 left position on top of the pendant 1 on the left hand side of frame Add a dropshadow 1,1,30,3,Black

Open Butterfly 6 copy and paste as a new layer resize by 40% place on the bottom left hand side of the frame duplicate then mirror Add a dropshadow 1,1,30,3,,Black

Add your copyright information and your name
crop your tag resize by 80%
save your file as a png file
and you are finished
I hope you enjoyed this tutorial,