Thursday 30 July 2009

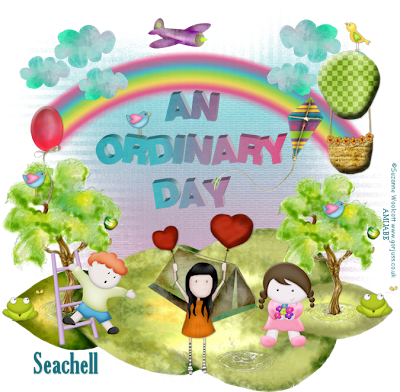
New Tutorial.........An Ordinary Day


This tutorial was written on 30th July 2009
Any simularity to another tutorial is purely coincidental
I am using PTU scrapkit by Seachell of Seachell scraps kit is called An Ordinary Day (tagger size) which can be Purchased HERE
Tubes of choice i am using Suzanne Woolcott under license number AMIJABE you can purchase there tubes from her website
Mask of choice
Font of choice

Let's Get Started

Open your supplies and minimise
Open a new raster layer 750 x 750 and floodfill with white
Open a paper of choice copy and paste as a new layer place above the white background layer, then layers new mask from image find your mask in the dropdown section source luminance checked invert data unchecked and apply delete mask layer and merge group


Open Element 2 and paste as a new layer resize by 80% duplicate then flip position both together then place near the bottom of the canvas see my tag for reference Add a dropshadow 1,1,30,3,Black

Next Open Element 22 copy and paste as a new layer,resize by 40% position above element 2 position on the left hand side copy and paste element 22 again this time resize by 30% position on the right hand side Add a dropshadow 1,1,30,3,Black

Open Element 43 copy and paste as a new layer resize by 30% position above element 2 in the middle Add a dropshadow 1,1,30,3,Black

Open Element 70 copy and paste as a new layer resize by 80% then position near the top of the canvas see my tag Add a dropshadow 1,1,30,3,Black

Open Element 33 copy and paste as a new layer resize by 60% then again by 40% position on the right hand side near element 70 duplicate then mirror Add a dropshadow 1,1,30,3,Black

Open Element 59 copy and paste as a new layer resize by 40% then place below element 70 in the middle Add a dropshadow 1,1,30,3,Black

Open Element 23 copy and paste as a new layer resize by 30% then position on the right hand side Add a dropshadow 1,1,30,3,Black

Open Element 41 copy and paste as a new layer resize by 20% position above element 70 Add a dropshadow 1,1,30,3Black

Open Element 47 copy and paste as a new layer resize by 30% then mirror position on the right hand side over element 59 Add a dropshadow 1,1,30,3,Black

Open Element 13 copy and paste as a new layer resize by 10% duplicate a few times then position around your elements as desired Add a dropshadow 1,1,30,3,Black

Open Tubes copy and paste as a new layer position as desired Add a dropshadow 1,1,30,3,Black

Add your copyright information and your name
crop your tag resize by 80%
save your file as a png file
I hope you enjoyed this tutorial

New Tutorial.........Whispers of the past

This tutorial was written on 30th July 2009
Any simularity to another tutorial is purely coincidental
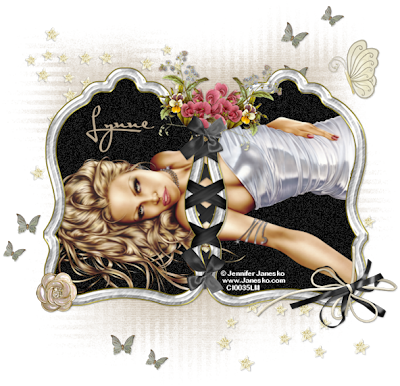
I am using PTU scrapkit by Lynn of Scrappin Divas kit is called Whispers of the past (tagger size) which can be Purchased HERE
Tubes of choice i am using Jennifer Janesko under license number CI0035LM you can purchase there tubes from CILM
Mask of choice
Font of choice
Let's Get Started
Open your supplies and minimise

Open a new raster layer 800 x 800 and floodfill with white
Open a paper of choice copy and paste as a new layer place above the white background layer, then layers new mask from image find your mask in the dropdown section source luminance checked invert data unchecked and apply delete mask layer and merge group

Open Doodle Frame copy and paste as a new layer,Open your tube as a new layer position below the frame back to the frame grab your magic wand select inside the frame select modify by 5 select invert onto the tube layer hit delete select none Add a dropshadow 1,1,30,3,Black
Next Open Circle doodles copy and paste as a new layer,position below the frame layer near the bottom edge of the frame duplicate then mirror the flip position below the frame near the top edge see my tag for reference Add a dropshadow 1,1,30,3,Black

Open Glitter splash copy and paste as a new layer resize by 80% then mirror position below the frame on the right hand side duplicate then position on the left hand side Add a dropshadow 1,1,30,3,Black

Open Heart tag copy and paste as a new layer resize by 30% then position on the top left hand side of the frame Add a dropshadow 1,1,30,3,Black

Open Dried butterfly copy and paste as a new layer resize by 60% then again by 30% position on the bottom left hand side of the frame Add a dropshadow 1,1,30,3,Black

Open Ivy copy and paste as a new layer resize by 70% then again by 80% place on the right hand side of the frame Add a dropshadow 1,1,30,3,Black

Open Vintage Blossom copy and paste as a new layer resize by 60% then position infront of the ivy on the right hand side duplicate and mirror position on the ivyAdd a dropshadow 1,1,30,3,Black

Open Longbow 1 copy and paste as a new layer resize by 60% position on the bottom right hand side over the vintage blossom Add a dropshadow 1,1,30,3,Black

Open Ribbonflower copy and paste as a new layer resize by 25% then position infront of the Longbow 1 Add a dropshadow 1,1,30,3,Black

Open Wordart copy and paste as a new layer resize as needed position below the frame Add a dropshadow 1,1,30,3,Black

Add your copyright information and your name
crop your tag resize by 80%
save your file as a png file
I hope you enjoyed this tutorial,

Monday 27 July 2009

New Tutorial.......Happy Town

This tutorial was written on 27th July 2009
Any simularity to another tutorial is purely coincidental
I am using PTU scrapkit by Kristi of Scrappin Divas kit is called Happy Town (tagger size) which can be Purchased HERE
Tubes of choice i am using Suzanne Woolcott under license number AMIJABE you can purchase there tubes from her websit
eMask 81 by Weescottlass HERE, Thank you for sharing
Font of choice

Let's Get Started
Open your supplies and minimise

Open a new raster layer 800 x 800 and floodfill with white
Open a paper of choice copy and paste as a new layer place above the white background layer, then layers new mask from image find your mask in the dropdown section source luminance checked invert data unchecked and apply delete mask layer and merge group

Open Rainbow copy and paste as a new layer resize by 70% Add a dropshadow 1,1,30,3,Black
Next Open Grass 1 copy and paste as a new layer,resize by 90% position above the rainbow layer at the bottom of the rainbow duplicate grass then mirror position below first one see my tag for reference Add a dropshadow 1,1,30,3,Black

Open Fence copy and paste as a new layer position above the grass layer at the bottom duplicate then position next to it so across the canvas see my tag for reference Add a dropshadow 1,1,30,3,Black

Open Train copy and paste as a new layer resize by 70% then position below the fence Add a dropshadow 1,1,30,3,Black

Open Tree copy and paste as a new layer resize by 50% position on left hand side behind the train Add a dropshadow 1,1,30,3,Black

Open Carousel copy and paste as a new layer resize by 70% then again by 50% place between the grass on the right hand side see my tag for reference Add a dropshadow 1,1,30,3,Black

Open Car copy and paste as a new layer resize by 90% then again by 60% position infront of the fence on the right hand side Add a dropshadow 1,1,30,3,Black

Open Flower border copy and paste as a new layer position on the fence Add a dropshadow 2,2,50,5,Black

Open rrcrossing copy and paste as a new layer resize by 40% then again by 60% position infront of the fence Add a dropshadow 2,2,50,5,Black
Open Blimp copy and paste as a new layer resize by 70% then position on the top right hand side Add a dropshadow 2,2,50,5,Black

Open Tubes copy and paste as a new layer position as desired Add a dropshadow 1,1,30,3,Black

I used the Alpha elements and resized by 10%

Add your copyright information and your name
crop your tag resize by 80%
save your file as a png file
I hope you enjoyed this tutorial,

Sunday 26 July 2009

New Tutorial.........Toot Toot Express

This tutorial was written on 26th July 2009
Any simularity to another tutorial is purely coincidental
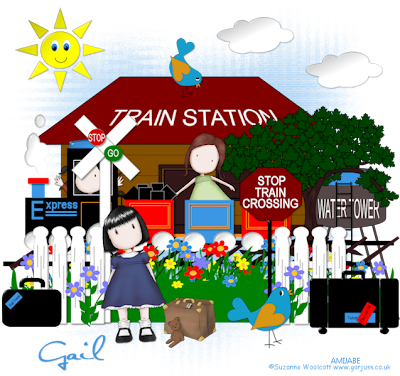
I am using PTU scrapkit by Aussie scraps kit is called Toot toot express (tagger size) which can be Purchased HERE
Tubes of choice i am using Suzanne Woolcott under license number AMIJABE you can purchase there tubes from her website
Mask 81 by Weescottlass HERE, Thank you for sharing
Font of choice

Let's Get Started

Open your supplies and minimise
Open a new raster layer 750 x 750 and floodfill with white
Open a paper of choice copy and paste as a new layer place above the white background layer, then layers new mask from image find your mask in the dropdown section source luminance checked invert data unchecked and apply delete mask layer and merge group
Open Station copy and paste as a new layer resize by 80% Add a dropshadow 1,1,30,3,Black
Next Open Tree copy and paste as a new layer,resize by 60% position on the right hand side Add a dropshadow 1,1,30,3,Black

Open Water tower copy and paste as a new layer resize by 60% position below the station on the right hand side see my tag for reference Add a dropshadow 1,1,30,3,Black

Open Train track copy and paste as a new layer resize by 80% then duplicate position over the other to make as long as the canvas Add a dropshadow 1,1,30,3,Black

Open Train copy and paste as a new layer position on top of the train track Add a dropshadow 1,1,30,3,Black
Open Fence copy and paste as a new layer resize by 80% then place on the canvas above the train leave enough room for the grass Add a dropshadow 1,1,30,3,Black
Open Flower bed copy and paste as a new layer then place below the fence near the edge duplicate and position to cover all the fence Add a dropshadow 1,1,30,3,Black
Open Birds copy and paste as a new layer resize by 40% then position as desired Add a dropshadow 2,2,50,5,Black

Open sun copy and paste as a new layer resize by 40% then position on the top left hand side Add a dropshadow 2,2,50,5,Black

Open Clouds copy and paste as a new layer resize by 50% then position as desired Add a dropshadow 2,2,50,5,Black

Open Tubes copy and paste as a new layer position as desired Add a dropshadow 1,1,30,3,Black
Add any other elements you wish

Add your copyright information and your name
crop your tag resize by 80%
save your file as a png file
you are finished
I hope you enjoyed this tutorial,

New Tutorial........Paisley


This tutorial was written on 26th July 2009
Any simularity to another tutorial is purely coincidental
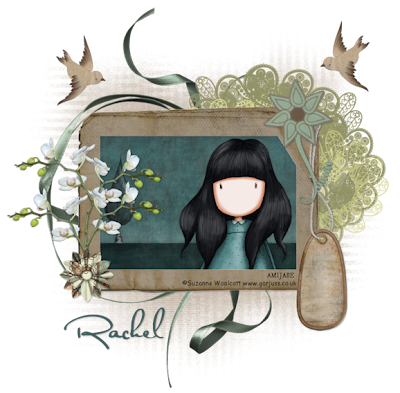
I am using PTU scrapkit by Captivated Visions kit is called Pretty Paisley (tagger size) which can be Purchased
HERE
Tubes of choice i am using Suzanne Woolcott under license number AMIJABE you can purchase there tubes from her website
Mask 81 by Weescottlass
HERE, Thank you for sharing
Font of choice

Let's Get Started

Open your supplies and minimise

Open a new raster layer 700 x 700 and floodfill with white
Open a paper of choice copy and paste as a new layer place above the white background layer, then layers new mask from image find your mask in the dropdown section source luminance checked invert data unchecked and apply delete mask layer and merge group

Open Frame 2 copy and paste as a new layer image free rotate by 90 degrees right Add a dropshadow 1,1,30,3,Black

Open Tube copy and paste as a new layer position below the frame layer grab your magic wand select inside the frame then select modify by 5 select invert back to your tube and hit delete select none Add a dropshadow 1,1,30,3,Black

Next Open Tree copy and paste as a new layer,resize by 60% position below the frame on the right hand side Add a dropshadow 1,1,30,3,Black

Open Frame 3 copy and paste as a new layer resize by 80% position below the frame 2 Add a dropshadow 1,1,30,3,Black

Open Tag copy and paste as a new layer resize by 40% then position on the frame on the right hand side Add a dropshadow 1,1,30,3,Black

Open Flower 3 copy and paste as a new layer resize by 70% then again by 40% position on the top right hand side over the tag Add a dropshadow 1,1,30,3,Black

Open Flower 4 copy and paste as a new layer resize by 30% then place on the left hand side of the frame duplicate a few times and arrange as desired Add a dropshadow 1,1,30,3,Black

Open Flower 2 copy and paste as a new layer resize by 30% then place above flower 4 on the left hand side Add a dropshadow 2,2,50,5,Black

Open Bird copy and paste as a new layer resize by 20% then position top right hand side of the frame duplicate image mirror Add a dropshadow 2,2,50,5,Black

Add your copyright information and your name
crop your tag resize by 80%
save your file as a png file
you are finished
I hope you enjoyed this tutorial,

Tuesday 21 July 2009

New Tutorial........Marissa


This tutorial was written on 21st July 2009
Any simularity to another tutorial is purely coincidental
I am using PTU scrapkit by Lynne aka Babycakes scrap kit is called Marissa (tagger size) which can be Purchased HERE
Tubes of choice i am using Jennifer Janesko under license number CI0035LM you can purchase there tubes from CILM
Font of choice
Mask of choice

Let's Get Started

Open your supplies and minimise

Open a new raster layer 700 x 700 and floodfill with white

Open a paper of Choice copy and paste as a new Layer,Layer New Mask Layer, from image find your mask in the dropdown section and apply making sure invert mask data is unchecked,onto mask layer hit delete and merge group

Open Double Frame copy and paste as a new layer resize by 70% grab your magic wand select inside both parts of the frame holding down your shift key select modify by 5 then select invert Open a paper of choice paste below the frame hit delete select none add/remove noise setting uniform 45 monochrome checked Add a dropshadow 1,1,30,3,Black

Open Tube of choice copy and paste as a new layer position below the frame layer grab your eraser tool erase any parts outside the frame Add a dropshadow 1,1,30,3,Black

Open Scatter copy and paste as a new layer resize by 80% then position below the frame Add a dropshadow 1,1,30,3,Black

Next Open Stars copy and paste as a new layer, position bottom right hand side below the frame duplicate then image mirror image flip Add a dropshadow 1,1,30,3,Black

Open Ties 2 copy and paste as a new layer resize by 40% then image mirror position on the bottom right hand side of the frame Add a dropshadow 1,1,30,3,Black

Open Flower 2 copy and paste as a new layer resize by 20% then position on the Bottom left hand side of the frame Add a dropshadow 1,1,30,3,Black

Open Butterfly 4 copy and paste as a new layer resize by 50% then again by 30% image mirror position top right hand side of the frame see my tag Add a dropshadow 1,1,30,3,Black

Add your copyright information and your name
crop your tag resize by 80%
save your file as a png file
you are finished
I hope you enjoyed this tutorial
Sunday 19 July 2009

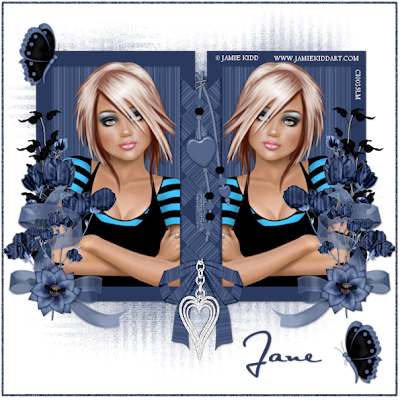
New Tutorial........Sweet Paradise


This tutorial was written on 19th July 2009
Any simularity to another tutorial is purely coincidental
I am using PTU scrapkit by Shaiyla Creation scrap kit is called Sweet Paradise (tagger size) which can be Purchased HERE
Tubes of choice i am using Jamie Kidd under license number CI0035LM you can purchase there tubes from CILM
Font of choice
Mask of choice

Let's Get Started

Open your supplies and minimise

Open a new raster layer 700 x 700 and floodfill with white
Open a paper of Choice copy and paste as a new Layer,Layer New Mask Layer, from image find your mask in the dropdown section and apply making sure invert mask data is unchecked,onto mask layer hit delete and merge group


Open Frame copy and paste as a new layer resize by 50% grab your magic wand select inside both parts of the frame holding down your shift key select modify by 5 then select invert Open a paper of choice paste below the frame hit delete select none Add a dropshadow 1,1,30,3,Black

Open Tube of choice copy and paste as a new layer resize by 80% position below the frame layer duplicate and position in the other part of the frame Add a dropshadow 1,1,30,3,Black

Open Flower 8 copy and paste as a new layer resize by 60% then again by 40% position on the left hand side of the frame duplicate then mirror position on the right hand side of the frame Add a dropshadow 1,1,30,3,Black

Next Open Flower 4 copy and paste as a new layer,resize by 40%, position on the right hand side above flower 8 duplicate then mirror Add a dropshadow 1,1,30,3,Black

Open Bow 8 copy and paste as a new layer resize by 40% then position on the right hand side of the frame above flower 4 duplicate then mirror Add a dropshadow 1,1,30,3,Black

Open Flower 10 copy and paste as a new layer resize by 60% then again by 40% position on the Bow on the left hand side duplicate position on the right hand side bow Add a dropshadow 1,1,30,3,Black

Open Image 3 copy and paste as a new layer position bottom middle of the bow on the frame see my tag Add a dropshadow 1,1,30,3,Black

Open Bead 2 copy and paste as a new layer resize by 50% then again by 70% position in the middle of the frame Add a dropshadow 1,1,30,3,Black

Open Butterfly 4 copy and paste as a new layer resize by 30% then position on the right hand side of the frame duplicate then position on the left hand side Add a dropshadow 1,1,30,3,Black

i Added a glitter border,rectangle shape foreground colour to match background closed size 5 draw around your tag then convert to raster add/noise for a different effect

Add your copyright information and your name

crop your tag resize by 80%
save your file as a png file
you are finished
I hope you enjoyed this tutorial
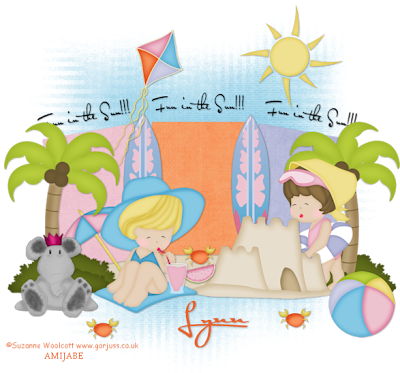
New Tutorial......Fun in the sun


This tutorial was written on 19th July 2009
Any simularity to another tutorial is purely coincidental
I am using PTU scrapkit by Lynn of Scrappin Divas kit is called fun and fancy free (tagger size) which can be Purchased HERE
Tubes of choice I am using Suzanne woolcott under license number AMIJABE you can purchase tubes from there website
Template 5 by Blissfully beth HERE, Thank you for sharing
mask of choice
Font of choice

Let's Get Started

Open your supplies and minimise

Open Template 5 shift D and close original delete info layer then Image canvas size 700 x 700 pixels lock aspect ratio unchecked, Layer New Raster Layer floodfill with white send to bottom,Delete Background Layer close off star 1 and 2 we dont need these

Open Sandcastle copy and paste as a new layer resize by 50% then position at the bottom right hand side of the template Add a dropshadow 1,1,30,3,Black

Onto Bottom rounded rectangle layer select all,select float,select defloat new raster layer floodfill with a colour of choice i used same as sandcastle to make look like sand select none,delete original layer Add a dropshadow 1,1,30,3,Black

Open Cutie 1 copy and paste as a new layer resize by 40% then position below the sandcastle layer position on the right hand side of it Add a dropshadow 1,1,30,3,Black

Open Palmtree copy and paste as a new layer resize by 50% then position on the left hand side above the template duplicate and mirror position below the cutie 1 layer see my tag for reference Add a dropshadow 1,1,30,3,Black

Open Cutie 2 copy and paste as a new layer resize by 40% then position on the left hand side between the sandcastle and palmtree Add a dropshadow 1,1,30,3,Black

Open Tube of choice copy and paste as a new layer resize as needed and position as desired Add a dropshadow 1,1,30,3,Black

Open Surfboard of choice copy and paste as a new layer resize by 40% position between the triangles duplicate and position between the other triangles see my tag Add a dropshadow 1,1,30,3,Black

Open Kite copy and paste as a new layer resize by 40% position Add a dropshadow 1,1,30,3,Black
Open Sun copy and paste as a new layer resize by 30% position top right hand side Add a dropshadow 1,1,30,3,Black


Open Beachball copy and paste as a new layer resize by 20% position on right hand side Add a dropshadow 1,1,30,3,Black

Open Watermelon copy and paste as a new layer resize by 10% position by the sandcastle Add a dropshadow 1,1,30,3,Black

Open Crab copy and paste as a new layer resize by 10% position above the watermelon so its eating it lol duplicate 2 times position as desired Add a dropshadow 1,1,30,3,Black

Onto Rectangle 1 select all select float select defloat select invert copy and paste a paper of choice hit delete select none Add a dropshadow 1,1,30,3,Black

Onto Rectangle 2 select all select float select defloat select invert copy and paste a paper of choice hit delete select none Add a dropshadow 1,1,30,3,Black

Onto Rectangle 1 select all select float select defloat select invert copy and paste a paper of choice hit delete select none Add a dropshadow 1,1,30,3,Black

I added some wordart

Add your copyright information and your name
crop your tag resize by 80%
save your file as a png file
you are finished
I hope you enjoyed this tutorial,

New Tutorial........Summer Breeze

This tutorial was written on 18th July 2009
Any simularity to another tutorial is purely coincidental
I am using PTU scrapkit by KairinaKat Kreations scraps kit is called Summer Breeze (tagger size) which can be Purchased HERE
Tubes of choice i am using Pinuptoons under license number CI0035LM you can purchase there tubes from CILM
Font of choice
Mask of choice

Let's Get Started

Open your supplies and minimise

Open a new raster layer 700 x 700 and floodfill with white
Open a paper of Choice copy and paste as a new Layer,Layer New Mask Layer, from image find your mask in the dropdown section and apply making sure invert mask data is unchecked,onto mask layer hit delete and merge group

Open Element 44 copy and paste as a new layer grab your magic wand select inside the frame select float select defloat select modify by 3 then select invert copy and paste a paper of choice resize by 80% hit delete select none Add a dropshadow 1,1,30,3,Black

Open Element 47 copy and paste as a new layer resize by 85% position below the frame layer and above the paper layer Add a dropshadow 1,1,30,3,Black

Open Element 39 copy and paste as a new layer resize by 70% position on the left hand side below the paper layer duplicate then mirror position under the paper layer Add a dropshadow 1,1,30,3,Black

Next Open Tube copy and paste as a new layer,resize by 80%, position above the frame Add a dropshadow 1,1,30,3,Black

Open Element 7 copy and paste as a new layer resize by 40% then image free rotate 20 degrees right position on the top left hand side of the frame duplicate and position bottom right of frame Add a dropshadow 1,1,30,3,Black

Open Element 77 copy and paste as a new layer resize by 20% then position on the bottom left hand side of the frame duplicate position top right hand side of frame Add a dropshadow 1,1,30,3,Black

Open Element 64 copy and paste as a new layer resize by 40% then again by 40% position bottom left hand side of the tube duplicate and mirror Add a dropshadow 1,1,30,3,Black


Add your copyright information and your name
crop your tag resize by 80%
save your file as a png file
you are finished
I hope you enjoyed this tutorial

Saturday 18 July 2009

New Tutorial.......Rain rain go away

This tutorial was written on 18th July 2009
Any simularity to another tutorial is purely coincidenta
lI am using PTU Collab scrapkit by Scrappin Divas kit is called RainRaingoaway (tagger size) which can be Purchased HERE
Tubes of choice I am using Suzanne woolcott under license number AMIJABE you can purchase tubes from there website
Font of choice

Let's Get Started

Open your supplies and minimise

Open a new raster layer 700 x 700 and floodfill with white

Open Frame in zip 2 copy and paste as a new layer resize by 20% then grab your magic wand select inside the frame then modify expand by 5 select invert open a paper of choice hit delete on the paper layer select none Add a dropshadow 1,1,30,3,Black

Open Grassyhill in zip 2 copy and paste as a new layer resize by 65% then again by 20% position below the frame on the bottom Add a dropshadow 1,1,30,3,Black

Open Fence in zip 2 copy and paste as a new layer resize by 10% then position above the grassyhill layer duplicate 3/4 times depending how you position and position across the frame see my tag for reference Add a dropshadow 1,1,30,3,Black

Open Rainbow in zip 2 copy and paste as a new layer resize by 10% then position on the left hand side inside the frame near the top Add a dropshadow 1,1,30,3,Black

Open Flowers in zip 12 copy and paste as a new layer resize by 30% then again by 10% position on the grassyhill on the left hand side duplicate and position as desired Add a dropshadow 1,1,30,3,Black

Open Bee in zip 12 copy and paste as a new layer resize by 60% then again by 10% place as desired Add a dropshadow 1,1,30,3,Black

Open Butterfly in zip 12 copy and paste as a new layer resize by 80% then again by 10% place as desired Add a dropshadow 1,1,30,3,Black

Open Puddle in zip 7 copy and paste as a new layer resize by 50% then again by 20% position on the right hand side of the grassyhill Add a dropshadow 1,1,30,3,Black

Open Annabellaumbrella in zip 5 copy and paste as a new layer resize by 10% then position in the puddle above this layer Add a dropshadow 1,1,30,3,Black

Open Ropesun in zip 1 copy and paste as a new layer resize by 10% position top right hand side inside the frame Add a dropshadow 1,1,30,3,Black

Open Glitterdrops in zip 1 copy and paste as a new layer resize by 10% position under the cloud of the rainbow duplicate and position under the other cloud Add a dropshadow 1,1,30,3,Black

Open Tube of choice copy and paste as a new layer resize by 60% position on the left hand side of the frame Add a dropshadow 1,1,30,3,Black

Open Boots in zip 2 copy and paste as a new layer resize by 10% position on the right hand side of the frame Add a dropshadow 1,1,30,3,Black

For the name i used a colour from the kit and drew a rectangle on the top of the frame applied the name and duplicated the bees

Add your copyright information and your name
crop your tagresize by 80%
save your file as a png file
you are finished
I hope you enjoyed this tutorial

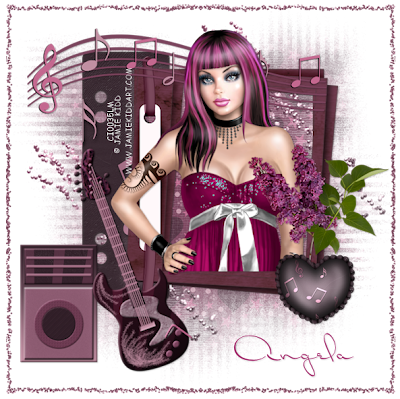
New Tutorial.....Rock with me


This tutorial was written on 18th July 2009
Any simularity to another tutorial is purely coincidental
I am using PTU scrapkit by Angela of Schnegge scraps kit is called Rock with me (tagger size) which can be Purchased HERE
Tubes of choice i am using Jamie Kidd under license number CI0035LM you can purchase there tubes from CILM
Font of choice
Mask of choice

Let's Get Started

Open your supplies and minimise

Open a new raster layer 700 x 700 and floodfill with white

Open a paper of Choice copy and paste as a new Layer,Layer New Mask Layer, from image find your mask in the dropdown section and apply making sure invert mask data is unchecked,onto mask layer hit delete and merge group

Open frame 4 copy and paste as a new layer Add a dropshadow 1,1,30,3,Black

Open Music notes copy and paste as a new layer resize by 80% position top of the frame Add a dropshadow 1,1,30,3,Black

Next Open Tube copy and paste as a new layer,resize by 80%, position above the frame duplicate and position below the frame grab your eraser tool back to the top tube layer erase any parts over the frame you dont want showing Add a dropshadow 1,1,30,3,Black

Open Flower 4 copy and paste as a new layer resize by 60% position on the right hand side of the frame Add a dropshadow 1,1,30,3,Black

Open Heart 4 copy and paste as a new layer resize by 50% then position on the right hand side over the flower Add a dropshadow 1,1,30,3,Black

Open Speaker copy and paste as a new layer resize by 60% then position on the left hand side of the frame Add a dropshadow 1,1,30,3,Black

Open Guitar copy and paste as a new layer resize by 80% then image free rotate by 20 degrees left position next to the speaker Add a dropshadow 1,1,30,3,Black

Open Glitter copy and paste as a new layer resize by 60% position below the frame bottom left hand side duplicate position on top right hand side below the frame Add a dropshadow 1,1,30,3,Black

Open Glitteredge copy and paste as a new layer Add a dropshadow 1,1,30,3,Black

Add your copyright information and your name
crop your tag resize by 80%
save your file as a png file
you are finished
I hope you enjoyed this tutorial,

Thursday 16 July 2009

New Tutorial......Summer Rain

This tutorial was written on 16th July 2009
Any simularity to another tutorial is purely coincidental
I am using PTU scrapkit by Kristi of Scrappin Divas kit is called Summer Rain (tagger size) which can be Purchased HERE
Tubes of choice I am using Suzanne woolcott under license number AMIJABE you can purchase tubes from there website
Mask of choice
Font of choice

Let's Get Started

Open your supplies and minimise
Open a new raster layer 700 x 700 and floodfill with white
Open a paper of choice copy and paste as a new layer,layer new mask layer from image find your mask in tHe dropdown section source luminance checked, invert data unchecked apply, delete mask layer merge mask group

Open Frame 2 copy and paste as a new layer then grab your magic wand select inside the frame then modify expand by 5 select invert open a tube of choice hit delete select none Add a dropshadow 1,1,30,3,Black

Open Bubbles copy and paste as a new layer position below the frame on the right hand side duplicate and mirror Add a dropshadow 1,1,30,3,Black

Open String copy and paste as a new layer resize by 60% then position above the frame on the top right hand side Add a dropshadow 1,1,30,3,Black

Open Leaves copy and paste as a new layer resize by 30% then position on the left hand side of the frame Add a dropshadow 1,1,30,3,Black

Open Roses copy and paste as a new layer resize by 40% then again by 40% position on the left hand side above the leaves Add a dropshadow 1,1,30,3,Black

Open Flower 3 copy and paste as a new layer resize by 50% then again by 40% place on the bottom left hand corner above the roses layer Add a dropshadow 1,1,30,3,Black

Open Bench copy and paste as a new layer resize by 50% then image mirror image position bottom right hand side of the frame Add a dropshadow 1,1,30,3,Black

Open Tube copy and paste as a new layer resize by 80% position on the bench Add a dropshadow 1,1,30,3,Black

Open Glitterbug copy and paste as a new layer resize by 45% then image free rotate by 20 degrees right position top left hand side of the frame Add a dropshadow 1,1,30,3,Black

Open Bird copy and paste as a new layer resize by 40% position top left hand side duplicate then mirror Add a dropshadow 1,1,30,3,Black

Open Tag copy and paste as a new layer resize by 30% position bottom left hand side of frame Add a dropshadow 1,1,30,3,Black

Add your copyright information and your name
crop your tag resize by 80%
save your file as a png file
and you are finished
I hope you enjoyed this tutorial,

New Tutorial.........Pretty Pink

This tutorial was written on 16th July 2009
Any simularity to another tutorial is purely coincidental
I am using PTU scrapkit by Danielle of Dazzling Scraps kit is called A few of my favourite things (tagger size) which can be Purchased HERE
Tubes of choice i am using Jamie Kidd under license number CI0035LM You can purchase there tubes from CILM
Template 150 by Designs by Ali you can download HERE,Thank you for sharing
Mask of choice
Font of choice

Let's Get Started
Open your supplies and minimise
Open Template 150 shift D and close original delete info layer then Image canvas size 700 x 700 pixels lock aspect ratio unchecked, Layer New Raster Layer floodfill with white send to bottom,Delete Background Layer,

Open a paper of choice copy and paste as a new layer,layer new mask layer from image find your mask in tHe dropdown section source luminance checked, invert data unchecked apply, delete mask layer merge mask group place below the template layer

Open a paper of Choice copy and paste as a new Layer,onto Shapes 2 select all select float,select defloat select contract by 2 then select invert onto paper layer hit delete select none, Add a dropshadow 2,2,50,5,Black, Delete original layer

Open another paper of choice copy and paste as a new layer onto Shapes 2 copy, Selection all, select float, select defloat,select contract by 2 then select invert onto paper layer hit delete select none, Add a drop shadow 2, 2, 50, 5, Black, Delete original layer

Onto Shape 1,copy and paste a close up or tube of choice above this layer resize as desired then onto shape 1 select all,select float, select defloat,select invert then onto tube layer hit delete select none,resize the tube by 90% position in the middle of shape 1
Add a drop shadow 2, 2, 50, 5, Black,

Onto Shape 1 copy, paste a close up or tube of choice above this layer resize as desired then onto shape 1 select all,select float, select defloat,select invert then onto tube layer hit delete select none,resize the tube by 90% position in the middle of shape 1 copy Add a drop shadow 2, 2, 50, 5, Black,

Open Tube copy and paste as a new layer resize by 80% then position in the middle of the template Add a dropshadow 2,2,50,5,Black

Open Hot pink water pot 2 copy and paste as a new layer resize by 60% then again by 10% place on the bottom of the shape Add a dropshadow 2,2,50,5,Black

Open Hot water pot copy and paste as a new layer resize by 40% then again by 20% place on the shape layer Add a dropshadow 2,2,50,5,Black

Open Pink dragonfly copy and paste as a new layer resize by 10% then place on the left hand side duplicate and position on the right hand side Add a dropshadow 2,2,50,5,Black

Open Flower 1 pink copy and paste as a new Layer resize by 50% then again by 20% position on the bottom left hand corner of the shape duplicate position bottom right hand corner of the shape Add a dropshadow 2,2,50,5 Black

add any copyright and your name,
Layers Merge Flatten,
crop your tag and resize by 90%
Save as Png.

Monday 13 July 2009

New Tutorial.......Paris Chic


This tutorial was written on 13th July 2009
Any simularity to another tutorial is purely coincidental
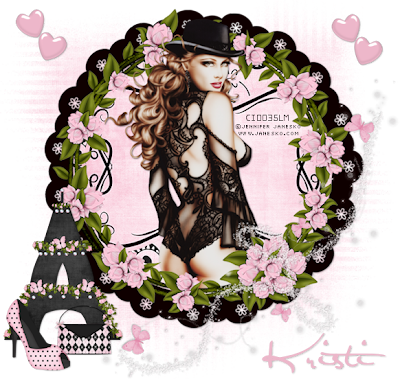
I am using PTU scrapkit by Kristi of Scrappin Divas kit is called Paris chic (tagger size) which can be Purchased
HERE
Tubes of choice i am using Jennifer Janesko under License CI0035LM you can purchase there tubes from CILM
Mask of choice
Font of choice

Let's Get Started

Open your supplies and minimise
Open a new raster layer 700 x 700 and floodfill with white

Open Scallop Frame copy and paste as a new layer resize by 45% then grab your magic wand select inside the frame then modify expand by 5 select invert open a paper of choice hit delete select none Add a dropshadow 1,1,30,3,Black

Open Flower frame copy and paste as a new layer resize by 95% then position above the scallop frame Add a dropshadow 1,1,30,3,Black

Open Tube copy and paste as a new layer resize by 80% duplicate position one below the frame back to the top one grab your eraser tool and erase parts over the frame Add a dropshadow 1,1,30,3,Black

Open Tower copy and paste as a new layer resize by 40% then position on the left hand side Add a dropshadow 1,1,30,3,Black

Open Shoe copy and paste as a new layer resize by 30% then position on the left hand side e Add a dropshadow 1,1,30,3,Black

Open purse copy and paste as a new layer resize by 20% then place on the left hand side Add a dropshadow 1,1,30,3,Black

Open butterfly swirl copy and paste as a new layer resize by 60% then image mirror image flip position bottom right hand side Add a dropshadow 1,1,30,3,Black

Open heart copy and paste as a new layer resize by 30% position top left hand side duplicate and mirror Add a dropshadow 1,1,30,3,Black

Add your copyright information and your name
crop your tag resize by 80% save your file as a png
I hope you enjoyed this tutorial
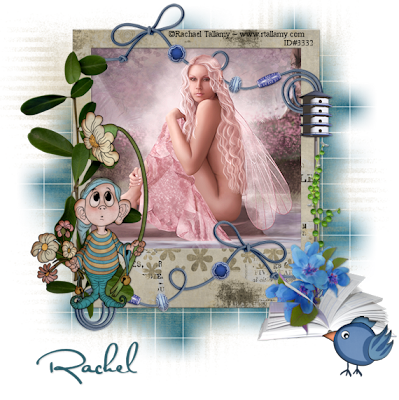
New Tutorial........Somewhere over the rainbow


This tutorial was written on 13th July 2009
Any simularity to another tutorial is purely coincidental

I am using PTU scrapkit by Captivated Visions kit is called Somewhere over the Rainbow (tagger size) which can be Purchased
HERE I used kit 1
Tubes of choice i am using Rachael Tallamy under license number ID#3332 you can purchase there tubes from her website
HERE
Mask 84 and 81 by Weescottlass
HERE, Thank you for sharing
Font of choice

Let's Get Started
Open your supplies and minimise

Open a new raster layer 700 x 700 and floodfill with white
Open a paper of choice copy and paste as a new layer place above the white background layer, then layers new mask from image find mask 84 in the dropdown section source luminance checked invert data unchecked and apply delete mask layer and merge group

Open a paper of choice copy and paste as a new layer place above the white background layer, then layers new mask from image find mask 81 in the dropdown section source luminance checked invert data unchecked and apply delete mask layer and merge group

Open Frame 2 copy and paste as a new layer,Open your tube copy and paste as a new layer below the frame grab your magic wand select inside the frame then select modify by 5 select invert onto tube layer hit delete select none, Add a dropshadow 1,1,30,3,Black

Next Open Beadstring copy and paste as a new layer,resize by 40% position above the frame at the top duplicate mirror position bottom of the frame Add a dropshadow 1,1,30,3,Black

Next Open Branch copy and paste as a new layer,resize by 40% position above the frame on the left hand side Add a dropshadow 1,1,30,3,Black

Open Fantasyelf copy and paste as a new layer resize by 80% then again by 60% position on the Left hand side of the frame above the Branch Add a dropshadow 1,1,30,3,Black

Open Birdhouse copy and paste as a new layer resize by 60% then position on the right hand side of the frame Add a dropshadow 1,1,30,3,Black

Open Book copy and paste as a new layer resize by 30% then position on the right hand side Add a dropshadow 1,1,30,3,Black

Open Blueflower copy and paste as a new layer resize by 40% then position behind the book duplicate and place over the book grab your eraser tool and erase bits of the flower so its in the book Add a dropshadow 1,1,30,3,Black

Open Bird copy and paste as a new layer resize by 70% then again by 40% place on the right hand side above the book Add a dropshadow 1,1,30,3,Black

Add your copyright information and your name crop your tag
resize by 80% save your file as a png file
and you are finished
I hope you enjoyed this tutorial,