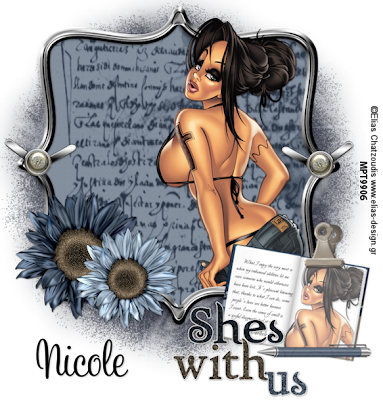
Sunday 24 May 2009

New Tutorial..........Bee_utiful

This tutorial was written on 24th May 2009
Any simularity to another tutorial is purely coincidental
I am using PTU scrapkit by Heart and soul creations kit is called Bee Happy (tagger size) which can be Purchased HERE
Tube of choice i am using Jennifer Janesko under license number CI0035LM you can purchase there tubes from CILM
Mask of choice
Font of choice

Let's Get Started

Open your supplies and minimise

Open a new raster layer 700 x 700 and floodfill with white

Open a paper of choice copy and paste as a new layer place above the white background layer, then layers new mask from image find your mask in the dropdown section source luminance checked invert data unchecked and apply delete mask layer and merge group

Next Open Frame 8 copy and paste as a new layer Open a paper of choice copy and paste as a new layer below the frame back to the frame grab your magic wand select inside the frame holding down the shift key select both parts then select defloat select modify by 5 select invert onto the paper layer hit delete select none Add a dropshadow 1,1,30,3,Black

Open your tube copy and paste as a new layer above the frame resize by 70% duplicate and mirror you should have 2 tubes one in each frame duplicate both tubes again and place below the frame layer grab your eraser tool and on the top tubes erase any parts showing outside the frame Add a dropshadow 1,1,30,3,Black

Open Elemenet 61 copy and paste as a new layer resize by 40% position on the left hand side of the frame corner Add a dropshadow 1,1,30,3,Black

Open Element 21 of choice copy and paste as a new layer resize by 40% then again by 40% place ont the top right hand corner of the left hand side of the frame duplicate place on top of the right hand side frame Add a dropshadow 1,1,30,3,Black

Open Element 60 copy and paste as a new layer position on the bottom of the right hand side of the frame Add a dropshadow 1,1,30,3,Black

Open Element 65 copy and paste as a new layer resize by 40% place in the middle of the top of the frame on the right hand side duplicate and place on the bottom of the left hand side of the frame see my tag Add a dropshadow 1,1,30,3,Black

Add your copyright information and your name
crop your tag resize by 80%
save your file as a png file
and you are finished
I hope you enjoyed this tutorial,

New Tutorial...........Modern Love

This Tutorial was written on 24th May2009
Any Simularity to any other Tutorial is purely coincidental

SUPPLIES NEEDED

1 tube of choice I am using Keith Garvey under License MPT9906 which can be purchased from her website.
PTU Scrap- kit by Seachell of Seachell's Scrapz, kit is called Modern Love (Taggers size) and can be purchased HERE
Font of Choice.
Mask of choice

LETS GET STARTED

Open your supplies and minimise

Open new raster layer 700 x 700 pixels Floodfill with white send to bottom,

Open a paper of choice copy and paste as a new layer place above the white background layer, then layers new mask from image find your mask in the dropdown section source luminance checked invert data unchecked and apply delete mask layer and merge group Open another paper and apply mask again mege down both mask layers

Open Element 54 copy and paste as a new layer resize by 75% then place above white background in the middle of the canvas
Open Element 3 copy and paste as a new layer resize by 70% position above mask layer apply add noise uniform setting 40 Add a dropshadow 2,2,50,5,Black

Open Element 11 copy and paste as a new layer above the frame layer resize by 80% then again by 60% position over the top of the frame ribbon Add a drop shadow 2, 2, 50, 5, Black

Open Paper of choice copy and paste as a new layer position below the frame grab your magic wand onto the frame layer hold down shift key select all 4 sides of frame then select defloat select modify by 5 then select invert onto paper layer hit delete select none Add a drop shadow 2, 2, 50, 5, Black,

Next open tube of choice copy and paste as a new layer resize by 80% then place below the frame and above the paper position on the left side duplicate then mirror grab your eraser tool and erase any parts in the opposite side in both tubes on one of the tubes apply adjust hue/saturation colourize both settings to 0 Add a dropshadow 2,2,50,5,Black

Open Element 26 copy and paste as a new Layer resize by 80% position on the top of the frame erase any parts outside the frame duplicate and position at the bottom Add a drop shadow 2, 2, 50, 5, Black,

Open Element 17 copy and paste as a new Layer resize by 70% then again by 50% position in the middle of the frame at the top Add a dropshadow 2,2,50,5 Black

Open Element 24 copy and paste as a new layer resize by 70% then position on the top right hand side of the frame Add a drop shadow 2, 2, 50 ,5, Black,

Open Element 62 grab your selection tool on freehand and draw around one of the elements then edit copy edit paste as a new layer select none close the other element then back to original resize by 30% then position on the top left hand side of frame Add a dropshadow 2,2,50,5,Black

Open Element 20 copy and paste as a new layer resize by 30% then place on the bottom left hand side of the frame duplicate and position on the right hand side Add a dropshadow 2,2,50,5,Black

Open Element 36 copy and paste as a new layer resize by 70% then again by 50% place in the middle of the bottom of the frame Add a dropshadow 2,2,50,5,Black

add any copyright and your name,
Layers Merge Flatten,
crop your tag and resize by 90%
Save as Png.

Saturday 23 May 2009

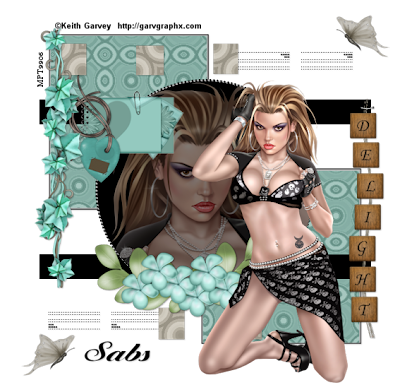
New Tutorial..........Mint Delight


This Tutorial was written on 19th May 2009
Any Simularity to any other Tutorial is purely coincidental

SUPPLIES NEEDED

1 tube of choice I am using Keith Garvey under License MPT9906 which can be purchased from MPT
PTU Scrap- kit from Magic Scraps by Sabs, kit is called Mint Delight(Taggers size) and can be purchased
HERE.
Template 2 from Diamond2design
HERE. Thank you For Sharing
Font of Choice.

LETS GET STARTED

Open your supplies and minimise

Open Template 2 shift D and close original delete info layer then Image canvas size 700 x 700 pixels lock aspect ratio unchecked, Layer New Raster Layer floodfill with white send to bottom,Delete Background Layer,

Open a paper of Choice copy and paste as a new Layer,onto vierkant links select all select float,select defloat select contract by 2 then select invert onto paper layer hit delete select none, Add a dropshadow 2,2,50,5,Black,leave original layer open below paper layer

Open another paper of choice copy and paste as a new layer onto vierkant rechts, Selection all, select float, select defloat,select contract by 2 then select invert onto paper layer hit delete select none, Add a drop shadow 2, 2, 50, 5, Black, leave original layer open below paper layer

Open another paper of choice copy and paste as a new layer onto blokjes 1, Selection all, select float, select defloat,select invert then hit delete select none, Add a drop shadow 2, 2, 50, 5, Black, delete original layer

Open another paper of choice copy and paste as a new layer onto blokjes 2, Selection all, select float, select defloat,select invert open a closed off paper then hit delete select none Add a drop shadow 2, 2, 50, 5, Black, delete original layer

Onto cirkel, Selection all, select float, select defloat,select contract by 2, layer new raster layer floodfill with black copy and paste tube of choice onto cirkel layer select invert back to tube hit delete select none lower opacity to 50 Add a drop shadow 2, 2, 50, 5, Black,leave the original layer open below the paper layer

Open Journaling copy and paste as a new layer resize by 30% then place on the left hand side of the cirkel Add a dropshadow 2,2,50,5,Black

Open Tube copy and paste as a new layer resize by 80% then position on the right hand side of the template Add a dropshadow 2,2,50,5,Black

Open Swirly ivy copy and paste as a new layer resize by 90% then again by 80% place on the left hand side of the template Add a dropshadow 2,2,50,5,Black

Open Pendant copy and paste as a new layer resize by 30% then place on the left hand side by the journaling Add a dropshadow 2,2,50,5,Black

Open Alpha beads copy and paste as a new Layer resize by 70% then position on the right hand side at the bottom Add a dropshadow 2,2,50,5 Black

Open Flower 6 copy and paste as a new layer resize by 70% then by 90 position over the bottom of the cirkel below the main tube Add a dropshadow 2,2,50,5,Black

Open Butterfly copy and paste as a new layer resize by 60% then again by 30% position as desired Add a dropshadow 2,2,50,5,Black

add any copyright and your name,
Layers Merge Flatten,
crop your tag and resize by 90%
Save as Png.

Tuesday 19 May 2009

New Tutorial........Twilight Zone

This Tutorial was written on 19th May 2009
Any Simularity to any other Tutorial is purely coincidental

SUPPLIES NEEDED

1 tube of choice I am using Keith Garvey under License MPT9906which can be purchased from MPT.
Scrap- kit by Missy of Scrappin with attitude, kit is called Twilight (Taggers size) and can be purchased HERE.
Template 3 twilight templates from essence of creativity by Yvette Here. Thank you For Sharing
Mask of choice
Font of Choice.

LETS GET STARTED

Open your supplies and minimise

Open Template 3 shift D and close original delete info layer then Image canvas size 700 x 700 pixels lock aspect ratio unchecked, Layer New Raster Layer floodfill with white send to bottom,Delete Background Layer,

Open a paper of choice copy and paste as a new layer place above the white background layer, then layers new mask from image find your mask in the dropdown section source luminance checked invert data unchecked and apply delete mask layer and merge group lower opacity to 50

Open a paper of Choice copy and paste as a new Layer,onto Large rectangle select all select float,select defloat select invert onto paper layer hit delete select none, Add a dropshadow 2,2,50,5,Black,delete Original Layer,

Open another paper of choice copy and paste as a new layer onto circle 2, Selection all, select float, select defloat,select invert onto paper layer hit delete select none, Add a drop shadow 2, 2, 50, 5, Black, delete Original Layer,

Open another paper of choice copy and paste as a new layer onto circle 1, Selection all, select float, select defloat,select invert then hit delete select none, Add a drop shadow 2, 2, 50, 5, Black, delete original layer

Open another paper of choice copy and paste as a new layer onto rectangle 1, Selection all, select float, select defloat,select invert open a closed off paper then hit delete select none Add a drop shadow 2, 2, 50, 5, Black,delete original layer

Open another paper of choice copy and paste as a new layer onto Background, Selection all, select float, select defloat,select invert open a closed off paper then hit delete select none Add a drop shadow 2, 2, 50, 5, Black,delete original layer

Onto Slats, Selection all, select float, select defloat,new raster layer floodfill with white select none,delete original layer Add a drop shadow 2, 2, 50, 5, Black, delete original layer

Open Sword copy and paste as a new layer resize by 40% then place inside the background layer square see my tag Add a dropshadow 2,2,50,5,Black

Open Tube copy and paste as a new layer resize by 80% then position above the template in the middle Add a dropshadow 2,2,50,5,Black

Open Tall candle copy and paste as a new layer resize by 30% then place on the right hand side of the template Add a dropshadow 2,2,50,5,Black

Open White dove copy and paste as a new layer resize by 40% then again by 60% image mirror place on the top left hand side of the frame Add a dropshadow 2,2,50,5,Black

Open Double heart copy and paste as a new Layer resize by 20% then position on the left hand side at the bottom Add a dropshadow 2,2,50,5 Black

Open Glitterhearts copy and paste as a new layer resize by 70% then flip position over the template Add a dropshadow 2,2,50,5,Black

Open wordart of choice copy and paste as a new layer resize as needed and position as desired Add a dropshadow 2,2,50,5,Black

add any copyright and your name,
Layers Merge Flatten,
crop your tag and resize by 90%
Save as Png.

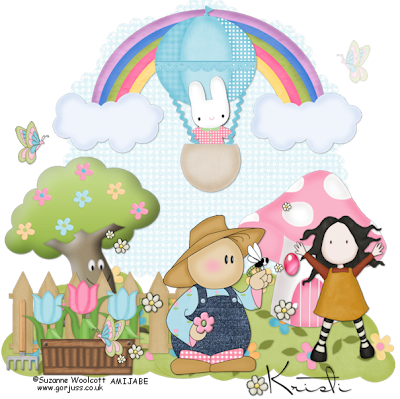
New Tutorial.......Woolcott's Garden


This Tutorial was written on 19th May2009
Any Simularity to any other Tutorial is purely coincidental

SUPPLIES NEEDED

1 tube of choice I am using Suzanne Woolcott under License AMIJABEwhich can be purchased from her website.
Scrap- kit by Kristi of The Scrappin Divaz, kit is called Back yard garden (Taggers size) and can be purchased
HERE
Font of Choice.

LETS GET STARTED

Open your supplies and minimise

Open new raster layer 700 x 700 pixels Floodfill with white send to bottom,
Open Mat2 copy and paste as a new layer resize by 60% then again by 20% place above white background lower opacity to around 30

Open Rainbow copy and paste as a new layer above the mask layer resize by 90% then again by 20% position near the top of the layer side
Add a drop shadow 2, 2, 50, 5, Black

Open Bush copy and paste as a new layer resize by 20% position near bottom of canvas duplicate and position at the side see my tag for reference
Add a drop shadow 2, 2, 50, 5, Black,

Next open the mushroom house copy and paste as a new layer resize by 80% then again by 20% place on the right side on the bush
Add a dropshadow 2,2,50,5,Black

Open Tree copy and paste as a new Layer resize by 60% position on the left hand side on the bush
Add a drop shadow 2, 2, 50, 5, Black,

Open Fence copy and paste as a new Layer resize by 20% position in front of the tree on the left hand side
Add a dropshadow 2,2,50,5 Black

Open window planter copy and paste as a new layer resize by 50% then again by 20% position in front of the fence on the left side
Add a drop shadow 2, 2, 50 ,5, Black,

Open Tulip copy and paste as a new layer resize by 60% then again by 10% place below the window planter layer and position inside the planter duplicate twice or choose another colour and place by each other
Add a dropshadow 2,2,50,5,Black

Open Fork copy and paste as a new layer resize by 10% then place next to the window planter on the fence on the left hand side
Add a dropshadow 2,2,50,5,Black

Open Balloon copy and paste as a new layer resize by 10% place in the middle of the rainbow Add a dropshadow 2,2,50,5,Black

Open Bunny copy and paste as a new layer resize by 70% then again by 30% place below the balloon duplicate and position above the balloon grab your eraser tool erase parts over the balloon so the bunny's inside the balloon
Add a dropshadow 2,2,50,5,Black

Open Butterfly copy and paste as a new layer resize by 10% place on the left hand side duplicate position on the right and lower opacity to around 30 on one
Add a dropshadow 2,2,50,5,Black

Open Gardener copy and paste as a new layer resize by 20% place in front of the fence
Add a dropshadow 2,2,50,5,Black

Open Tube copy and paste as a new layer resize by 60% place in front of the mushroom house Add a dropshadow 2,2,50,5,Black

add any copyright and your name
Layers Merge Flatten,
crop your tag and resize by 90%
Save as Png.

Sunday 17 May 2009

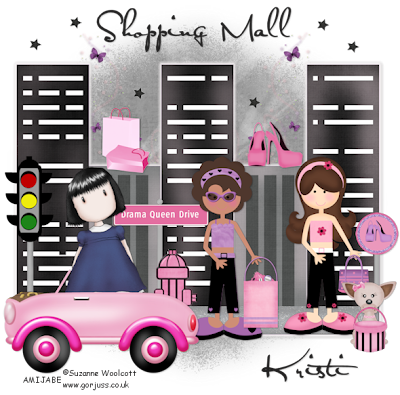
New Tutorial...........Girls on the town


This Tutorial was written on 17th May 2009
Any Simularity to any other Tutorial is purely coincidental

SUPPLIES NEEDED

1 tube of choice I am using Suzanne woolcott under License AMIJABE which can be purchased from her website.
Scrap- kit by Kristi of The Scrappin Divaz, kit is called Totally Clueless (Taggers size) and can be purchased
HERE.
Mask of choice
Font of Choice.

LETS GET STARTED

Open your supplies and minimise

Open new raster layer 700 x 700 pixels Floodfill with white send to bottom,
Open a paper of Choice copy and paste as a new Layer,Layer New Mask Layer, from image find your mask in the dropdown section and apply making sure invert mask data is unchecked,onto mask layer hit delete and merge group

Open Skyline copy and paste as a new layer above the mask layer resize by 30% Add a drop shadow 2, 2, 50, 5, Black

Open Traffic light copy and paste as a new layer resize by 10% then position above the skyline layer on the left hand side Add a drop shadow 2, 2, 50, 5, Black,

Next open street sign copy and paste as a new layer resize by 15% then place in the middle above the skyline Add a dropshadow 2,2,50,5,Black

Open another street sign copy and paste as a new Layer resize by 15% position on the right hand side above the skyline layer Add a drop shadow 2, 2, 50, 5, Black,

Open sidewalk copy and paste as a new layer reisze by 10% position infront of the bottom of the skyline hiding the bottom duplicate and position together so full lengh of skyline Add a dropshadow 2,2,50,5 Black

Open Firehydrant copy and paste as a new layer resize by 10% then position above the sidewalk layer on the join to hide it lol Add a drop shadow 2, 2, 50 ,5, Black,

Open swirl 1 copy and paste as a new layer resize by 10% position above the mask layer inbetween the sklyline duplicate and mirror grab your text and write out wording of choice place in between the swirls above the sklyline see my tag Add a dropshadow 2,2,50,5,Black

Open Tube copy and paste as a new Layer resize by 80% position on top of the sidewalk Add a dropshadow 2,2,50,5 Black

Open girl 1 copy and paste as a new layer resize by 20% then again by 50% place on the side walk do the same with girl 2 then Add a dropshadow 2,2,50,5,Black

Open Car copy and paste as a new layer resize by 25% then place in front of the traffic light on the left hand side Add a dropshadow 2,2,50,5,Black

Open chihuahua copy and paste as a new layer resize by 10% then again by 40% place on the right hand side infront of the girl Add a dropshadow 2,2,50,5,Black

Open purse copy and paste as a new layer resize by 10% then again by 50% position in one of the girls hands Open filledbag copy and paste as a new layer resize by 10% then again by 50% position in other girls hand Add a dropshadow 2,2,50,5,Black

Open Hatbox copy and paste as a new layer resize by 10% then again by 50% position in the chihuahua mouth lol Add a dropshadow 2,2,50,5,Black

Open shopping bags copy and paste as a new layer resize by 10% position on the skyline Add a dropshadow 2,2,50,5,Black

Open shoes copy and paste as a new layer resize by 10% then again by 70% position on the skyline Add a dropshadow 2,2,50,5,Black

add any copyright and your name,
Layers Merge Flatten
crop your tag and resize by 90%
Save as Png.

Saturday 16 May 2009

New Tutorial...........Seduction

This tutorial was written on 16th May 2009
Any simularity to another tutorial is purely coincidental
I am using PTU scrapkit by Heart and soul creations kit is called Love is in the air (tagger size) which can be Purchased HERE
Tubes of choice i am using Keith Garvey which you can purchase tubes from Mpt
Mask of choice
Font of choice

Let's Get Started

Open your supplies and minimise
Open a new raster layer 700 x 700 and floodfill with white
Open a paper of choice copy and paste as a new layer place above the white background layer, then layers new mask from image find your mask in the dropdown section source luminance checked invert data unchecked and apply delete mask layer and merge group

Open a bracket copy and paste as a new layer resize by 90% position above the mask layer
Add a dropshadow 1,1,30,3,Black
Next Open Frame 4 copy and paste as a new layer resize by 70% open a paper of choice place below the frame then back to your frame layer and grab your magic wand select inside the frame select modify by 5 then select invert back to your paper and hit delete select none
Add a dropshadow 1,1,30,3,Black

Open Tube copy and paste as a new layer resize by 90% position inside the frame duplicate and position copy below the frame grab your eraser tool and erase any parts over the bow or outside the frame you dont want showing on both tube layers
Add a dropshadow 1,1,30,3,Black

Open Decoration of choice copy and paste as a new layer resize by 70% place on top of the frame layer on the right hand side
Add a dropshadow 1,1,30,3,Black

Open Bird copy and paste as a new layer resize by 40% position in front of the candle
Add a dropshadow 1,1,30,3,Black

Open Padded heart copy and paste as a new layer resize by 40% place in front of the decoration Add a dropshadow 1,1,30,3,Black

Open butterfly copy and paste as a new layer resize by 70% then again by 50% position top left of the frame duplicate mirror and position below the right of the frame
Add a dropshadow 1,1,30,3,Black

Add your copyright information and your name
crop your tag resize by 80%
save your file as a png file
and you are finished
I hope you enjoyed this tutorial,

New Tutorial.............Blackberry Nights

This tutorial was written on 16th May 2009
Any simularity to another tutorial is purely coincidental
I am using PTU scrapkit by Magic Scraps by Sabs kit is called Blackberry nights (tagger size) which can be Purchased HERE
Tubes of choice i am using Barbara Jensen under license number BJ0932 you can purchase there tubes from her website
Xero:Fritillary
Mask of choice
Font of choice
Let's Get Started

Open your supplies and minimise

Open a new raster layer 700 x 700 and floodfill with white
Open a paper of choice copy and paste as a new layer place above the white background layer, then layers new mask from image find your mask in the dropdown section source luminance checked invert data unchecked and apply delete mask layer and merge group Apply xero fritillary settings: 5,30,10,5

Next Open Frame 3 copy and paste as a new layer resize by 90%,next open a paper of choice copy and paste as a new layer below the frame grab your magic wand select inside the frame hold down shift key to select both end boxes then select modify by 10, select invert back to your paper layer hit delete select none Add a dropshadow 1,1,30,3,Black

open your tube and resize by 80% position in your frame Add a dropshadow 1,1,30,3,Black
then grab your magic wand select inside the frame then select modify by 5 then select invert back to your tube layer hit delete select none duplicate then mirror should be positioned other side of your frame

Open a paper of choice copy and paste as a new layer below the frame grab your magic wand select inside the middle of the frame then select modify by 10, select invert back to your paper layer hit delete select none Add a dropshadow 1,1,30,3,Black

Open Journaling copy and paste as a new layer resize by 30% then image free rotate by 10 degrees right position on the left hand side of the frame near the top Add a dropshadow 1,1,30,3,Black

Open Arabesque copy and paste as a new layer resize by 40% position on the left hand edge of the frame duplicate and position on the right hand side Add a dropshadow 1,1,30,3,Black
Open Binderclip copy and paste as a new layer resize by 30% rot 90 degrees right position on the right hand edge of the frameAdd a dropshadow 1,1,30,3,Black

Open metalclip copy and paste as a new layer resize by 50% then again by 40% place on the frame as desired Add a dropshadow 1,1,30,3,Black

Open Flower 3 copy and paste as a new layer resize by 70% then again by 70% position in front of the frame on the left hand side Add a dropshadow 1,1,30,3,Black

Open Bag copy and paste as a new layer resize by 90% then again by 30% position in front of the frame on the left hand side Add a dropshadow 1,1,30,3,Black

Open pen copy and paste as a new layer resize by 30% position in front of the bag on the left hand side Add a dropshadow 1,1,30,3,Black

Open Tube copy and paste as a new layer resize by 90% position in front of the flower Add a dropshadow 1,1,30,3,Black

Open Butterfly copy and paste as a new layer resize by 50% then again by 30% position above the frame on the right hand side Add a dropshadow 1,1,30,3,Black

Open Decoglitter copy and paste as a new layer resize by 30% position above the frame on the left hand side duplicate and position below the frame on the right hand side Add a dropshadow 1,1,30,3,Black

Add your copyright information and your name
crop your tag resize by 80% save your file as a png file
you are Finished

Friday 15 May 2009

New Tutorial..........Peachy Parfait

This Tutorial was written on 16th May 2009
Any Simularity to any other Tutorial is purely coincidental

SUPPLIES NEEDED

1 tubes of choice I am using Barbara Jensen under License BJ0932 which can be purchased from her website.
Scrap- kit by Lynn of Scrappin Divaz, kit is called Strawberry Parfait (Taggers size) and can be purchased HERE.
Mask of choice
Font of Choice.

LETS GET STARTED

Open your supplies and minimise
Open New Raster Layer 700 x 700 floodfill with white send to bottom,

Open a paper of Choice copy and paste as a new Layer,Layer New Mask Layer, from image find your mask in the dropdown section and apply making sure invert mask data is unchecked,onto mask layer hit delete and merge group lower the opacity to around 65

Open Sparklecirle 2 copy and paste as a new layer, resize by 90% then again by 40%, Add a drop shadow 2, 2, 50, 5, Black,

Open Pearl Flower copy and paste as a new layer resize by 80% then again by 30%,position above the mask layer and below the sparkle layer, Add a drop shadow 2, 2, 50, 5, Black,

Open Tube copy and paste as a new layer resize by 80% then position inside the sparklecircle Add a dropshadow 2,2,50,5,Black,

Open Posey Flower copy and paste as a new layer resize by 70% then again by 40% position on the right hand side of the sparkle circle duplicate and mirror position just below the first flower merge down both duplicate again and mirror so you should have one on the left hand side,
Add a drop shadow 2, 2, 50, 5, Black,

Open Butterfly copy and paste as a new layer resize by 60% then again by 30% place on the left side below the posye flower duplicate and mirror back to the poseyflower if any stem is hanging down grab your eraser tool and erase any bits under the butterfly
Add a dropshadow 2,2,50,5,Black

Open Plastic flower copy and paste as a new layer resize by 10% then place over the bottom of the tube duplicate twice and position together
Add a dropshadow 2,2,50,5,Black

Open CandyBouquet copy and paste as a new layer resize by 70% then again by 20% position at the side of the plastic flower duplicate and position on the other side see my tag for reference Add a dropshadow 2,2,50,5,Black

Open Flutterby copy and paste as a new layer resize by 20% position on the top left hand side duplicate and position on the bottom right hand side
Add a dropshadow 2,2,50,5,Black
add any copyright and your name,
Layers Merge Flatten,
crop your tag and resize by 90%
Save as Png.

Thursday 14 May 2009

New Tutorial....I'm not like other girls

This Tutorial was written on 14th May 2009
Any Simularity to any other Tutorial is purely coincidental

SUPPLIES NEEDED

1 tubes of choice I am using Keith Garvey under License MPT9906which can be purchased from MPT.
Scrap- kit by Lynn of Scrappin Divaz, kit is called Forever Friends (Taggers size) and can be purchased HERE.
Template 64 from Blissfully by Beth HERE. Thank you For Sharing
Font of Choice.

LETS GET STARTED

Open your supplies and minimise

Open Template 64 shift D and close original delete info layer then Image canvas size 750 x 750 pixels lock aspect ratio unchecked, Layer New Raster Layer floodfill with white send to bottom,Delete Background Layer,

Open a paper of Choice copy and paste as a new Layer,onto Frame layer select all select float,select defloat select invert onto paper layer hit delete select none, Add a dropshadow 2,2,50,5,Black,delete Original Layer,

Open another paper of choice copy and paste as a new layer duplicate 2 times close these off onto Stripes 2, Selection all, select float, select defloat,select invert onto paper layer hit delete select none, Add a drop shadow 2, 2, 50, 5, Black, delete Original Layer,

Onto Stripes 1 layer, Selection all, select float, select defloat,select invert open closed off paper then hit delete select none, Add a drop shadow 2, 2, 50, 5, Black,

Onto Stars layer, Selection all, select float, select defloat,new raster layer then floodfil with a colour of choice, Add a drop shadow 2, 2, 50, 5, Black, do the same for each star or add a paper is desired

Open Tube copy and paste as a new layer resize by 80% then position on the top Add a dropshadow 2,2,50,5,Black, grab your selection tool set to rectangle draw around your tubes head then edit copy paste as a new layer select none position inside frame bg layer on the right hand side duplicate the mirror grab your magic wand select inside the frame bg layer select float then defloat select invert onto tube layer hit delete same for other tube then select none then lower the opacity on both tubes to 45

Open wording copy and paste as a new layer resize by 60% then again by 50% position inside the black frame bg layer above the tubes Add a dropshadow 2,2,50,5,Black

Open Butterfly copy and paste as a new layer resize by 10% then place on the bottom left side duplicate resize by 80% then position above the wordart top right Add a dropshadow 2,2,50,5,Black

Open Bow copy and paste as a new layer resize by 20% then 40% place on the right hand side of the template Add a dropshadow 2,2,50,5,Black

add any copyright and your name,
Layers Merge Flatten,
crop your tag and resize by 90%
Save as Png.

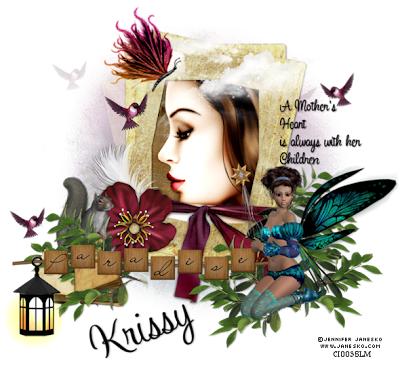
New Tutorial.........Kristal's Paradise


This Tutorial was written on 14th May 2009
Any Simularity to any other Tutorial is purely coincidental

SUPPLIES NEEDED

1 tube of choice I am using Jennifer Janesko under License CI0035LMwhich can be purchased from CILM.
Scrap- kit by Krissy of Krissy's Scraps, kit is called Kristal's Paradise (Taggers size) and can be purchased
HERE.
Wordart by Weescotlass which can be downloaded
HERE, Thank you for sharing
Mask of choice.
Font of Choice.
Toadies filter: who are you

LETS GET STARTED

Open your supplies and minimise

Open a paper of Choice copy and paste as a new Layer,Layer New Mask Layer, from image find your mask in the dropdown section and apply making sure invert mask data is unchecked,onto mask layer hit delete and merge group

Open Frame 2 copy and paste as a new Layer,resize by 60% position in middle of canvas,Open tube of choice copy and paste as a new layer below the frame reisze by 80% onto your frame select inside with your magic wand then select modify by 5 select invert onto the tube hit delete select none, Add a dropshadow 2,2,50,5,Black,to the tube and frame

Open Clouds copy and paste as a new layer resize by 70% position on the top of the frame Add a dropshadow 2,2,50,5,Black

Open Hummingbird copy and paste as a new layer resize by 80% then again by 20% position on the left hand side of the frame duplicate image mirror image free rotate 22 left,position on the right hand side of the frame below the worart Add a drop shadow 2, 2, 50, 5, Black,

Open Butterfly copy and paste as a new layer resize by 40% then image free rotate 22.5 degrees right position on the left hand side of the frame, Add a drop shadow 2, 2, 50, 5, Black,

Next close off the white background and mask layer then edit copy merged paste as a new layer above the mask layer apply toadies who are you then image mirror position behind the original lower the opacity to 16 open closed off layers

Open wordart black paradise copy and paste as a new layer resize by 80% position in front of the frame at the bottom Add a dropshadow 2,2,50,5,Black

Open Foilage copy and paste as a new layer above the paradise wordart,resize by 50% duplicate a few times and position on the right hand side Add a drop shadow 2, 2, 50, 5, Black,

Open Fairy copy and paste as a new layer resize by 80% then again by 60% position on the foilage see my tag for reference Add a dropshadow 2,2,50,5,Black

Open wordart of choice copy and paste as a new layer,position on the right hand side of the frame Add a drop shadow 2, 2, 50, 5, Black,

Open Book copy and paste as a new layer resize by 70% then again by 60% position slightly under the paradise worart duplicate the foilage 2 times place one behind the book and the other over the book grab your selection tool and draw around the right hand side of the book then invert back onto the foilage hit delete select none the foilage should be as though inside the book see my tag for reference Add a dropshadow 2,2,50,5,Black

Open lamp copy and paste as a new layer resize by 70% then again by 60% position over the paradise wordart pole duplicate and place one below woradrt onto top copy and grab your eraser tool erase the end so its hooked over the pole Add a dropshadow 2,2,50,5,Black

Open squirrel copy and paste as a new layer resize by 80% then again by 50% then position behind the foilage just peeking through on the left hand side Add a dropshadow 2,2,50,5,Black

add any copyright and your name,
Layers Merge Flatten
crop your tag and resize by 90%
Save as Png.

Wednesday 13 May 2009

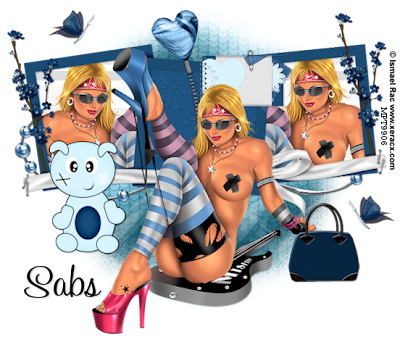
New Tutorial.........Blue Rock Star


This tutorial was written on 13th May 2009
Any simularity to another tutorial is purely coincidental
I am using PTU scrapkit by Magic Scraps by Sabs kit is called Blue Star (tagger size) which can be Purchased
HERE
Tubes of choice i am using Ismael Rac under license number MPT9906 you can purchase there tubes from Mpt
Mask of choice
Font of choice

Let's Get Started

Open your supplies and minimise
Open a new raster layer 700 x 700 and floodfill with white
Open a paper of choice copy and paste as a new layer place above the white background layer, then layers new mask from image find your mask in the dropdown section source luminance checked invert data unchecked and apply delete mask layer and merge group

Next Open Frame 6 copy and paste as a new layer resize by 90%,next open a paper of choice copy and paste as a new layer below the frame grab your magic wand select inside the frame hold down shift key to select all 3 then select modify by 5 then select invert back to your paper layer hit delete select none Add a dropshadow 1,1,30,3,Black

open your tube and resize by 80% position in your frame Add a dropshadow 1,1,30,3,Black then grab your magic wand select inside the frame then select modify by 5 then select invert back to your tube layer hit delete select none duplicate then mirror should be positioned other side of your frame

Open Flower 6 copy and paste as a new layer resize by 40% then position to the right hand side of the frame on the edge duplicate and mirror Add a dropshadow 1,1,30,3,Black

Open Journal choice copy and paste as a new layer resize by 60% then again by 40% position on the middle of the frame near the top Add a dropshadow 1,1,30,3,Black

Open Spiral Heart copy and paste as a new layer resize by 50% position by the middle of the frameAdd a dropshadow 1,1,30,3,Black

Open Deco copy and paste as a new layer place above the mask layer below the frame position as desired Add a dropshadow 1,1,30,3,Black

Open Tube copy and paste as a new layer resize by 90% position in front of the frame Add a dropshadow 1,1,30,3,Black

Open Kit copy and paste as a new layer resize by 70% then again by 40% position in front of the frame on the left hand side Add a dropshadow 1,1,30,3,Black

Open Bag copy and paste as a new layer resize by 20% position in front of the frame on the right hand side Add a dropshadow 1,1,30,3,Black

Open Butterfly copy and paste as a new layer resize by 60% then again by 20% position as desired duplicate and place as desired Add a dropshadow 1,1,30,3,Black

Add your copyright information and your name
crop your tag resize by 80%
save your file as a png file
and you are finished
I hope you enjoyed this tutorial,
Sunday 10 May 2009

New Tutorial...........She talks to Angels


This Tutorial was written on 10th May 2009
Any Simularity to any other Tutorial is purely coincidental

SUPPLIES NEEDED

1 tubes of choice I am using Pinuptoons under License CI0035LM which can be purchased from CILM.
Scrap- kit by Kesha of KNC Scrapz, kit is called An Angel for Kayla (Taggers size) and can be purchased HERE
Wordart by Weescotlass you can download HERE. I used 6th one Thank you for sharing
Font of Choice.

LETS GET STARTED

Open your supplies and minimise
Open new raster layer 700 x 700 pixels Floodfill with white send to bottom,
Open Rainbow copy and paste as a new Layer,resize by 70% position near top of canvas Add a dropshadow 1,1,30,3,Black

Open Gates copy and paste as a new Layer,resize by 50% then place above the rainbow layer position just below the top of the rainbow
Add a dropshadow 1,1,30,3,Black

Open Ivy copy and paste as a new layer resize by 40% then again by 40% place above the gates layer position aboce the pole of the gates use your mover tool if you have to agjust it to fit snug duplicate then image mirror and position on the opposite post
Add a dropshadow 1,1,30,3,Black

Open Halo 2 copy and paste as a new layer resize by 40% place above the ivy layer on the right hand side position over the post on the right hand side duplicate and place below the post back to top layer grab your eraser tool and erase bottom parts so its wrapped around the post see my tag for reference
Add a drop shadow1,1,30,3,Black
,
Open Keylock copy and paste as a new layer resize by 60% then again by 205 place above the gates position in the middle of the gates duplicate and position other below the gates grab your eraser tool back to top keylock erase the ends so keylock is around the gates
Add a dropshadow 1,1,30,3,Black

Open Unicorn copy and paste as a new layer resize by 40% then position on the right hand side of the gates
Add a drop shadow 1,1,30,3,Black,

Open Pond copy and paste as a new layer resize by 40% position on the right hand side infront of the unicorn
Add a dropshadow 1,1,30,3,Black

Open Leafy copy and paste as a new layer resize by 40% position behind the pond on the right hand side infront of the unicorn
Add a dropshadow 1,1,30,3,Black

Open Wordart copy and paste as a new layer position above the gates over the rainbow
Add a dropshadow 1,1,30,3,Black

Open Tube copy and paste as a new layer resize by 80% place on the Left hand side in front of the gates Add a dropshadow 2,2,50,5,Black duplicate the leafy layer and position behind the tube see my tag for reference

Open Butterfly copy and paste as a new layer resize by 20% then again by 40% duplicate and position as desired Add a dropshadow 1,1,30,3,Black

add any copyright and your name,
Layers Merge Flatten,
crop your tag and resize by 90%
Save as Png.

New Tutorial.........Fashion Victim


This tutorial was written on 1oth May 2009
Any simularity to another tutorial is purely coincidental
I am using PTU scrapkit by Sabs of Magic Scraps kit is called Fashion Victim (tagger size) which can be Purchased HERE
Tube of choice i am using Ismael Rac under license number MPT9906 you can purchase there tubes from Mpt
Mask of choice
Font of choice

Let's Get Started

Open your supplies and minimise
Open a new raster layer 750 x 750 and floodfill with whiteOpen a paper of choice copy and paste as a new layer place above the white background layer, then layers new mask from image find your mask in the dropdown section source luminance checked invert data unchecked and apply delete mask layer and merge group

Next Open Frame 1 copy and paste as a new layer resize by 80%,next open a paper of choice copy and paste as a new layer below the frame grab your magic wand select inside the frame select modify by 5 then select invert back to your paper layer hit delete select none Add a dropshadow 1,1,30,3,Black

open your tube and resize by 90% position over your frame Add a dropshadow 1,1,30,3,Black then duplicate position other below your frame back to the top tube grab your eraser tool and erase any parts you dont want outside the frame

Open keylock copy and paste as a new layer resize by 70% then again by 40% then position to the right hand side of the frame on one of the eyelets grab your eraser tool as small as you can see and erase bit of the lock so looks hooked in the eyelet Add a dropshadow 1,1,30,3,Black
Open coat hanger of choice copy and paste as a new layer resize by 20% then position on the left had side of the frame near the top Add a dropshadow 1,1,30,3,Black

Open corset copy and paste as a new layer resize by 45% position on the coat hangerAdd a dropshadow 1,1,30,3,Black

Open Flower copy and paste as a new layer resize by 30% place on the bottom right corner of the frame see my tag Add a dropshadow 1,1,30,3,Black

Open lipstick copy and paste as a new layer resize by 40% position in front of the flower on the right hand side Add a dropshadow 1,1,30,3,Black

Open sunglasses copy and paste as a new layer resize by 30% position in front of the lipstick on the right hand side Add a dropshadow 1,1,30,3,Black

Open shoe copy and paste as a new layer resize by 20% position in front of the sunglasses on the right hand side Add a dropshadow 1,1,30,3,Black

Open Box copy and paste as a new layer resize by 30% position in front of the frame on the left hand side open another box and resize by 20% position in at side of box 1 Add a dropshadow 1,1,30,3,Black

Open ipod copy and paste as a new layer resize by 25% onto your tube layer grab your selection tool set on rectangle add shift draw around the face of your tube edit copy then paste as a new layer select none resize the tube by 90% or as desired onto the ipod layer grab your magic wand select inside the ipod modify by 5 then new raster layer floodfill with black don't deslect yet onto the the ipod layer selection invert back to your tube layer hit delete select none position the black layer below the tube so you should have from top ipod,tube,then black layer merge down the 3 layers then image free rotate by 20 left position in front of the boxes Add a dropshadow 1,1,30,3,Black

Open Wordart copy and paste as a new layer resize by 45% position in front of the frame inbetween all the elements see my tag for reference Add a dropshadow 1,1,30,3,Black

Open Brad copy and paste as a new layer resize by 60% then again by 20% position above the frame on the left hand side duplicate twice and position like a letter L upside down lol or as desired i used a different colour one for the middle its your choice Add a dropshadow 1,1,30,3,Black

Open Butterfly copy and paste as a new layer resize by 20% position on the left hand side above the boxes duplicate and position on the other side Add a dropshadow 1,1,30,3,Black

Add your copyright information and your name
crop your tag
resize by 80% save your file as a png
you are finished I hope you enjoyed this tutorial,

Saturday 9 May 2009

New Tutorial.........Spring Time

This Tutorial was written on 9th May 2009
Any Simularity to any other Tutorial is purely coincidental

SUPPLIES NEEDED

1 tube of choice I am using Michael Landefeld under License CI0035LMwhich can be purchased from CILM.
Scrap- kit by Bit's n Bobs,kit is called Spring Time (Taggers size) and can be purchased HERE.
Template 42 from Sara's scraps HERE. Thank you For Sharing
Mask of choice.
Font of Choice.

LETS GET STARTED

Open your supplies and minimise
Open Template 42 shift D and close original delete info layer then Image canvas size 750 x 750 pixels lock aspect ratio unchecked, Layer New Raster Layer floodfill with white send to bottom,Delete Background Layer,

Open a paper of Choice copy and paste as a new Layer,Layer New Mask Layer, from image find your mask in the dropdown section and apply making sure invert mask data is unchecked,onto mask layer hit delete and merge group

Open a paper of Choice copy and paste as a new Layer,onto Raster 2 select all select float,select defloat select invert onto paper layer hit delete select none, Add a dropshadow 2,2,50,5,Black,delete Original Layer,

Open a paper of choice copy and paste as a new layer onto Raster 3, Selection all, select float, select defloat,select invert onto paper layer hit delete select none, Add a drop shadow 2, 2, 50, 5, Black, delete Original Layer,

Open another paper of choice copy and paste as a new layer Onto Raster 4, Selection all, select float, select defloat,select invert onto paper layer then hit delete select none, Add a drop shadow 2, 2, 50, 5, Black, delete Original Layer,

Open Tube copy and paste as a new layer resize by 80% then position over Raster 6 layer grab your magic wand select inside the raster 6 selection modify by 1 then invert onto your tube layer and hit delete select none lower the opacity to around 60 Add a dropshadow 2,2,50,5,Black

Copy and paste your Tube again resize by 80% then position above the template layer on the right hand side Add a dropshadow 2,2,50,5,Black

Open Tag copy and paste as a new layer resize by 40% then place on the top middle of the template with the tube Add a dropshadow 2,2,50,5,Black

Open flower of choice copy and paste as a new layer resize by 30% place on the top left hand corner of the template with the tube Add a dropshadow 2,2,50,5,Black

Open Ribbon eyelet copy and paste as a new Layer resize by 40% position on the raster 4 rectangle see my tag for reference Add a dropshadow 2,2,50,5 Black

Open Lamb chain copy and paste as a new layer resize by 40% then position on the raster 3 square layer on the left hand corner duplicate then position below the other so they look joined together Add a dropshadow 2,2,50,5,Black

Open bow of choice copy and paste as a new layer resize by 40% position above the lamb chain Add a dropshadow 2,2,50,5,Black

Open bow bunny copy and paste as a new layer resize by 40% position on the left hand side at the bottom corner of the square Add a dropshadow 2,2,50,5,Black

Open butterfly copy and paste as a new layer resize by 30% position as desired duplicate and position as desired Add a dropshadow 2,2,50,5,Black

Open spring wordart copy and paste as a new layer resize by 70% then again by 50% position above the circle layer Add a dropshadow 2,2,50,5,Black

add any copyright and your name,
Layers Merge Flatten,
crop your tag and resize by 90%
Save as Png.

New Tutorial..............Groovy

This Tutorial was written on 9th May 2009
Any Simularity to any other Tutorial is purely coincidental

SUPPLIES NEEDED

1 tube of choice I am using Elias Chatzoudis under License MPT9906 which can be purchased from MPT
.Scrap- kit by Krissy of Krissy's Scraps , kit is called Groovylicious (Taggers size) and can be purchased HERE.
Template 71 from Blissfully Beth HERE. Thank you For Sharing
Mask of choice.
Font of Choice.

LETS GET STARTED

Open your supplies and minimise
Open Template 71 shift D and close original delete info layer then Image canvas size 750 x 750 pixels lock aspect ratio unchecked, Layer New Raster Layer floodfill with white send to bottom,Delete Background Layer
,
Open a paper of Choice copy and paste as a new Layer,Layer New Mask Layer, from image find your mask in the dropdown section and apply making sure invert mask data is unchecked,onto mask layer hit delete and merge group lower the opacity to around 50

Open a paper of Choice copy and paste as a new Layer,onto ruffle 1 and copy of ruffle 1 merge down the two select all select float,select defloat select invert onto paper layer hit delete select none, Add a dropshadow 2,2,50,5,Black,delete Original Layer,

Open a paper of choice copy and paste as a new layer onto vert stripe merge down both vert stripes, Selection all, select float, select defloat,select invert onto paper layer hit delete select none, Add a drop shadow 2, 2, 50, 5, Black, delete Original Layer,

Open another paper of choice copy and paste as a new layer Onto LG gray frame circle, Selection all, select float, select defloat,select invert onto paper layer then hit delete select none, Add a drop shadow 2, 2, 50, 5, Black, delete Original Layer,

Open another paper of choice copy and paste as a new layer Onto DK gray frame circle, Selection all, select float, select defloat,select invert onto paper layer then hit delete select none, Add a drop shadow 2, 2, 50, 5, Black,delete Original Layer,

Open another paper of choice copy and paste as a new layer,onto wordart, Selection all, select float, select defloat,select invert open a closed off paper then hit delete select none Add a drop shadow 2, 2, 50, 5, Black,delete Original Layer,

Open Tube copy and paste as a new layer resize by 80% then position under the LG gray circle frame layer grab your magic wand select inside the frame selection modify by 5 then invert onto your tube layer and hit delete select none Add a dropshadow 2,2,50,5,Black

Copy and paste your Tube again image mirror ressize by 80% then position under the DK gray circle frame layer grab your magic wand select inside the frame selection modify by 5 then invert onto your tube layer and hit delete select none Add a dropshadow 2,2,50,5,Black

Onto the LG cirlce bg select all selection float select defloat layer new raster layer and floodfill with black select none Add a dropshadow 2,2,50,5,Black delete Original Layer,

Onto the White cirlce bg select all selection float select defloat layer new raster layer and floodfill with black select none Add a dropshadow 2,2,50,5,Black delete Original Layer,

Open Disco ball1 copy and paste as a new layer resize by 60% then again by 60% place on the top middle of the template Add a dropshadow 2,2,50,5,Black

Open peace hand copy and paste as a new layer resize by 40% place on the top left hand side of the template Add a dropshadow 2,2,50,5,Black

Open Painted flower copy and paste as a new Layer resize by 40% position on top right hand side of the template Add a dropshadow 2,2,50,5 Black

Open Flower copy and paste as a new layer resize by 30% then position over the middle of the frames Add a dropshadow 2,2,50,5,Black

Open wire 1 copy and paste as a new layer resize by 60% position above the wordart happiness Add a dropshadow 2,2,50,5,Black

Open lava lamp copy and paste as a new layer resize by 70% position on the left hand side at the bottom of the template see my tag for reference Add a dropshadow 2,2,50,5,Black

Open boom box copy and paste as a new layer resize by 40% position on the left hand side behind the lava lamp Add a dropshadow 2,2,50,5,Black

Open Groovy wordart copy and paste as a new layer resize by 60% position in front at the bottom of the wordart Add a dropshadow 2,2,50,5,Black
Open female silhouette 1 copy and paste as a new layer resize by 40% position on the left hand side in front of the groovy words duplicate and mirror Add a dropshadow

add any copyright and your name,
Layers Merge Flatten,
crop your tag and resize by 90%
Save as Png.

Thursday 7 May 2009

New Tutorial.......Cullen's Story


This Tutorial was written on 7th May 2009
Any Simularity to any other Tutorial is purely coincidental


SUPPLIES NEEDED

1 tube of choice I am using Elias Chatzdouis under License MPT9906which can be purchased from MPT.
Scrap- kit by Nicole of Simply Iresistible Designz, kit is called Carlisle Cullen (Taggers size) and can be purchased
HERE.
Mask of choice.
Font of Choice.

LETS GET STARTED

Open your supplies and minimise

Open New Raster layer size 750 x 750 pixels floodfill with white send to bottom
Open a paper of Choice copy and paste as a new Layer,Layer New Mask Layer, from image find your mask in the dropdown section and apply making sure invert mask data is unchecked,onto mask layer hit delete and merge group

Open Frame 3 copy and paste as a new layer resize by 70% then position above the mask layer, Add a dropshadow 2,2,50,5,Black,

Open a paper of choice copy and paste as a new layer onto frame layer grab your magic wand select inside the frame select modify by 15 then invert onto paper layer hit delete select none Add a dropshadow,2,2,50,5, Black,

Open Tube copy and paste as a new layer resize by 90% then position over the frame duplicate and position duplicate below the frame grab your eraser tool onto top tube and erase any parts showing outside frame you don't want and same on bottom tube
Add a drop shadow 2, 2, 50, 5, Black,

Open Book copy and paste as a new layer resize by 60% then again by 40% position bottom right of the frame image free rotate by 10 degrees,
Add a drop shadow 2, 2, 50, 5, Black,

Duplicate one of the tubes and resize by 60% then onto the book grab your freehand tool point to point add shift and draw a square around the empty right hand side of the book onto the tube position over the selected layer select invert and hit delete select none
Add a dropshadow 2,2,50,5,Black,
Lower the opacity to the tube to around 60

Open pen copy and paste as a new layer resize by 40% position in front of the book layer Add a dropshadow 2,2,50,5,Black,

Open Clip copy and paste as a new layer resize by 40% position over the top of the book Add a dropshadow 2,2,50,5,Black

Open Brad copy and paste as a new layer resize by 50% position on the left hand side middle of the frame duplicate then mirror
Add a dropshadow 2,2,50,5,Black,

Open wordart copy and paste as a new layer resize by 60% postiion by the book layer
Add a dropshadow 2,2,50,5,Black,

add any copyright and your name,
Layers Merge Flatten,
crop your tag and resize by 90%
Save as Png.

New Tutorial........Girls and there Toys

This Tutorial was written on 7th May 2009
Any Simularity to any other Tutorial is purely coincidental

SUPPLIES NEEDED

1 tube of choice I am using Ismael Rac under License MPT9906which can be purchased from MPT.
Scrap- kit by Raeven of Heart and soul creations, kit is called Childs Play (Taggers size) and can be purchased HERE.
Template 206 from Missy of Divine Intentionz HERE. Thank you For Sharing
Mask 119 by Weescotlass which you can download HERE Thank you for sharing
Font of Choice.
Preset shape splat or ink blot (optional) or simular

LETS GET STARTED

Open your supplies and minimise
Open Template 206 shift D and close original delete info layer then Image canvas size 750 x 750 pixels lock aspect ratio unchecked, Layer New Raster Layer floodfill with white send to bottom,Delete Background Layer,Add a drop shadow 2, 2, 50, 5, Black

Open a paper of Choice copy and paste as a new Layer above the white background ,Layer New Mask Layer, from image find your mask in the dropdown section and apply making sure invert mask data is unchecked,onto mask layer hit delete and merge group,Add a dropshadow 2,2,50,5,Black

Onto Rectangle Layer,select all select float,select defloat layer new raster layer floodfill with a colour of choice select none, Add a dropshadow 2,2,50,5,Black,delete Original Layer,

Onto Circle 1, Selection all, select float, select defloat,select invert copy and paste a paper of choice hit delete select none, Add a drop shadow 2, 2, 50, 5, Black, delete Original Layer,

Onto Circle 2, Selection all, select float, select defloat,select invert copy and paste a paper of choice hit delete select none, Add a drop shadow 2, 2, 50, 5, Black, delete Original Layer,

Onto Circle 3, Selection all, select float, select defloat,select invert copy and paste a paper of choice hit delete select none, Add a drop shadow 2, 2, 50, 5, Black, delete Original Layer,

Open Jigsaw piece of choice copy and paste as a new layer position above the circle 2 at the edge of the template Add a dropshadow 2,2,50,5,Black

Open Tube copy and paste as a new layer resize by 80% then position in the middle of the template Add a dropshadow 2,2,50,5,Black

Open Car copy and paste as a new layer above the template resize by 40% then again by 80% place on the top right side Add a dropshadow 2,2,50,5,Black

Open Mushroom copy and paste as a new layer resize by 50% then place on the right hand side Add a dropshadow 2,2,50,5,Black

Open Bear copy and paste as a new layer resize by 30% then place on the Left hand side Add a dropshadow 2,2,50,5,Black

Open Frog copy and paste as a new Layer resize by 20% then position as desired Add a dropshadow 2,2,50,5 Black

Open Butterfly copy and paste as a new layer resize by 50% then position on the left hand side of template duplicate and position on right hand side of template Add a dropshadow 2,2,50,5,Black

Grab your preset shape and draw some splats around the template and tube in different colours see my tag for reference Add a dropshadow 2,2,50,5,Black

add any copyright and your name,
Layers Merge Flatten,
crop your tag and resize by 90%
Save as Png.

Wednesday 6 May 2009

New Tutorial...........Twilight

This Tutorial was written on 6th May 2009
Any Simularity to any other Tutorial is purely coincidental

SUPPLIES NEEDED

1 tube of choice I am using Sonja Roji under License MPT9906 which can be purchased from MPT
Scrap- kit by CBJ Creationz by Jo, kit is called Twilight (Taggers size) and can be purchased HERE.
Font of Choice.

LETS GET STARTED

Open your supplies and minimise
Open New Raster layer size 750 x 750 pixels floodfill with white send to bottom
Open Wrapframe 3 Frame copy and paste as a new layer resize by 70% then position in the middle of the canvas Add a dropshadow 2,2,50,5,Black,

Open a paper of Choice copy and paste as a new Layer below the frame Layer grab your magic wand select inside the frame select float select defloat select modify by 5 select invert onto paper layer hit delete select none Add a dropshadow 2,2,50,5,Black

Open tube copy and paste as a new layer position inside the frame grab your eraser tool and erase any parts showing outside the frame duplicate the tube and mirror position to both sides lower the opacity to around 50 or as desired Add a dropshadow,2,2,50,5, Black,

Open Love word copy and paste as a new layer position top of the frame Add a drop shadow 2, 2, 50, 5, Black,

Open Flowervine copy and paste as a new layer above the loveword resize by 30% then position on the left hand side of the frame duplicate then mirror Add a drop shadow 2, 2, 50, 5, Black,
Open Candle copy and paste as a new layer resize by 60% then postion on the bottom left hand side of the frame Add a dropshadow 2,2,50,5,Black,

Open Black flutter copy and paste as a new layer resize by 60% then again by 60% position beside the candle, Add a dropshadow 2,2,50,5,Black

Open Lily copy and paste as a new layer resize by 70% then again by 40% position on the bottom right hand side of the frame Add a dropshadow 2,2,50,5,Black

Open schoolwork copy and paste as a new layer resize by 50% position by the lily layer Add a dropshadow 2,2,50,5,Black

Open tube of choice copy and paste as a new layer resize by 80% position in the middle of the elements infront of the frame Add a dropshadow 2,2,50,5,Black

Open Swirl copy and paste as a new layer duplicate then mirror position both below the frame on either side of the frame see my tag for reference Add a dropshadow 2,2,50,5,Black

add any copyright and your name,
Layers Merge Flatten,
crop your tag and resize by 90%
Save as Png.

Tuesday 5 May 2009

New Tutorial.............Subtle Gift

This Tutorial was written on 5th May 2009
Any Simularity to any other Tutorial is purely coincidental

SUPPLIES NEEDED

1 tube of choice I am using Elias Chatzoudis under License MPT9906which can be purchased from MPT.
Scrap- kit by Lynn of Scrappin Divaz, kit is called Subtle Gift (Taggers size) and can be purchased HERE.
Font of Choice.

LETS GET STARTED

Open your supplies and minimise
Open New Raster layer size 750 x 750 pixels floodfill with white send to bottom
Open a paper of Choice copy and paste as a new Layer,Layer New Mask Layer, from image find your mask in the dropdown section and apply making sure invert mask data is unchecked,onto mask layer hit delete and merge group

Open squaregtrflw Frame copy and paste as a new layer resize by 40% then again by 70% position above the background layer, Add a dropshadow 2,2,50,5,Black,

Open Ivy with flowers copy and paste as a new layer resize by 20% then again by 705 position on the frame on the left hand side duplicate then mirror duplicate again then image free rotate 90 degrees left position bottom of frame duplcicate again image mirror then position at the top of the frame so all 4 sides are covered in the ivy Add a dropshadow,2,2,50,5, Black,

Open pretty flower copy and paste as a new layer resize by 10% then position top left corner of the frame duplicate and position bottom right of the frame Add a drop shadow 2, 2, 50, 5, Black,
Open satin flower resize by 20% then again by 70% position bottom left corner of the frame duplicate and position top right of the frame,Add a drop shadow 2, 2, 50, 5, Black,

Open Interlocking heart copy and paste as a new layer resize by 60% then again by 40% postion on the top right hand corner of the frame below the sation flower Add a dropshadow 2,2,50,5,Black,delete Original Layer,

Open curly ribbon copy and paste as a new layer resize by 50% then again by 20% position below the mask layerthen duplicate image free rotate 90 degrees left Add a dropshadow 2,2,50,5,Black

add any copyright and your name,
Layers Merge Flatten,
crop your tag and resize by 90%
Save as Png.